Prerequisites
projectx-prod-vpchas been created with subnets configured.projectx-prod-jumpboxEC2 instance exists and is accessible.- AWS CLI configured with appropriate credentials.
- Your AWS username for the bucket naming convention.
project-x-sec-boxconfigured with Wazuh.- S3 security datalake bucket has been created with the
cloudtrail/folder structure. - S3 bucket policy configured to allow CloudTrail to write logs.
Note
This guide is written for Wazuh version 4.9.2. UI elements and navigation paths may differ in other versions.
Network Topology
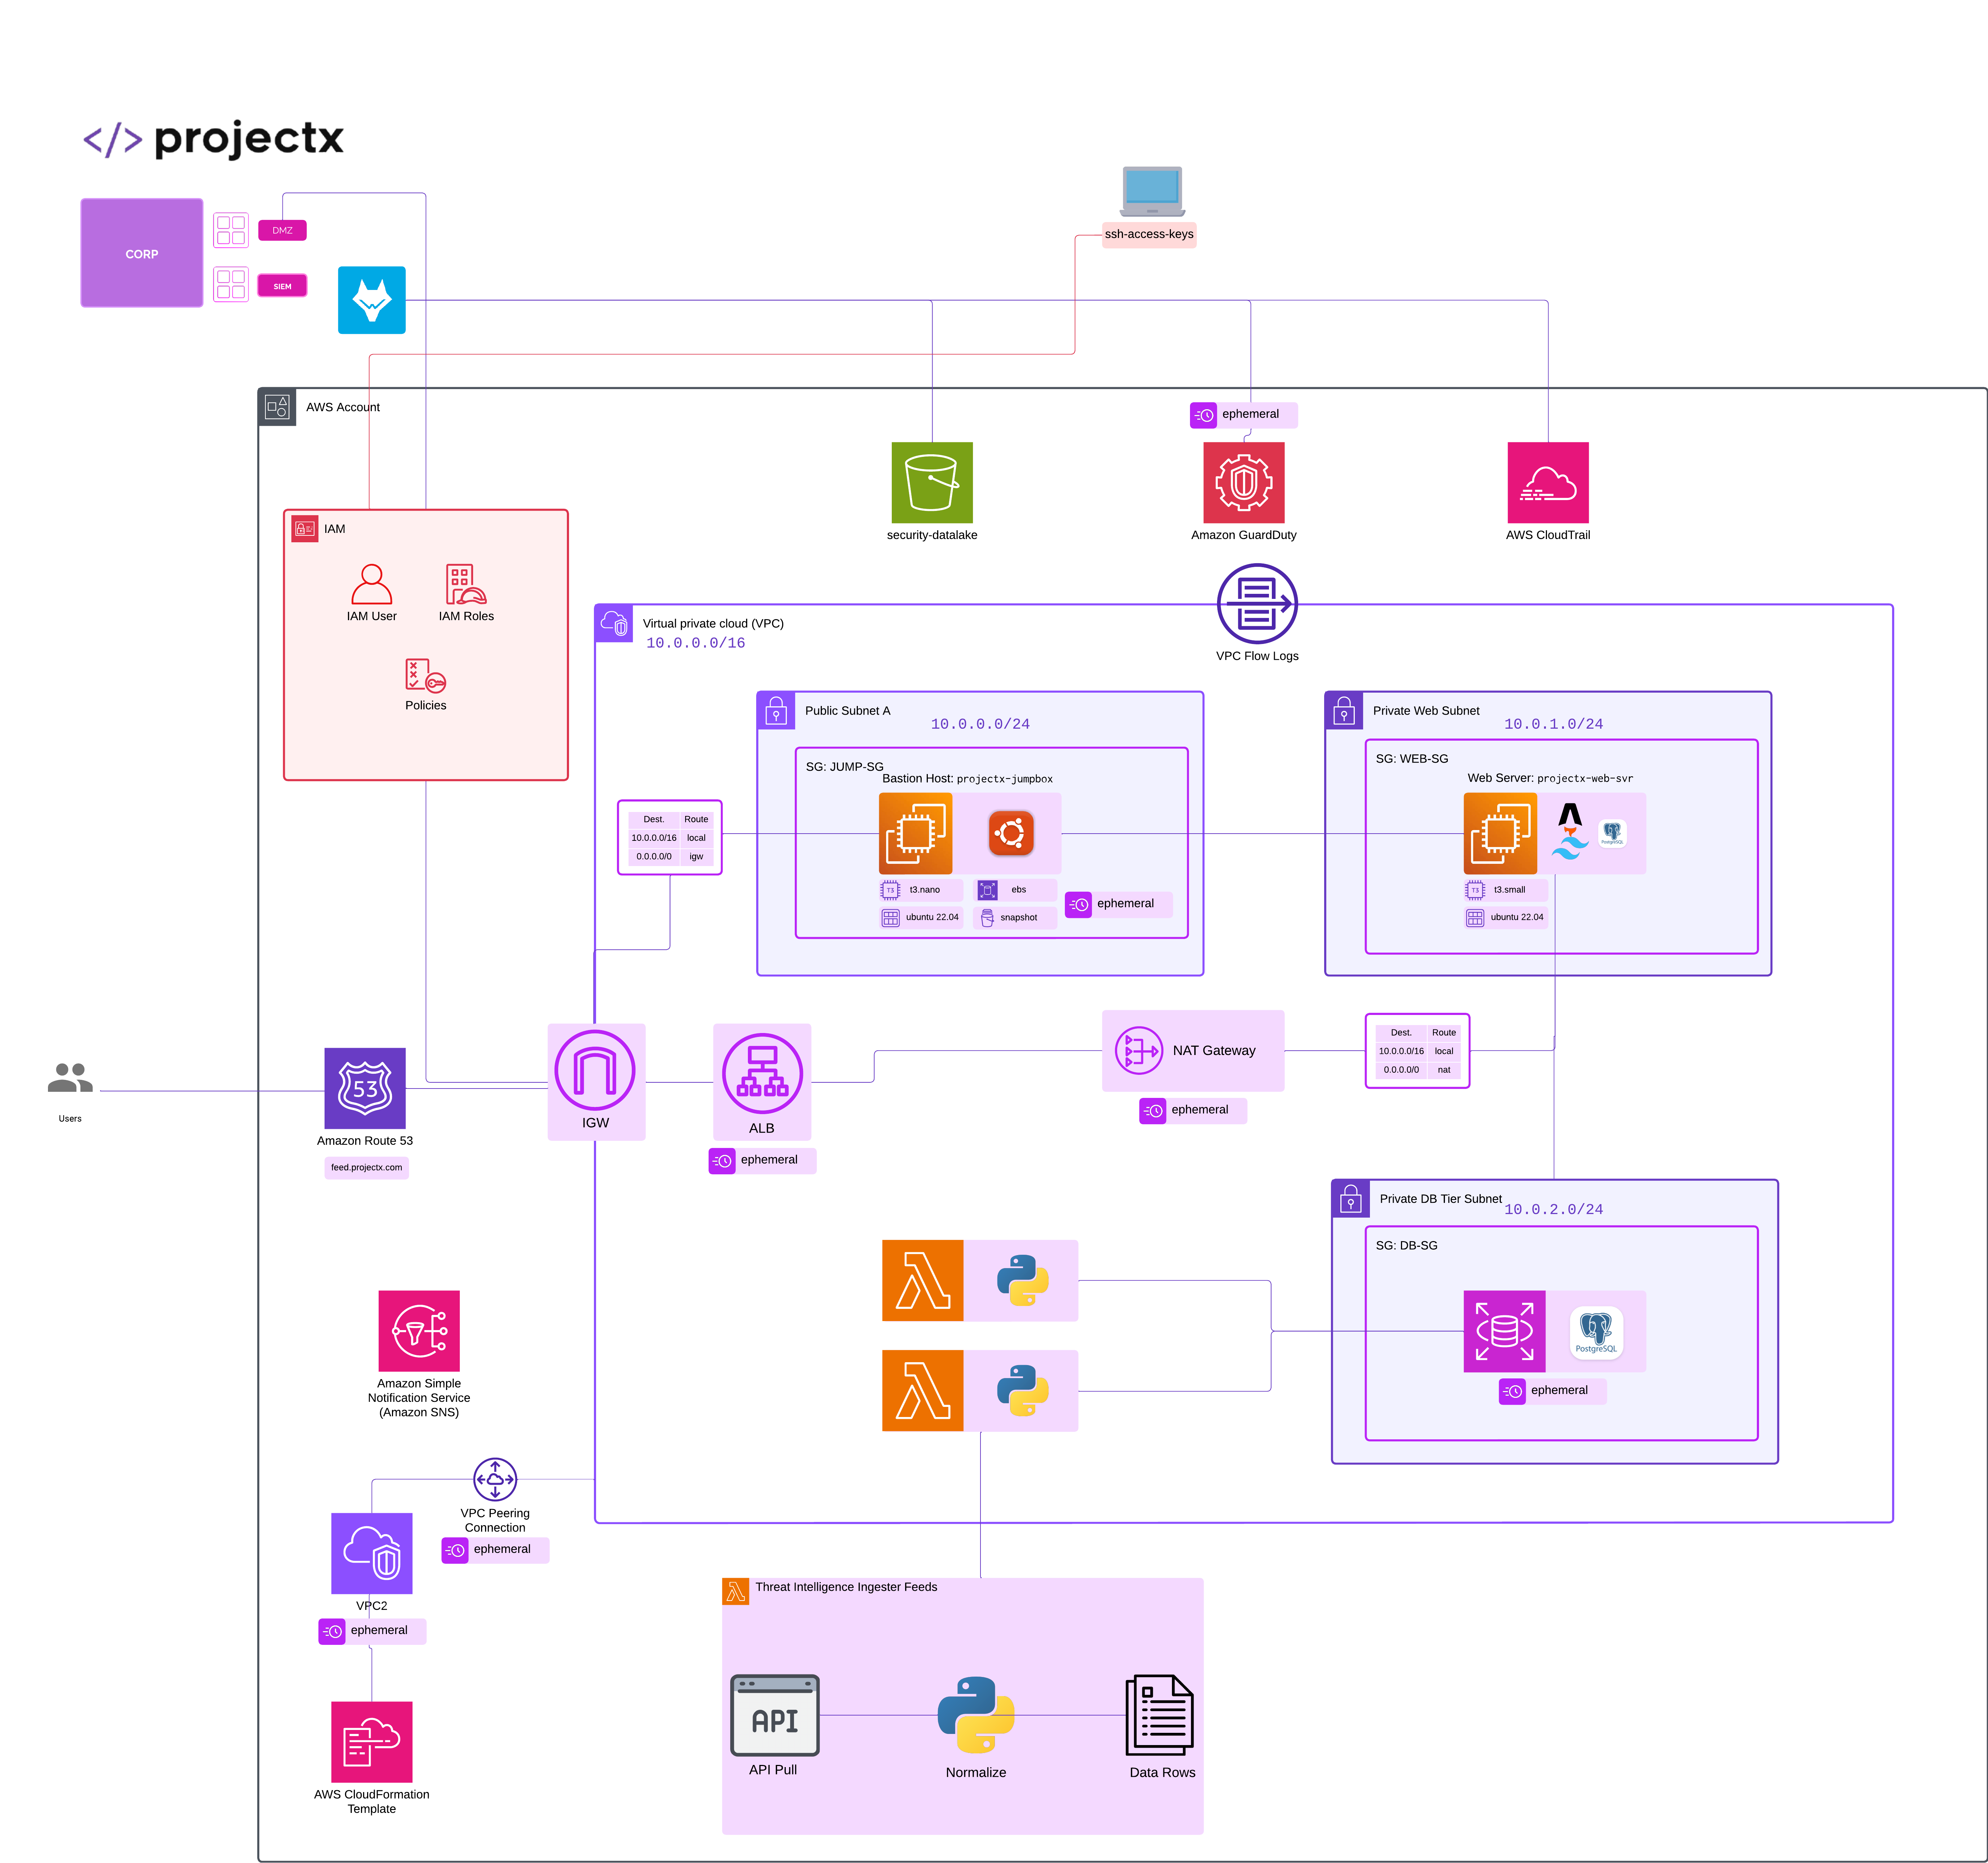
Overview
What is AWS CloudTrail?
AWS CloudTrail is a service that enables governance, compliance, operational auditing, and risk auditing of your AWS account. CloudTrail provides event history of your AWS account activity, including actions taken through the AWS Management Console, AWS SDKs, command line tools, and other AWS services.
CloudTrail logs include:
- API Calls: Who made what API call, when, and from where
- Resource Changes: What resources were created, modified, or deleted
- Identity Information: Which IAM user or role performed the action
- Source IP Addresses: Where the API calls originated from
👉 CloudTrail is essential for security monitoring, compliance, and forensic analysis of AWS account activity.
About CloudTrail Trails
A CloudTrail trail is a configuration that enables delivery of events as log files to an Amazon S3 bucket. You can create a trail that applies to all regions or a trail that applies to one region.
For this guide, we'll create a management trail that logs all API activity across all regions in your AWS account and delivers those logs to your S3 security datalake.
Create CloudTrail Trail
Navigate to CloudTrail
Open the CloudTrail service in the AWS Console.
In the left navigation pane, select Trails.
Click Create trail.

Configure Trail Details
Trail Name
- Trail name:
projectx-prod-management-trail
👉 Use a descriptive name that indicates this is a management trail for production.
-
Storage location: Select Use an existing S3 bucket and choose
projectx-prod-datalake-[username]. -
S3 bucket prefix (optional):
cloudtrail/ - 👉 This organizes CloudTrail logs in a dedicated folder within your datalake bucket
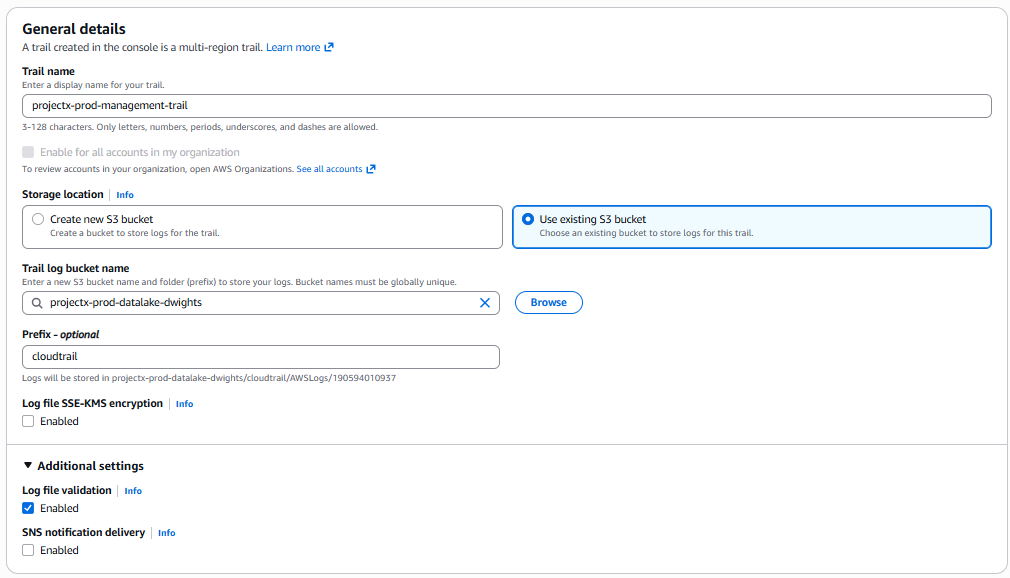
Additional Settings
- Log file SSE-KMS encryption: Leave Disabled for this lab
-
👉 For production, consider enabling KMS encryption for additional security
-
Log file validation: Leave Enabled
-
👉 Log file validation creates a digest file that can be used to verify log file integrity
-
SNS notification delivery: Leave Disabled
- 👉 You can enable this to receive notifications when new log files are delivered
Click Next.
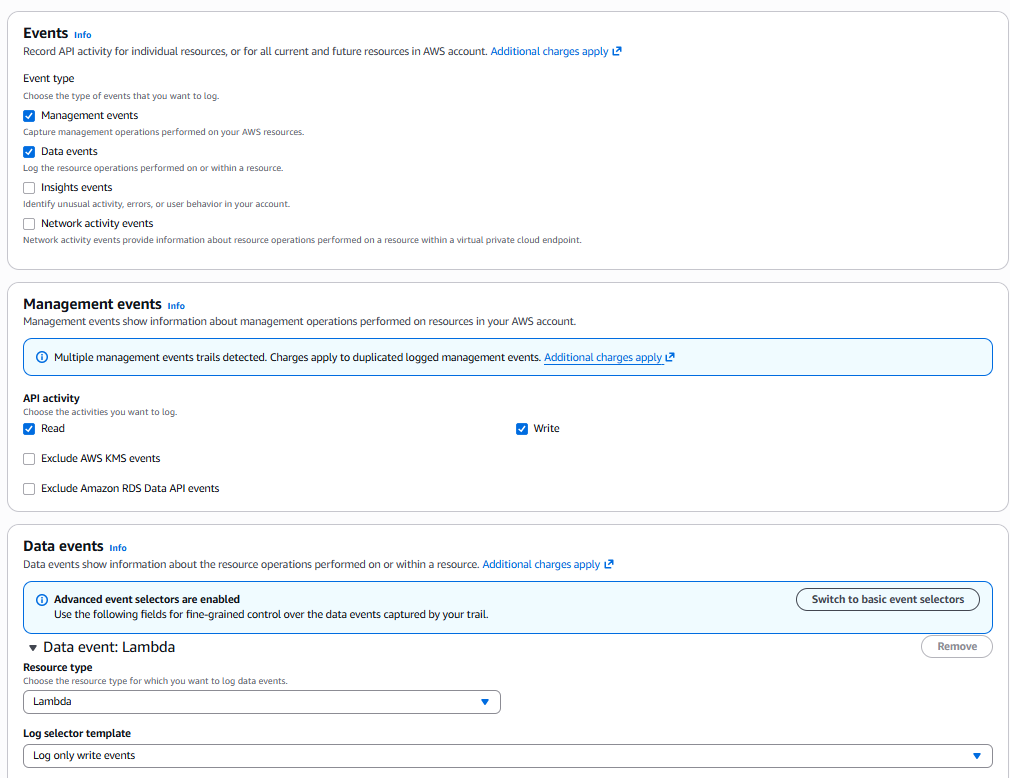
Configure Logging
Here is where we configure which events we would look to capture.
Event Type
- Event type: Select Management events | Data Events
-
👉 This captures all API activity including read and write events
-
Management events: Leave as Read | Write.
-
Data events: Choose Lambda | Log only write events.
Click Next.
Review and Create Trail
Review your trail configuration:
- Trail name:
projectx-prod-management-trail - Storage location:
projectx-prod-datalake-[username]/cloudtrail/ - Event type: All events
- Management events: Read and write
Click Create trail.

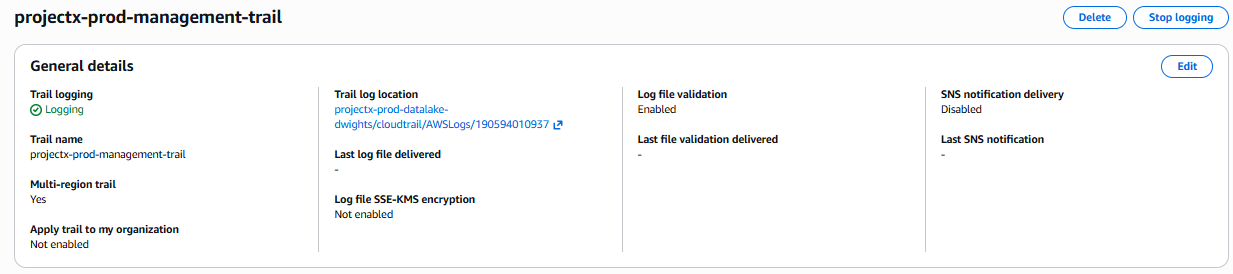
Verify Trail Status
After creation, you should see your trail listed with a status of Enabled.
👉 It may take a few minutes for CloudTrail to start delivering log files to your S3 bucket. Log files are typically delivered within 5 minutes of API activity.
Configure S3 Lifecycle Policy for CloudTrail Logs
To automatically delete CloudTrail logs after 14 days, we'll create a lifecycle policy that applies specifically to the cloudtrail/ prefix in your S3 bucket.
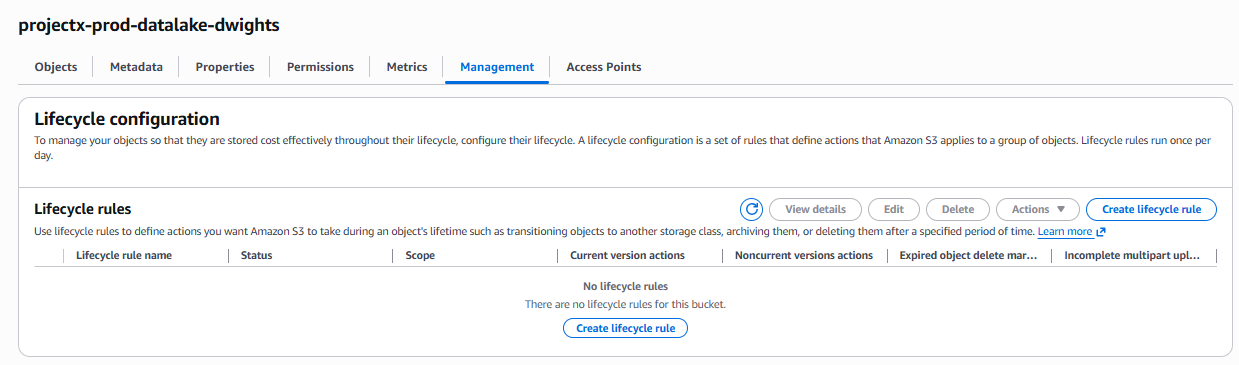
Navigate to S3 Lifecycle Rules
Open the S3 service in the AWS Console.
Select your bucket: projectx-prod-datalake-[username]
Go to the Management tab.
Scroll down to Lifecycle rules.
Click Create lifecycle rule.
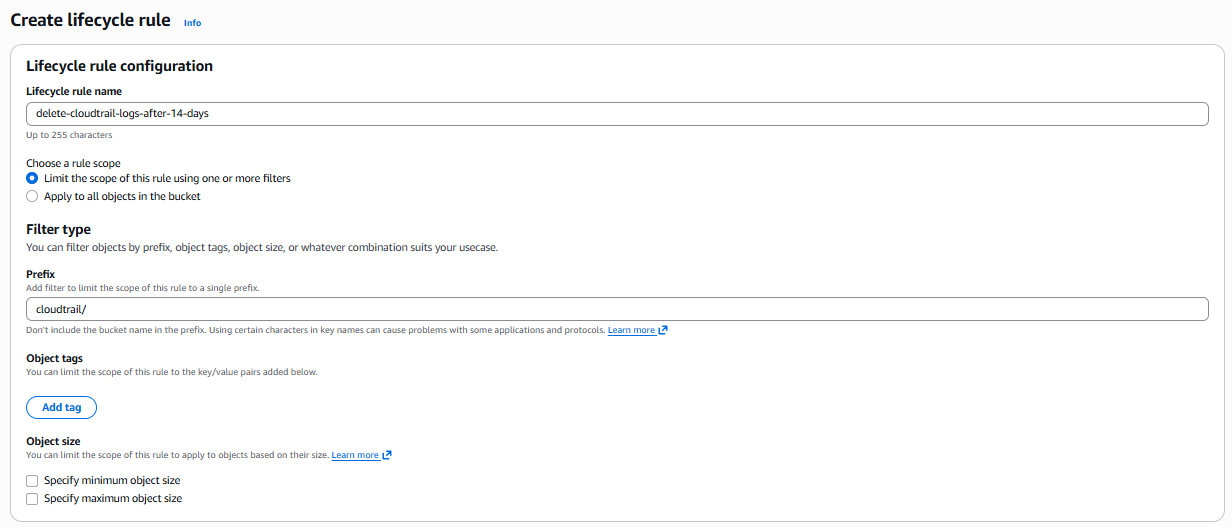
Configure Lifecycle Rule
Basic Configuration
-
Lifecycle rule name:
delete-cloudtrail-logs-after-14-days -
Rule scope: Select Limit the scope of this rule using one or more filters
-
Prefix:
cloudtrail/- 👉 This ensures the rule only applies to CloudTrail logs, not other data in the bucket
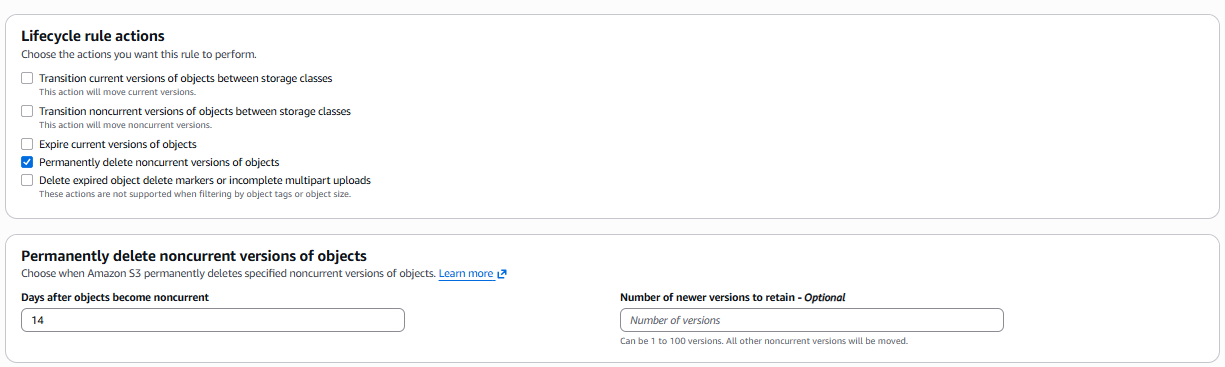
Lifecycle Rule Actions
Select Expire current versions of objects.
- Days after object creation:
14
👉 This will automatically delete CloudTrail log files 14 days after they are created, helping manage storage costs and comply with data retention policies.
👉 Note: "Expire current versions of objects" permanently deletes the current versions of objects after the specified number of days.
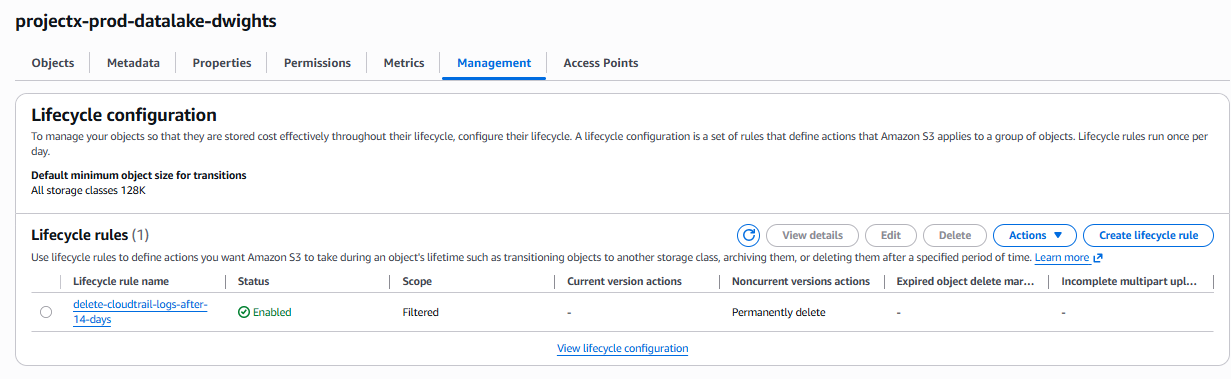
Verify Lifecycle Rule
Navigate back to Management ➔ Lifecycle rules.
You should see your rule delete-cloudtrail-logs-after-14-days listed.
👉 The lifecycle rule will automatically apply to all objects in the cloudtrail/ prefix. Objects will be deleted 14 days after creation.
Verify CloudTrail Log Delivery
Check S3 Bucket
Navigate to your S3 bucket: projectx-prod-datalake-[username]
Click on the cloudtrail/ folder.
You should see CloudTrail log files being delivered. Log files are typically organized by date:
AWSLogs/[account-id]/CloudTrail/[region]/[year]/[month]/[day]/

👉 If you don't see log files immediately, wait a few minutes and perform some AWS console actions (like viewing EC2 instances) to generate API activity that CloudTrail will log.
Verify Trail Activity
Navigate back to CloudTrail ➔ Trails.
Click on your trail: projectx-prod-management-trail
Select the Event history tab to view recent API activity.
👉 Event history shows the last 90 days of events. For longer retention, logs are stored in S3.

Wazuh Integration
Once CloudTrail logs are being delivered to your S3 bucket, you can configure Wazuh to ingest and analyze these logs.
Configure Wazuh S3 Integration
Power on [project-x-sec-box] VM.
Navigate to Server management Settings.
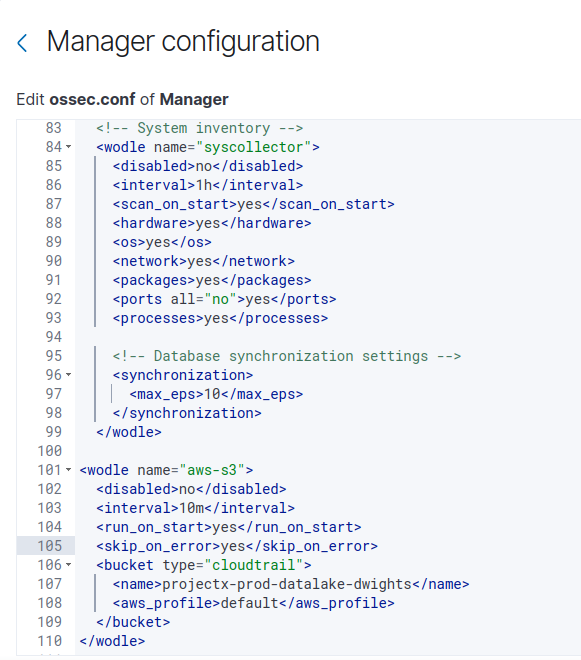
Navigate to the <wodle name="syscollector"> block.
Add the following <wodle> section below the <syscollector> block.
<wodle name="aws-s3">
  <disabled>no</disabled>
  <interval>10m</interval>
  <run_on_start>yes</run_on_start>
  <skip_on_error>yes</skip_on_error>
  <bucket type="cloudtrail">
    <name>projectx-prod-datalake-[username]</name>
    <aws_profile>default</aws_profile>
    <path>cloudtrail/</path>
  </bucket>
</wodle>
👉 Replace [username] with your actual AWS username (e.g., projectx-prod-datalake-johnsmith).
👉 The aws_profile should match the AWS credentials profile configured on the Wazuh server. If using the IAM user created earlier, ensure the AWS credentials are configured in ~/.aws/credentials.
Select Save.
Then Restart Manager to apply changes.
Restart Wazuh Manager
Restart the Wazuh manager to apply the configuration:
Verify Wazuh Integration
Check the Wazuh logs to verify CloudTrail logs are being ingested:
You should see messages indicating CloudTrail logs are being processed from S3.
👉 Look for entries like "Processing CloudTrail logs" or "Fetched X events from S3 bucket".
View CloudTrail Events in Wazuh
Navigate to the Wazuh Dashboard.
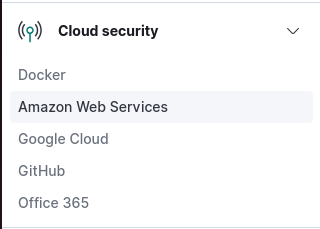
Go to Cloud security ➔ Amazon Web Services.
You should start to see data being collected.
Adjust the time range if needed.
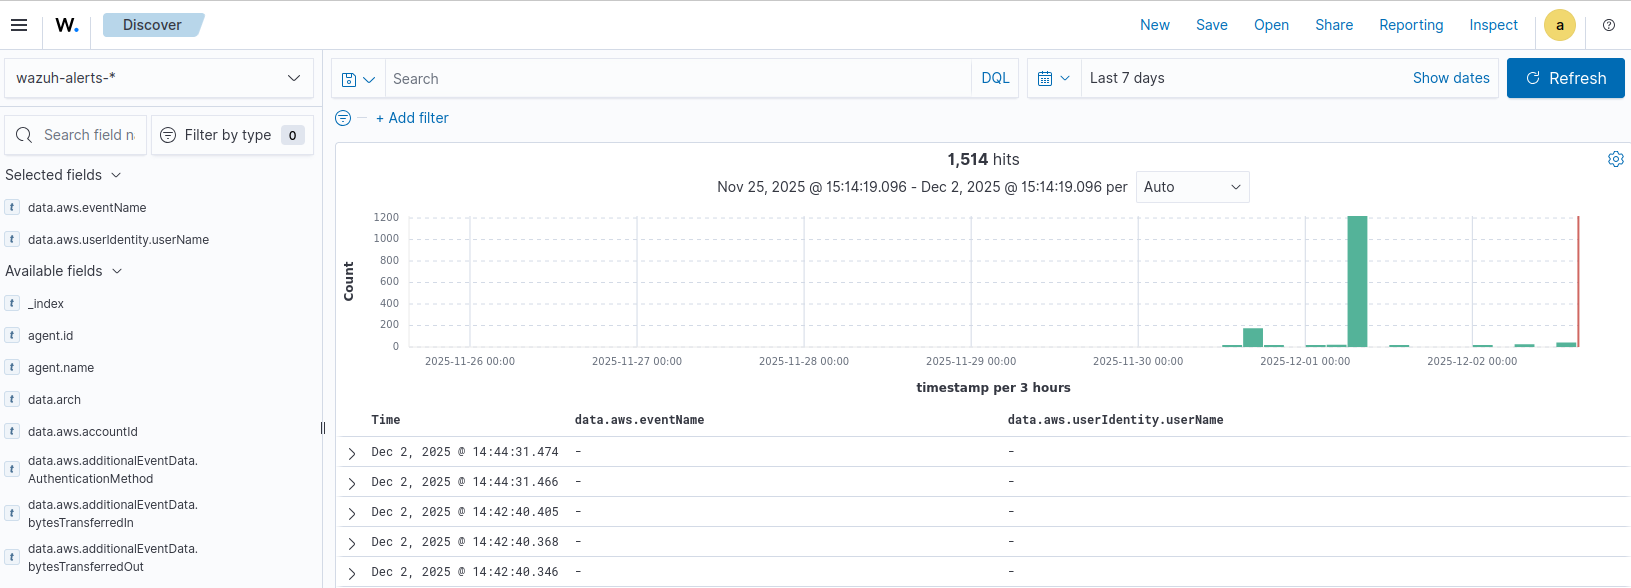
You can also go to Explore ➔ Discover.
Select the index pattern that includes CloudTrail events (typically wazuh-alerts-*).
Search for CloudTrail-related events using filters like:
data.aws.eventName- API event namesdata.aws.userIdentity- User or role that performed the action
Summary
Success!
Your AWS account activity is now being logged, stored in S3, and analyzed by Wazuh for security monitoring and compliance purposes. The automatic deletion policy ensures storage costs remain manageable while maintaining a 14-day retention period for security analysis.