Network Topology & Wazuh Agent Updates
Prerequisites
- VirtualBox or VMware Workstation Pro Installed.
- Virtual Machines
[project-x-corp-svr],[project-x-sec-work],[project-x-dc],[project-x-win-client],[project-x-linux-client]and[project-sec-box]are turned on.
Network Topology

Updates
We have a few updates to adjust before beginning our Defenses section. This include ensuring our hosts now conform to a new IP address schema and refreshing our Wazuh agents.
IP Address Changes
Now that we have applied network segmentation with three network segments, LAN, WAN, and DMZ, we have changed our network topology quite a lot since the Enterprise 101.
In addition to the network segments, we now have address spaces for LAN with an address space of 192.168.15.0/24 and DMZ with 10.0.5.0/30.
With all of these changes, will need to adjust a few settings.
Wazuh Agent Updates
During Enterprise 101, we deployed Wazuh as our SIEM and EDR platform to help detect and prevent the attacks we simulated.
Since we have added new services, via containers, to the corporate server and deployed Suricata to [project-x-sec-work, we need to set up new agent profiles.
👉 Since we are running our containers with
--network=host, the containers share the same IP address as the host. From an outside perspective, it appears as if the entire VM is just one server, rather than running four containers.
We will to add [project-x-corp-svr] and [project-x-sec-work] agents into Wazuh.
In addition, we will need to refresh agent profiles (uninstall and reinstall) for [project-x-win-client], [project-x-linux-client], [project-x-dc].
In total, we will have five agents new or freshed agents that will need to be installed.
On the [project-x-sec-box], where the Wazuh manager resides, we will need to set a static IP address.
The Wazuh Manager, or server, sits in the 192.168.15.0/24 subnet. We are going to change the [project-x-sec-box] to a static IP address of 192.168.15.50.
- 👉 This is a more "realistic" network setup. Workstation fleets will have all kinds of IP addresses, so this gives us a bit of experience with working in different subnets.
By default, Wazuh should be able to handle agents residing in different network subnets. The Wazuh manager will be the device that actively listens to for incoming connections.
IP Address Changes
| Hostname [project-x-…] | IP Address | Default Gateway | Network Adapter |
|---|---|---|---|
-dc (corp.project-x-dc.com) |
192.168.15.25 | 192.168.15.2 | Host-only LAN |
corp-svr |
10.0.5.10 | 10.0.5.2 | Host-only DMZ |
-sec-box |
192.168.15.50 | 192.168.15.2 | Host-only LAN |
-sec-work |
192.168.15.53 or (dynamic) | 192.168.15.2 | Host-only LAN |
-win-client |
192.168.15.51 or (dynamic) | 192.168.15.2 | Host-only LAN |
-linux-client |
192.168.15.52 or (dynamic) | 192.168.15.2 | Host-only LAN |
attacker |
dynamic | 192.168.15.2 | Host-only LAN |
corp-fw |
192.168.15.2 (LAN) | Router & Firewall | Host-only WAN, DMZ, LAN |
corp-svr-web-svr |
10.0.5.10:80 | Web Server | Host-only LAN |
corp-svr-dns-svr |
10.0.5.10:53 | DNS Server | Host-only LAN |
corp-svr-ftp-svr |
10.0.5.10:21 | File Server | Host-only LAN |
By now you should be familiar with changing IP addresses, depending on the operating system.
We will not overview how to change all of these IP Addresses, but at this point it is assumed all IP addresses are changed.
In addition, make sure each Virtual Machine has the proper Network Adapter assigned to receive the Network Profile.
For the three workstation clients: We recommend choosing dynamic IP addresses. Allow [project-x-corp-fw] to provide IP addresses to these client workstations via DHCP, this will allow the transfer of DNS information as well.
- 👉 Static: If you do decide to set static IP addresses, we have found that the connections should work as normal if they reside outside the DHCP scope. This is why you see 192.168.15.5X addresses.
Assign Static IP Addresses On [project-x-sec-box] & [project-x-corp-svr]
[project-x-sec-box]
Power on the [project-x-sec-box] VM.
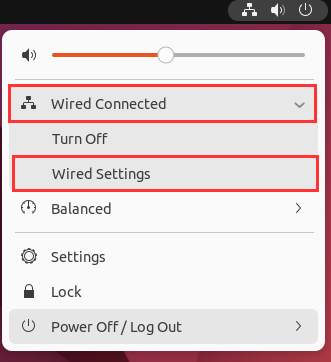
Navigate to "Wired Connected" "Wired Settings".
Select the gear icon "IPv4".
Change to a static IP address outside the range of our DHCP scope.
- 192.168.15.50
- 255.255.255.0
- 192.168.15.2
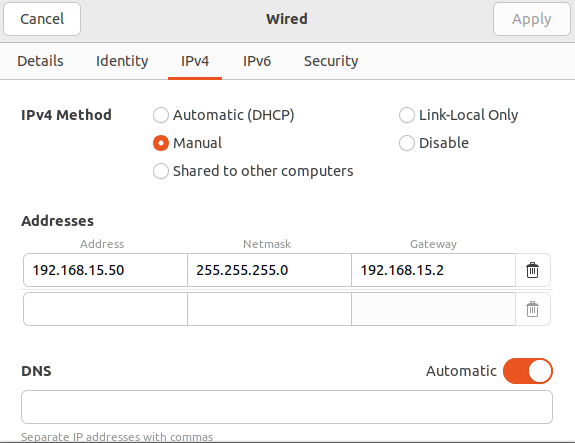
Restart the VM to apply IP address changes.
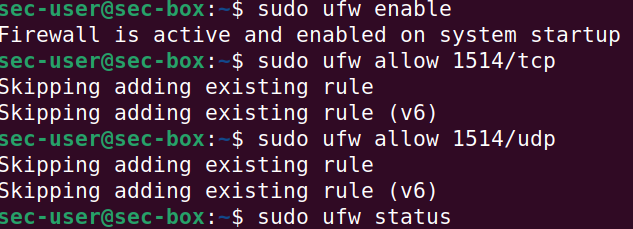
By default, Wazuh listens for agent connections on 1514 and 1515 TCP/UDP.
Let's make sure both of these network ports are opened via ufw.
-
sudo ufw enable -
sudo ufw allow 1514/tcp -
sudo ufw allow 1514/udp -
sudo ufw allow 1515/tcp -
sudo ufw allow 1515/udp
[project-x-corp-svr].
Navigate to Power Button ➔ "Wired Connected" ➔ "Wired Settings".
Select Gear Icon ➔ "IPv4" ➔ "Manual" ➔ Enter the following IP Information ➔ "Apply".
-
Address: 10.0.5.10
-
Netmask: 255.255.255.0
-
Gateway: 10.0.5.2
-
DNS: 8.8.8.8
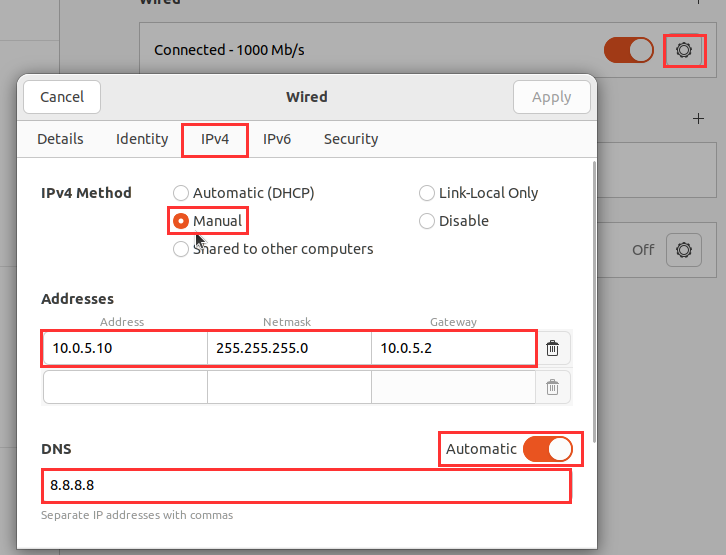
Restart [project-x-corp-svr].
Install Wazuh Agent On [project-x-sec-work]
Turn on [project-x-sec-work].
Open a new terminal session.
Start the Wazuh service:
systemctl start wazuh-agent.
Navigate to https://localhost.
Login with the credentials provided to you while you were setting up Wazuh.
Go to “Server Management” ➔ “Endpoint Summary”.
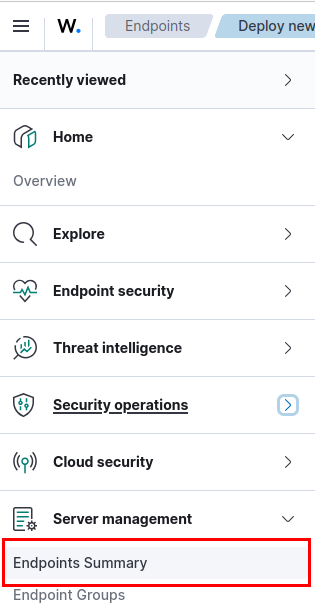
Choose “Deploy new agent”.

Select RPM amd64.
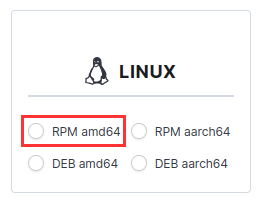
Server Address: 192.168.15.50.
Assign an agent name: project-x-sec-work
Groups: linux
Copy the command in step 4.
Power on the [project-x-sec-work] Virtual Machine.
Login under the project-x-sec-work account.
Open a new terminal ➔ enter the command copied from step 4.
curl -o wazuh-agent-4.9.2-1.x86_64.rpm https://packages.wazuh.com/4.x/yum/wazuh-agent-4.9.2-1.x86_64.rpm && sudo WAZUH_MANAGER='192.168.15.50' WAZUH_AGENT_GROUP='Linux' WAZUH_AGENT_NAME='project-x-sec-work' rpm -ihv wazuh-agent-4.9.2-1.x86_64.rpm

Enter in the following systemctl commands:

🛠️ Troubleshooting Tips
- If the agent profile is not showing up in Wazuh, go back to your workstation, type the following command
sudo tail -f /var/ossec/logs/ossec.log- this should showcase the connection logs and should showcase why the agent is not connecting to Wazuh.
The security agent has been deployed to the security workstation.
Install Wazuh Agent On [project-x-corp-svr]
Now let's add [project-x-corp-svr] to Wazuh. We will do this through an agent installation again.
Since we have modified our network topology with pfSense sitting in the middle and separate network segments, we now have [project-x-corp-svr] configured with a static IP address of 10.0.5.10.
Navigate to [project-x-sec-box], where our Wazuh server has been installed.
Go to “Server Management” ➔ “Endpoint Summary”.
Choose “Deploy new agent”.
Choose "DEB amd64". Make sure the IP address is set to the [project-x-sec-box]'s static IP.
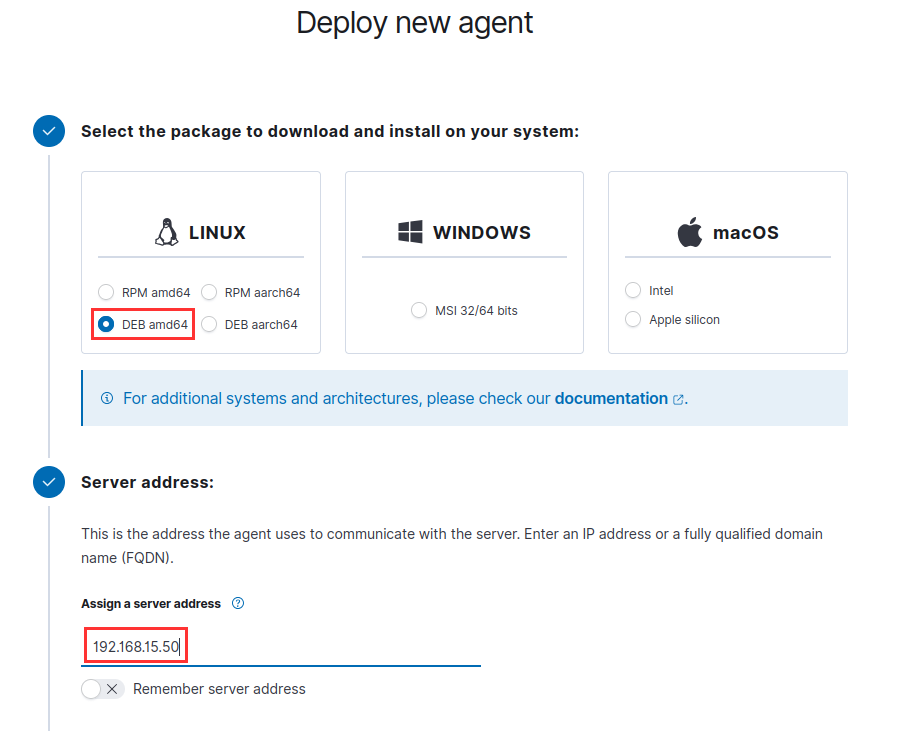
Assign the agent name of "project-x-corp-svr".
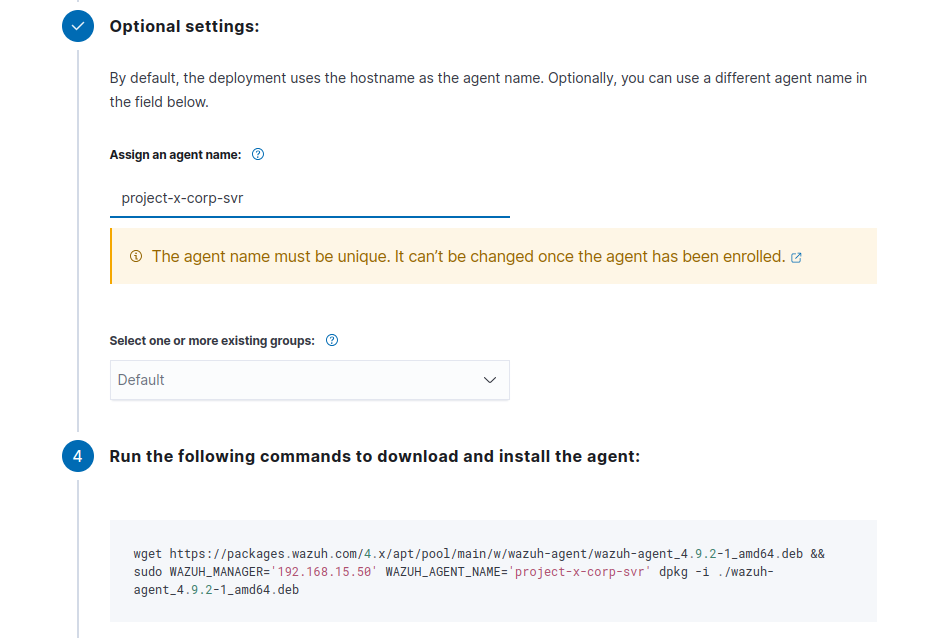
Open a new terminal ➔ enter the command copied from step 4.
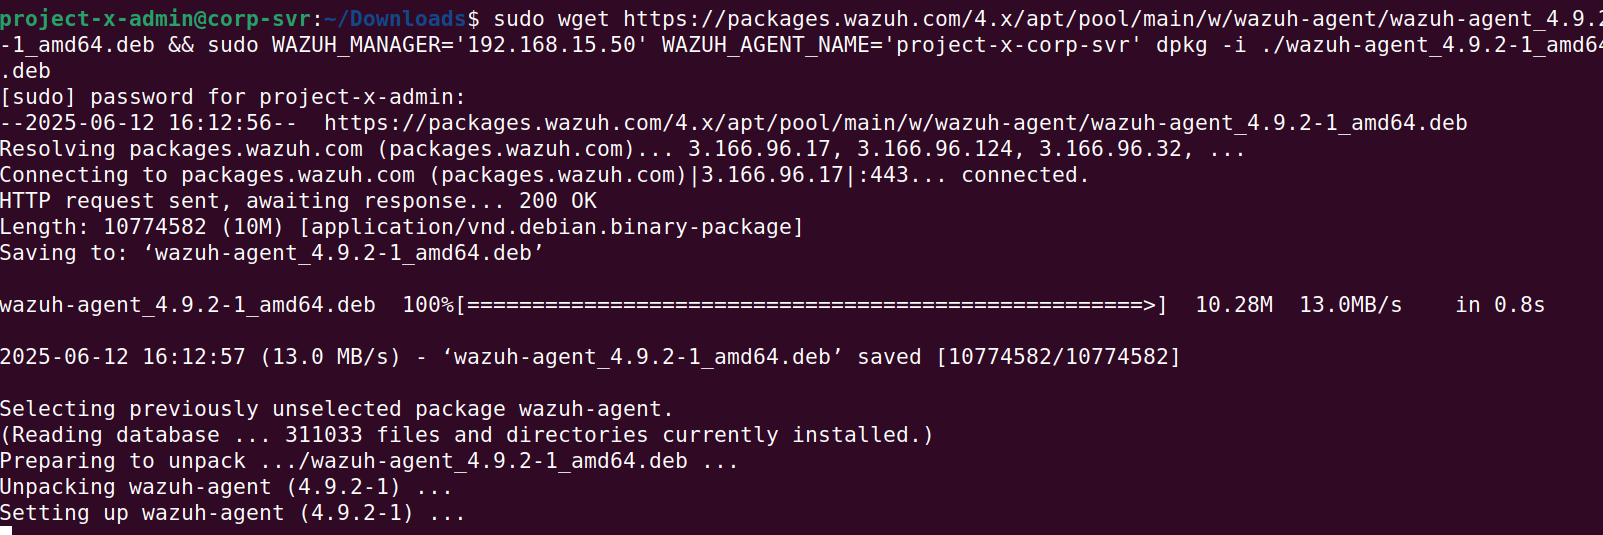
Enter in the following systemctl commands:
The security agent has been deployed to the corporate server.

Refresh Wazuh Agents On Windows/Linux
We now need to refresh the existing Wazuh Agents on [project-x-win-client], [project-x-linux-client], [project-x-dc]. Since these agent profiles were installed in Enterprise 101, we won't need to install the agent programs.
Instead, we will change the Wazuh Managers IP address from 10.0.0.10 to 192.168.15.50 the ossec.conf file. We will then restart the Wazuh agent. Wazuh should pick the up changes.
Refresh Wazuh Agent On [project-x-win-client] & [project-x-dc]
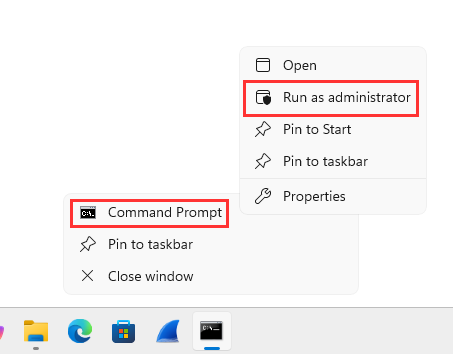
The process will be the same for each machine, besides the User Access Control (UAC) prompt for our workstation client.
Navigate to a new command line session ➔ Right-Click "Command Prompt" ➔ "Run as administrator".
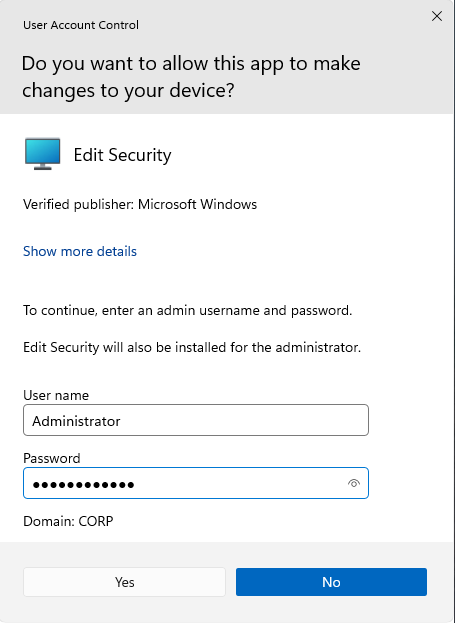
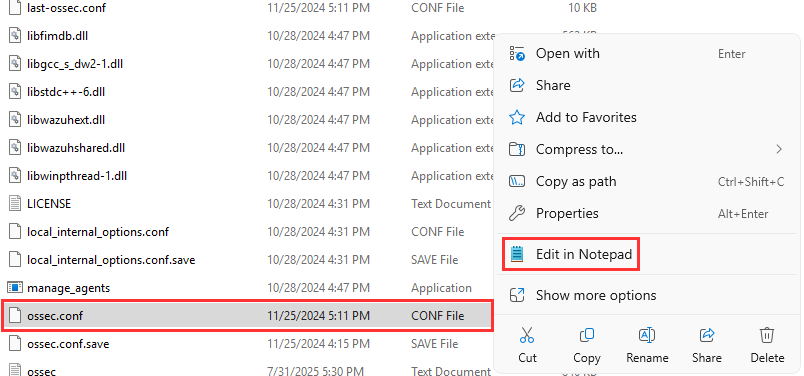
Open a new File Explorer window, navigate to: C:\Program Files (x86)\ossec-agent.

If the UAC prompt appears, type in the domain Administrator:@Deeboodah1! account credentials.
Scroll down to the ossec.conf file ➔ "Edit in Notepad".
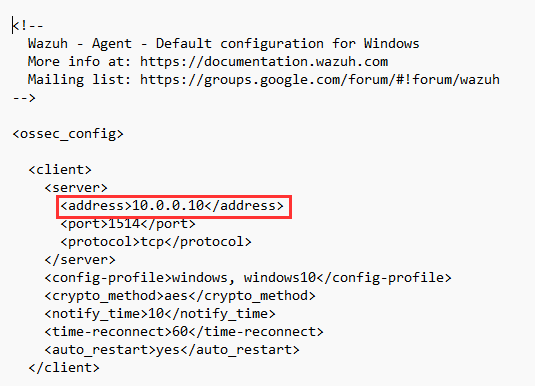
Notice how the <address> blog has our IP address for [project-x-sec-box] from Enterprise 101, let's change this to 192.168.15.50.
Here we have changed it to the new IP address.
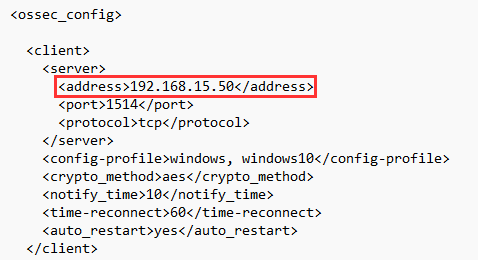
Save the file with CTRL + S.
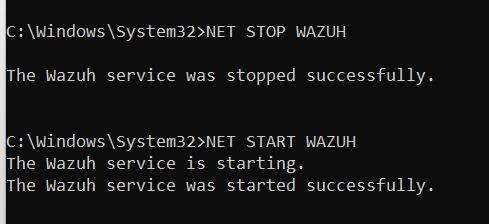
Navigate back to the command prompt. Provide a STOP and START command with NET.
-
NET STOP WAZUH -
NET START WAZUH
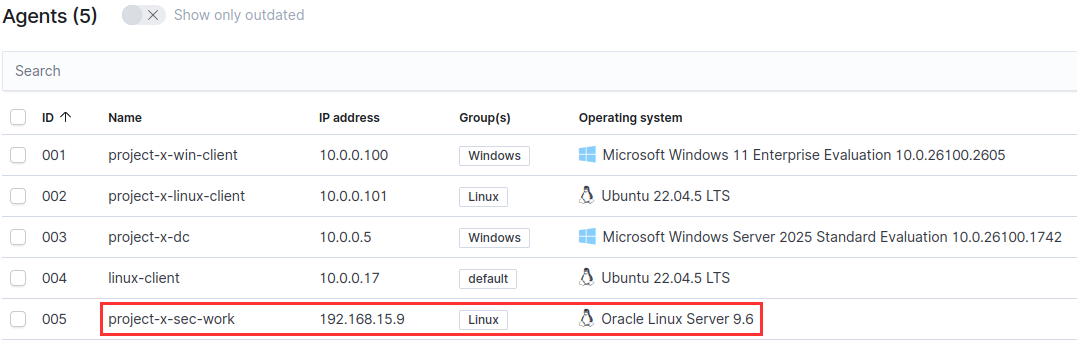
Going back to the [project-x-sec-box] ➔ “Server Management” ➔ “Endpoint Summary”, we should see our client profile updated.

Success!
Refresh Wazuh Agent On [project-x-linux-client]
Open a new terminal session.
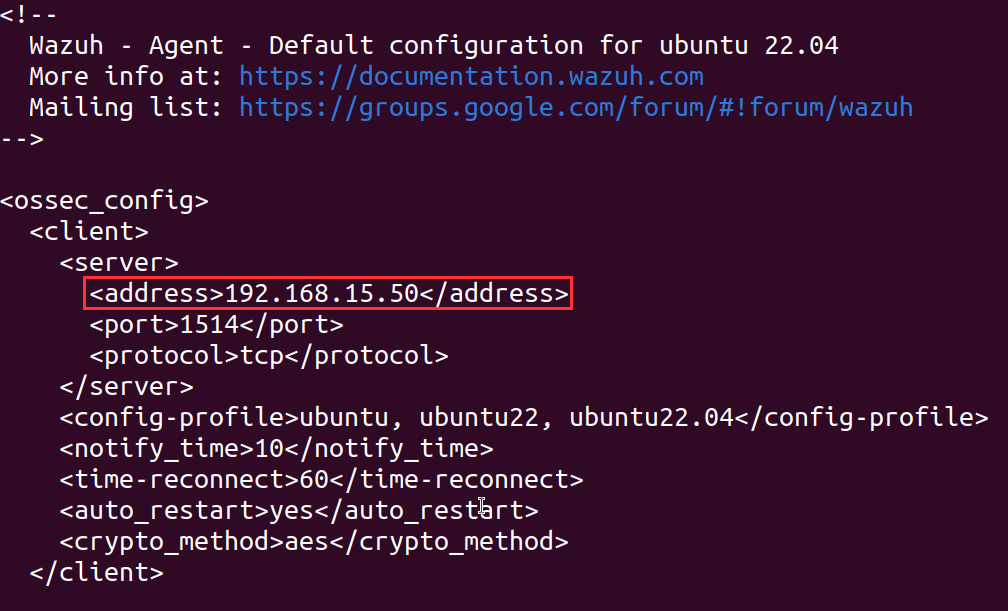
Open the ossec.conf file.
sudo nano /var/ossec/etc/ossec.conf
Notice how the <address> blog has our IP address for [project-x-sec-box] from Enterprise 101, let's change this to 192.168.15.50.

Here we have changed it to the new IP address.
Exit Nano with CTRL + X, then Y key, Enter Key.
Restart the wazuh-agent service.
-
sudo systemctl restart wazuh-service -
sudo systemctl status wazuh-service
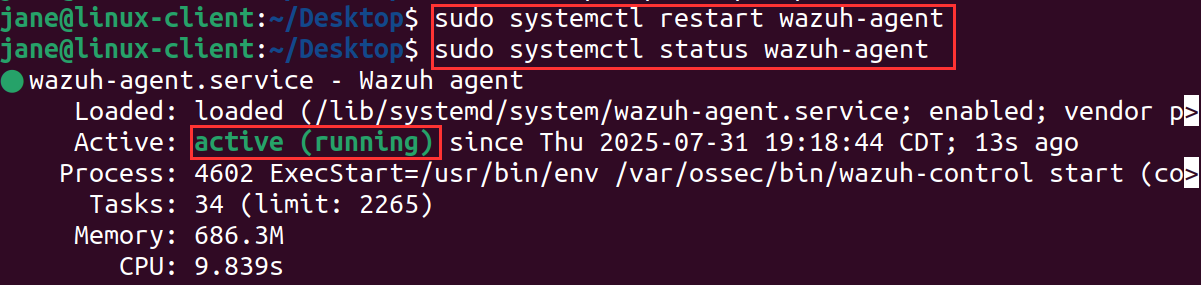
Going back to the [project-x-sec-box] ➔ “Server Management” ➔ “Endpoint Summary”, we should see our client profile updated.

Success!