Setup DNS Container
Prerequisites
- VirtualBox or VMware Workstation Pro Installed.
- Virtual Machine
[project-x-corp-svr]is configured with Docker.
Network Topology
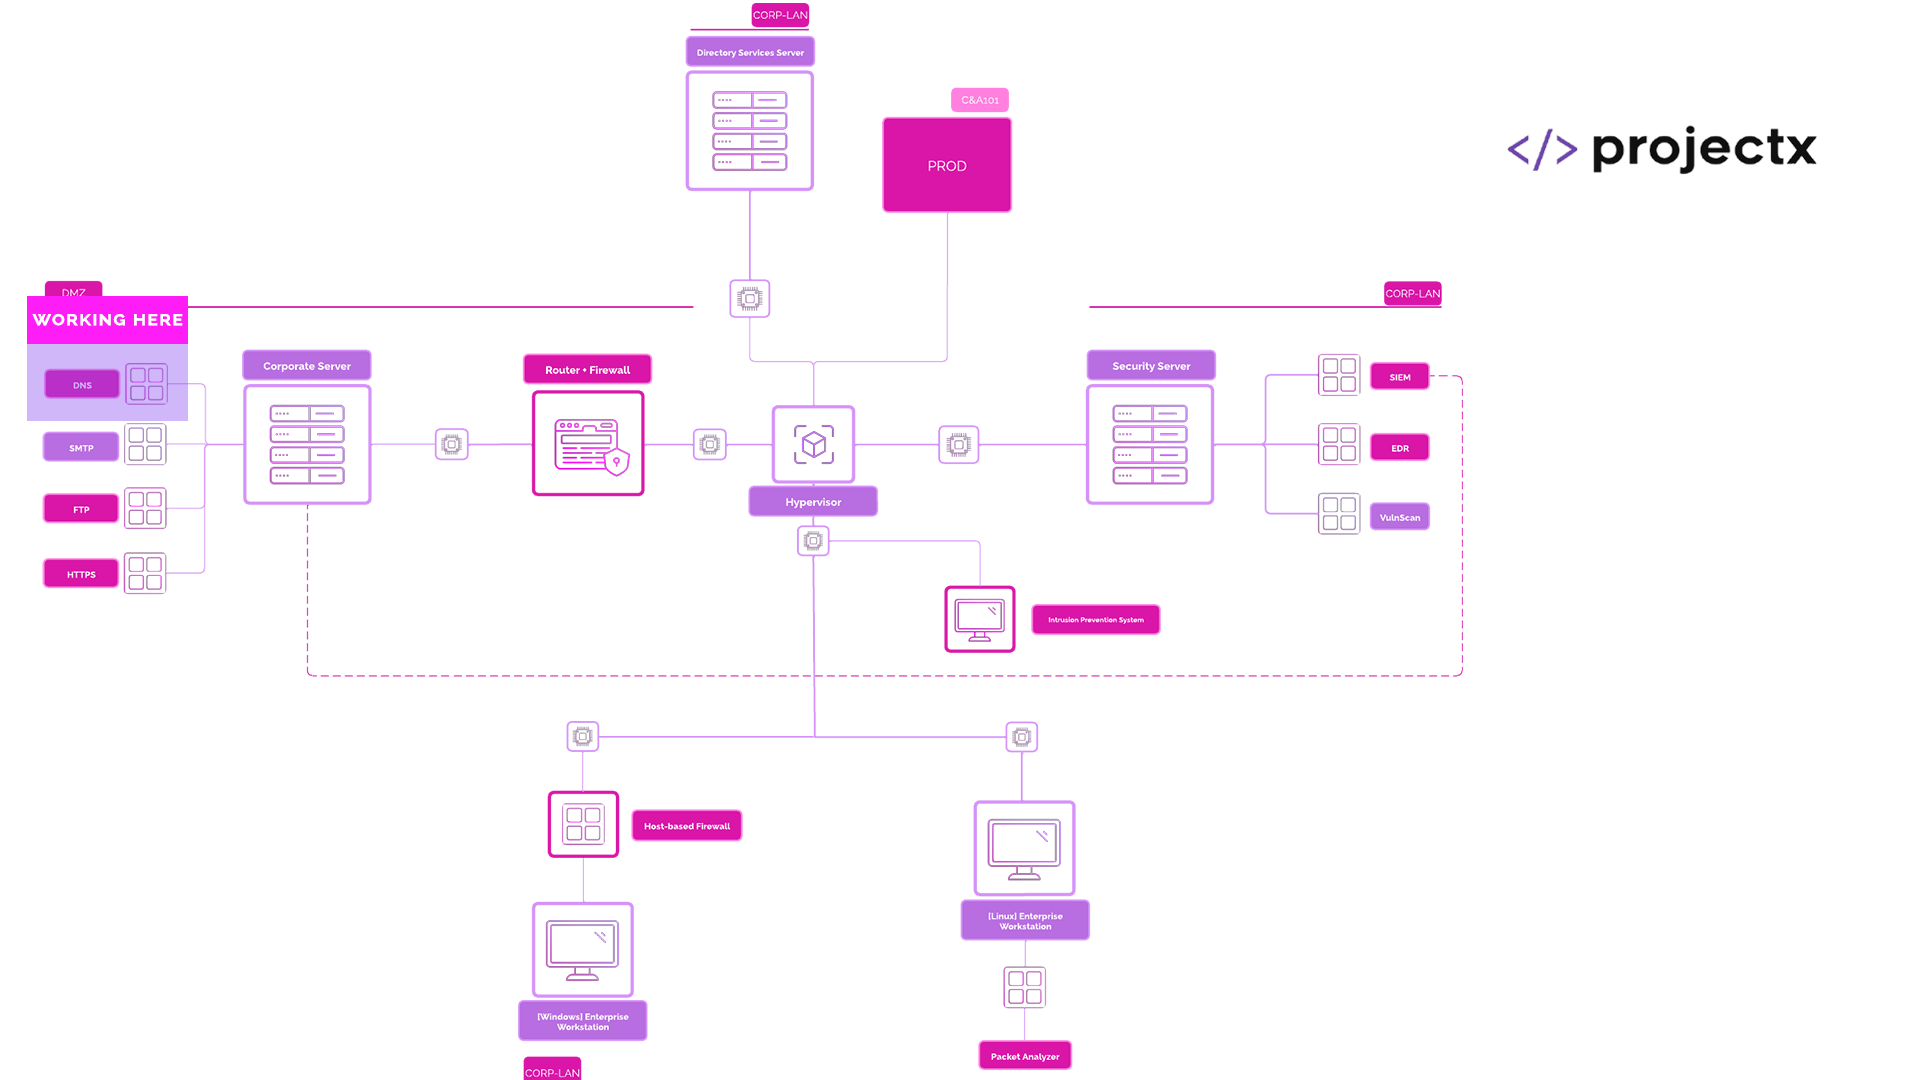
DNS Servers Overview
DNS and DNS servers are used to translate domain names such as projectsecurity.io into IP addresses that computers use to communicate. DNS servers are a critical part of the Internet. Without it, you wouldn't be able to browse to this website, Google, or your favorite memes.
There are many DNS server technologies offered to power the DNS protocol. BIND9 is the one we will use.
BIND9 Overview
BIND9 (Berkeley Internet Name Domain version 9) is one of the most widely used DNS server software implementations. It provides authoritative DNS services, recursive resolution, and zone management features for both internal networks and internet-facing environments.
How is BIND9 used?
BIND9 is used to host DNS zones for domains, this allows us to store DNS records that point a domain to IP address. It also can manage and replicate DNS records across multiple DNS servers for redundancy.
Internal vs External DNS Servers
In a corporate environment, internal DNS servers are used to resolve hostnames within the organization's private network, such as domain controllers, file servers, and internal applications—while external DNS servers handle resolution of public domains. Internal DNS is typically integrated with systems like Active Directory and is accessible only within the corporate network, ensuring that sensitive infrastructure names and IPs stay private.
Security Implications
Since DNS plays an important role in our Internet system, it's important to ensure DNS servers are configured correctly.
Common attacks include:
- Exposure to DNS amplification attacks if recursion is misconfigured
- Zone transfer leaks that reveal internal domain structure
- Cache poisoning or spoofed DNS responses
- Denial-of-service (DoS) attacks targeting DNS availability
Provision BIND9 Container
Open a new terminal session.
Create a new directory on [project-x-corp-svr] under /opt.
sudo mkdir -p /opt/bindconfig
👉 This is where we are going to set up zone monitoring for our DNS zone files when it comes to the DNS defense using Wazuh File Integrity Monitoring.
Navigate back to the home directory: cd /home.
Let's create a new folder called dns: mkdir dns.
Create a new Dockerfile: nano Dockerfile.
Inside this Dockerfile we will use Ubuntu 22.04 as our base image, install bind9 dependencies as well as a few useful networking tools, make a /etc/bind/zones directory where we will store our zone files.
# Pull Ubuntu 22.04 Base
FROM ubuntu:22.04

# Install BIND9 and utilities
RUN apt-get update && \
    DEBIAN_FRONTEND=noninteractive apt-get install -y bind9 bind9utils bind9-doc dnsutils net-tools nano iputils-ping openssh-server && \
    apt-get clean

# Create necessary directories for zone files
RUN mkdir -p /etc/bind/zones

# Ensure configuration files are created
RUN test -f /etc/bind/named.conf || cp /usr/share/doc/bind9/examples/named.conf /etc/bind/named.conf && \
    test -f /etc/bind/named.conf.options || cp /usr/share/doc/bind9/examples/named.conf.options /etc/bind/named.conf.options && \
    test -f /etc/bind/named.conf.local || cp /usr/share/doc/bind9/examples/named.conf.local /etc/bind/named.conf.local

# Default command
CMD ["/bin/bash"]
Let's build a new image from the Dockerfile.
docker build -t projectx-image-dns ..
We can run the container and automatically login.
docker run -it --network=host --name dns-svr -v /opt/bindconfig:/etc/bind/zones projectx-image-dns.
-v: This stands for volume. Here we are binding our host, which is[project-x-corp-svr], file path location/opt/bindconfigto the container's file path location of/etc/bind. When we change files inside the container, the changes will be copied to our host under the/opt/bindconfig.
You will now be logged into the new container (the -it flag will initiate a container login). By default, we are the root user.
Let's setup BIND9.
Configure BIND9
BIND9's configuration files reside in the /etc directory: cd /etc/bind.
BIND9 gets its configuration files from /etc/bind/named.conf. This file includes links to additional files where the actual options and settings are provided.
We are going to be editing a few configuration files including:
-
/etc/bind/named.conf.options -
/etc/bind/named.default-zones
First thing we will do is backup the default configuration files. This is a good practice when provisioning new systems. If we mess up the configuration, we can always restore to the default.
Let's rename these files with a .backup at the end.
-
mv /etc/bind/named.conf.options /etc/bind/named.conf.options.backup -
mv /etc/bind/named.default-zones /etc/bind/named.default-zones.backup

Now let's change some settings around.
Let's first edit named.conf.options.
nano named.conf.options.
You can replace the entire file contents with the following block below.
Here, we are applying a few settings such as forwarding our DNS requests on to 8.8.8.8, disabling DNSSEC and disabling domain authentication.
options {
    directory "/var/cache/bind";
    recursion yes;
    allow-query { any; };
    allow-recursion { any; };
    listen-on { any; };
    forwarders {
        8.8.8.8;
    };
    dnssec-validation no;
    auth-nxdomain no;
};
CTRL + X, then Y key, Enter Key.
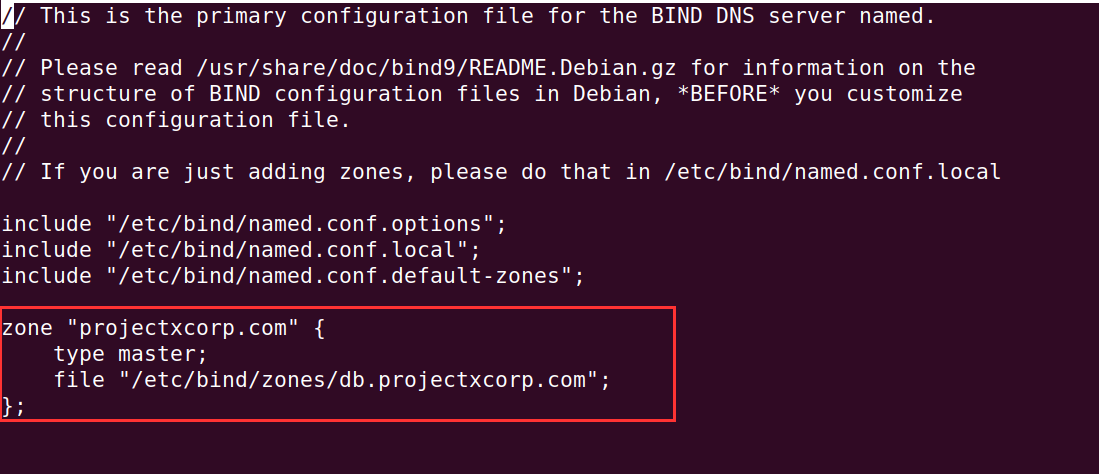
Next, we can create the zone file. This tells BIND9 where to look for when it comes to our specific domain to IP mappings. In this case, we are telling BIND9 that "projectxcorp.com"'s zone file is located at /etc/bind/zones/db.projectxcorp.com.
nano named.conf.default-zones.
Exit Nano with CTRL + X, then Y key, Enter Key.
Navigate to the /zones directory.
cd /etc/bind/zones.
Create a new zone file called db.projectxcorp.com.
nano db.projectxcorp.com.
Add the following to the file.
$TTL    604800
@       IN      SOA     ns1.projectxcorp.com. admin.projectxcorp.com. (
                              2         ; Serial
                         604800         ; Refresh
                          86400         ; Retry
                        2419200         ; Expire
                         604800 )       ; Negative Cache TTL
;
@       IN      NS      ns1.projectxcorp.com.
ns1     IN      A       10.0.0.8
www     IN      A       10.0.0.8
Finally, go back to the named.conf file: cd /etc/bind.
Add the following statement to the bottom of the named.conf file.
Exit Nano with CTRL + X, then Y key, Enter Key.
Start the BIND9 Service: service named start.

❗ If the
namedservice fails. Supply anamed -g -u bind. This starts thenamedservice in the foreground, which will show the logs (-g) to the terminal. Read through these logs to see why the bind9 service is failing.
If we go to another machine (such as as [project-x-attacker]) and provide the following dig command, we should see www.projectxcorp.com resolved.
dig @10.0.0.8 www.projectxcorp.com
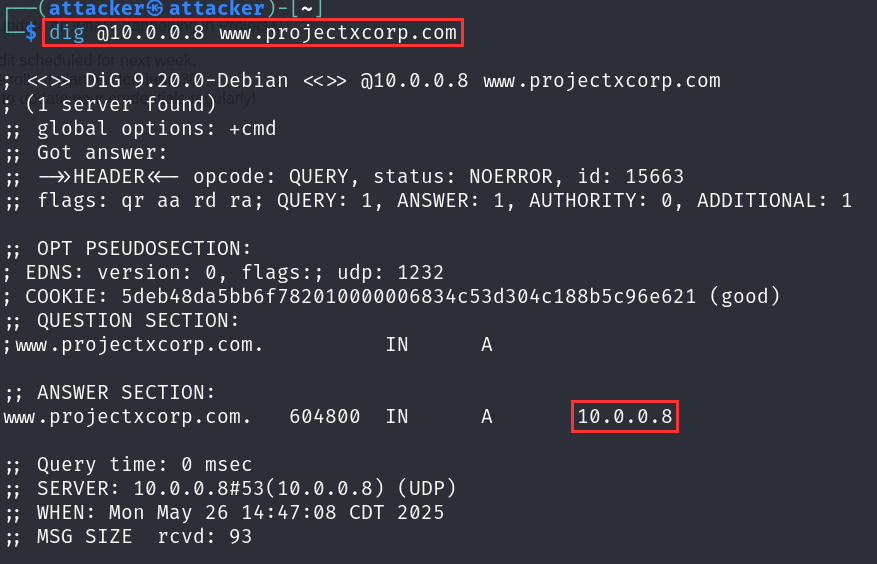
Success! At this point, we are able to query for the local domain name and get a local IP address returned. Right now, we do not have any content being served on www.projectxcorp.com, we will create and configure our web-svr container to serve our internal portal content.
Configure SSH Access
Let's add SSH to our DNS server so that we can manage our DNS server remotely.
Create a new directory: mkdir /var/run/sshd.
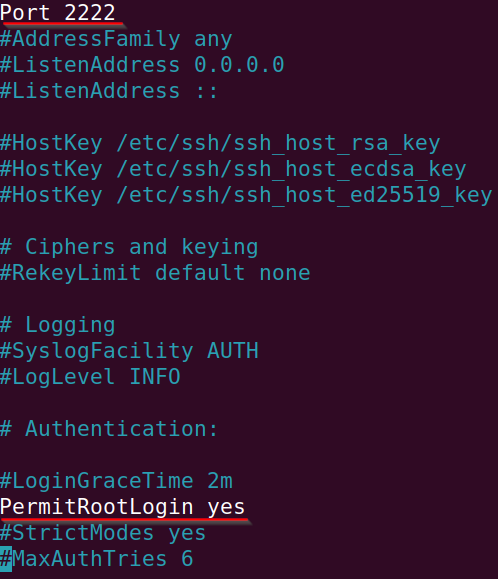
Edit to the ssh_config file: nano /etc/ssh/sshd_config.
Change the following settings:

Let's change root password to something weak.
echo 'root:admin' | chpasswd
We can then start the sshd service inside the dns-svr container.
service ssh start
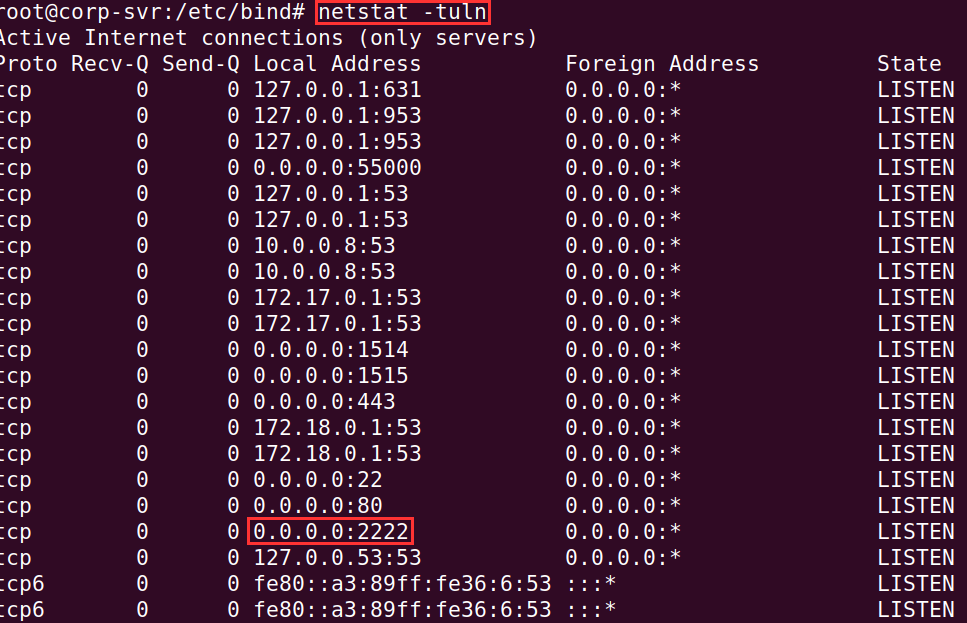
Perform a netstat -tuln and make sure 0.0.0.0:2222 is up and running.
UFW
Open ports 53 using UFW.
Enable ufw if you have not already: ufw enable.
Allow ports 53 for both TCP and UDP.
ufw allow 53/tcpufw allow 53/udp
📷 Take Snapshot!