pfSense Firewall
Prerequisites
- VirtualBox or VMware Workstation Pro Installed.
- Virtual Machine
[project-x-win-client].
Network Topology
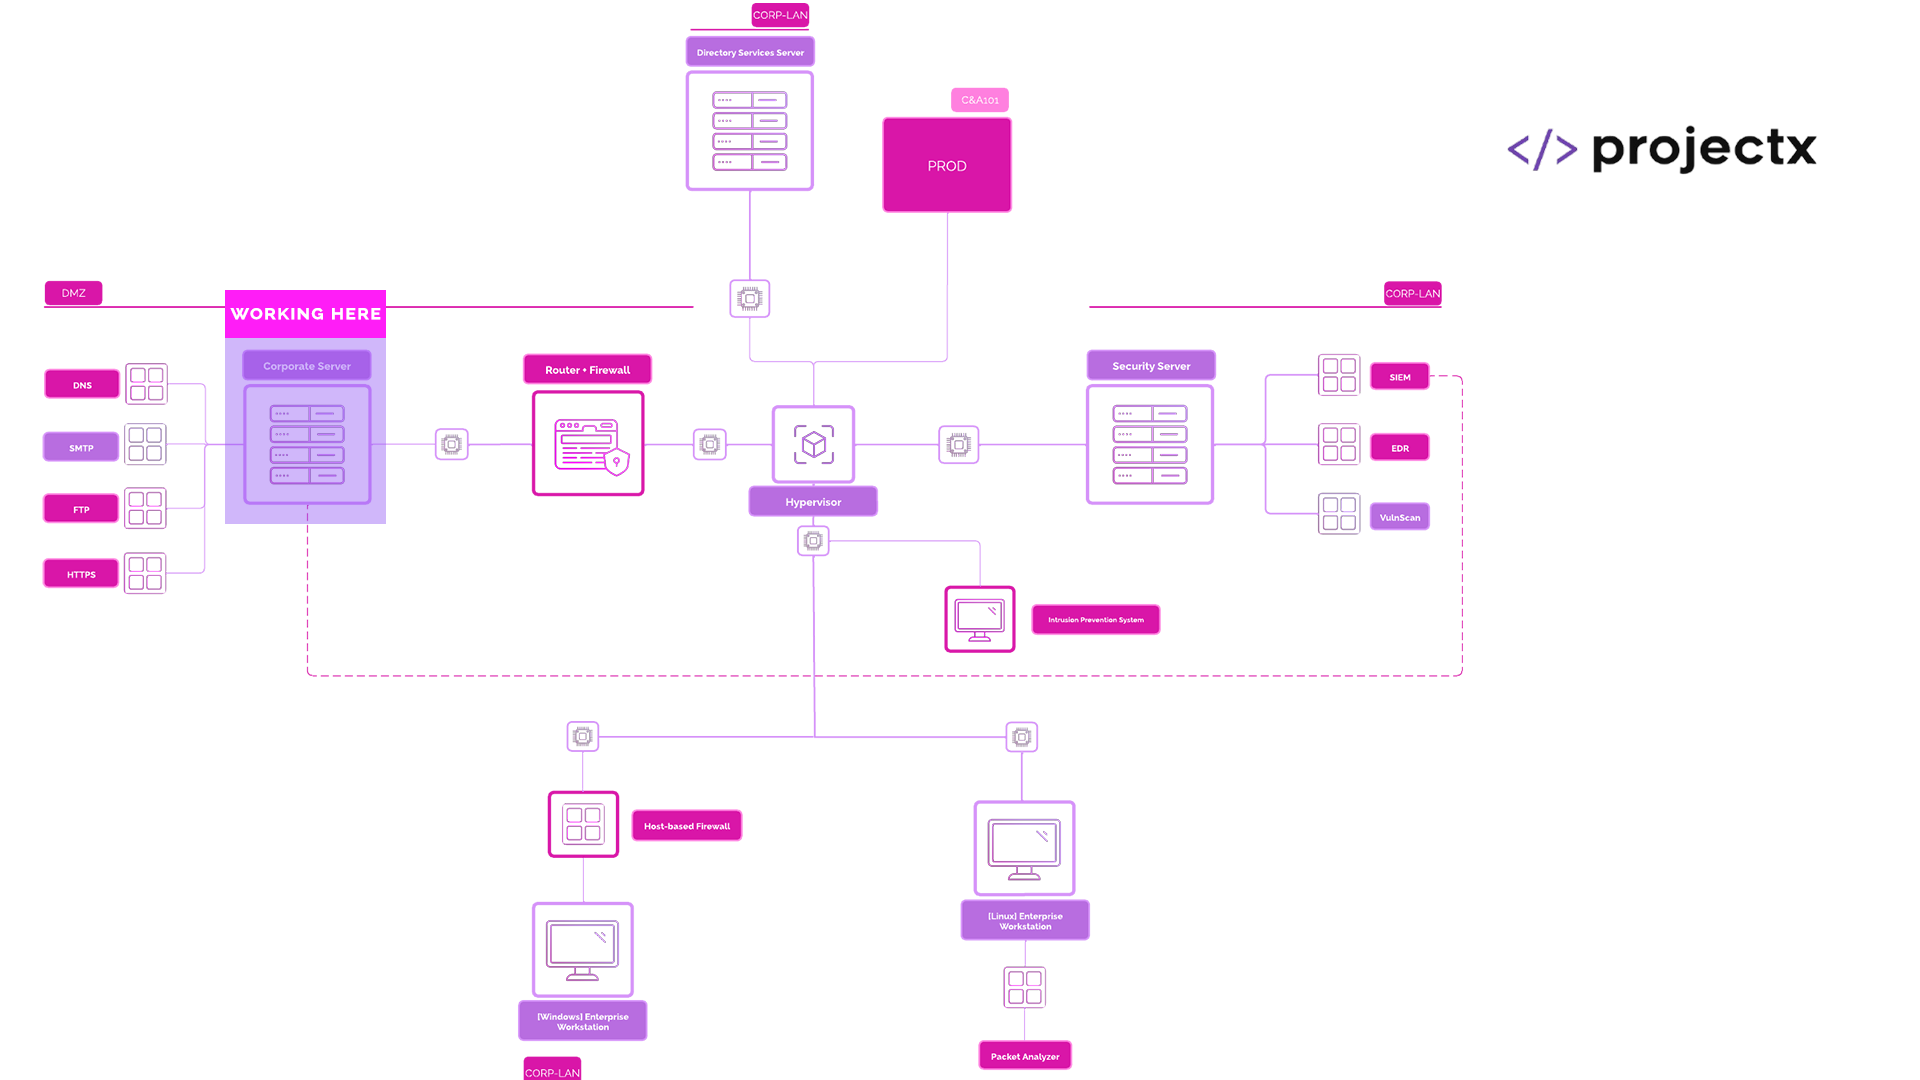
| Hostname [project-x-…] | IP Address Range | Function |
|---|---|---|
corp-svr |
10.0.5.10/24 | DMZ |
win-client |
DHCP (192.168.15.5-10/24) | LAN |
linux-client |
DHCP (192.168.15.5-10/24) | LAN |
corp-fw |
192.168.15.1/24 | FW-LAN |
corp-fw |
null | FW-WAN |
corp-fw |
10.0.5.1/24 | FW-DMZ |
pfSense Overview
pfSense is a free and open-source firewall and router platform based on FreeBSD.
It offers enterprise-grade features through a web-based interface, making it accessible for both home and business users. pfSense supports a wide range of features including routing, VPN, load balancing, and traffic shaping, making it a powerful network management solution.
pfSense can act as a router, firewall, and is commonly set up as both. We are going to be doing both.
The pfSense Firewall
pfSense uses a stateful packet inspection firewall, allowing it to track connections and enforce rules based on session state. Rules are created per interface (e.g., WAN, LAN) and follow a top-down approach.
By default, pfSense blocks all incoming connections on the WAN and allows all outbound traffic from the LAN. Administrators can define granular access control rules, NAT (Network Address Translation) settings, and logging policies.
Network Interfaces
pfSense comes configured with two default interfaces, LAN and WAN.
The LAN (Local Area Network) interface connects internal devices within a network and is typically assigned a private IP address range. It serves as the gateway for internal clients. The WAN (Wide Area Network) interface connects the pfSense device to the internet or an upstream provider. It usually receives a public IP and acts as the main point for incoming and outgoing external traffic.
In addition to the two default network interfaces, we will create a third interface for our DMZ, where our public server, [project-x-corp-svr] will reside with limited public access.
Security Implications
Deploying and maintaining a router and firewall has some security implications, such as the following:
-
Default Configurations: Over-reliance on default settings can leave gaps in security if not tailored to the specific network environment.
-
Misconfiguration Risks: Incorrect firewall rules, NAT settings, or open ports can lead to unauthorized access or data exposure.
-
Exposed Web GUI: Allowing access to the pfSense web interface from the WAN increases the risk of brute-force and remote code execution attacks.
-
Package Vulnerabilities: Optional packages such as Snort or pfBlockerNG can introduce additional attack surfaces if not regularly updated or properly secured.
-
Outdated Software: Running outdated versions of pfSense or FreeBSD can leave known vulnerabilities unpatched and exploitable.
-
Weak Access Control: Simple or reused passwords and lack of access restrictions can result in unauthorized administrative access.
-
Lack of Monitoring: Without proper logging, alerting, or intrusion detection systems, suspicious activity may go unnoticed.
-
VPN Configuration Issues: Misconfigured VPNs can allow unintended access or bypass internal firewall rules.
-
Improper Rule Order: Since firewall rules are processed top-down, incorrect ordering can result in unintentional access allowances or blocks.
-
Unrestricted WAN Exposure: Opening unnecessary ports or services to the WAN interface increases the network’s attack surface.
Part 0: Configure VirtualBox
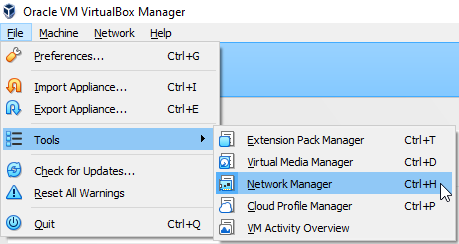
Let's create the two "Host-only Network" Adapters in VirtualBox.
Navigate to "File" ➔ "Tools" ➔ "Network Manager".
Select "Create".
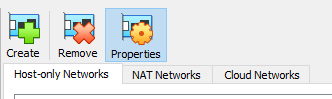
A new "VirtualBox Host-Only Ethernet Adapter #2" should appear at the bottom.
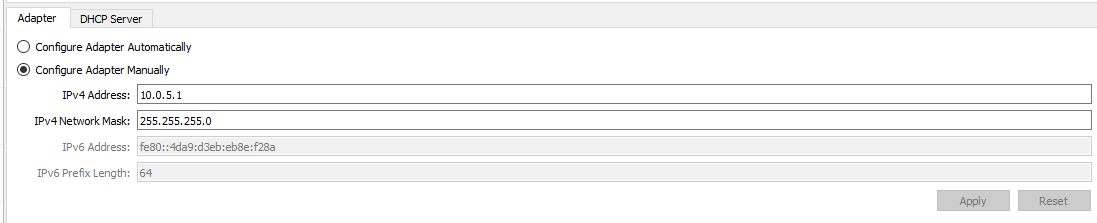
Change the IP address to 192.168.15.1 with a subnet mask of 255.255.255.0.

Create the second "Host-only" Network Adapter. This will be the DMZ adapter.
Select "Create".
A new "VirtualBox Host-Only Ethernet Adapter #3" should appear.
Change the IP address to 10.0.5.1 with a subnet mask of 255.255.255.0.
Part 0: Configure VMware Workstation Pro
Part 1: Deploy pfSense
Download pfSense ISO
You can download the pfSense ISO in the provided ProjectSecurity Downloads Drive. This is the recommended way.
👉 Refer to the "Project Overview" guide for Virtual Machine file downloads.
On Website
Or, you can download the latest version of pfSense on the website. You will have to create an account, add an address, and add the ISO to the cart.
If you download the ISO, you will have to extract binary with gzip. The screenshot below uses Windows WSL2, by default, gzip is not installed on Windows.
gzip -d netgate-installer-amd64.iso.gz

Provision [project-x-corp-fw] VM
Kudos to Juliana Mascarenhas on the helpful guide.
Go to "Machine" ➔ "New".
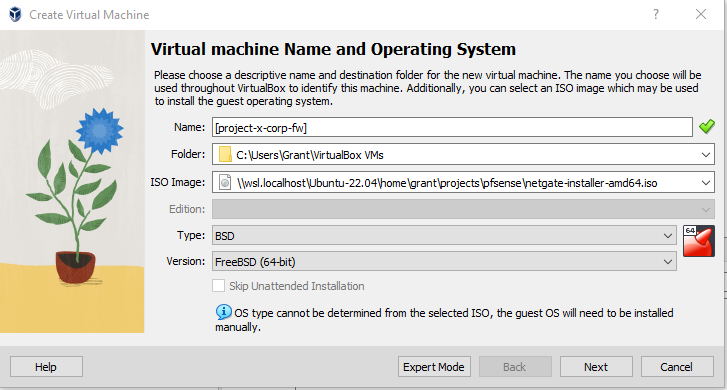
Proceed to add the following details.
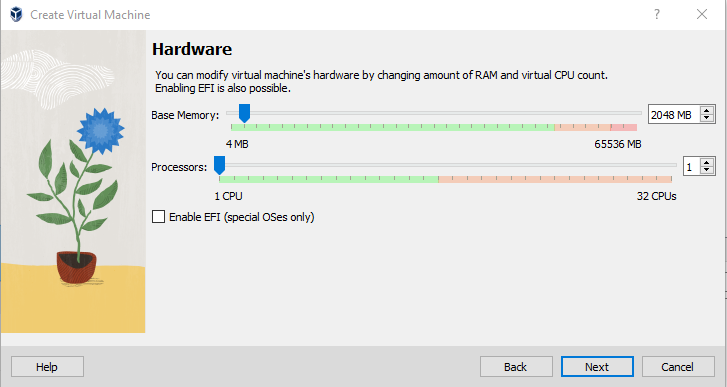
Change Hardware Specs:
-
Base Memory: 2048MB
-
Processors: 1
👉 Refer to the “Project Overview” guide for more information on default VM settings and names.
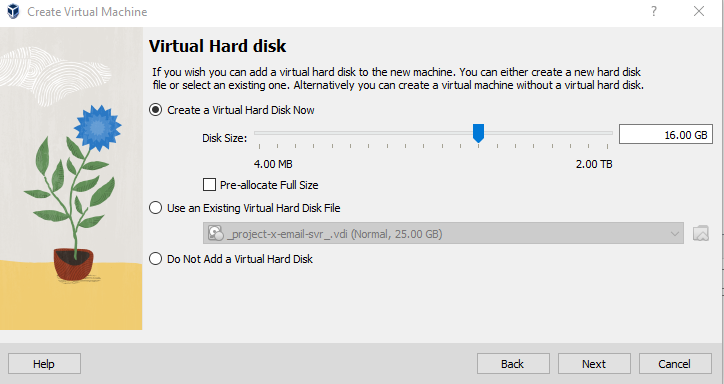
Leave default storage settings of 16.00 GB.
Select the new Virtual Machine profile ➔ "Settings".
Select the "Network" settings.
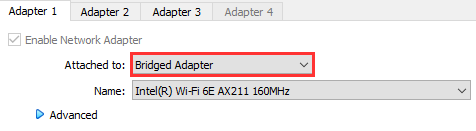
On the Adapter 1 tab, use the Bridged Adapter, leave the Name to the default. This will be the WAN network interface, which will access the Internet through your host machine.
On Adapter 2 tab, use Host-only Adapter. Choose the VirtualBox Host-Only Ethernet Adapter ## which has the 192.168.15.1/24 network. This will be the LAN network interface.
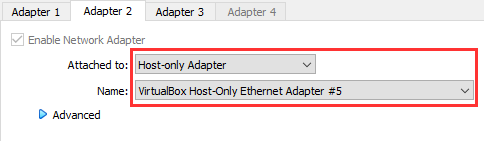
*In this screenshot it is #5, it will most likely be #2 depending on how many Host-only Networks you have created.

Close the settings menu.
Power on the new VM.
Attach the netgate-installer-amd64.iso to the VM and power on again.
Initializing pfSense
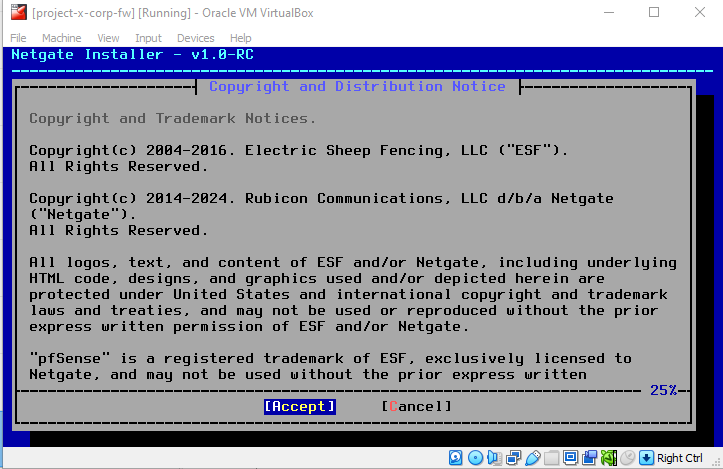
Wait for the initial setup to complete, the first dialogue box will be the End User License Agreement.
Accept the EULA by hitting "Enter".
Install pfSense by hitting "Enter".
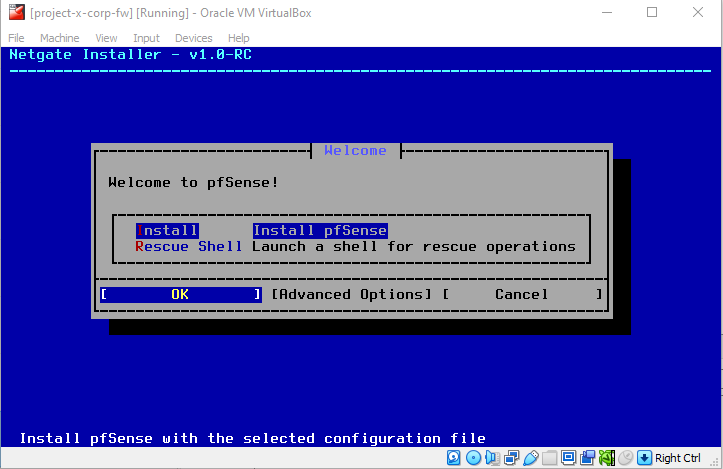
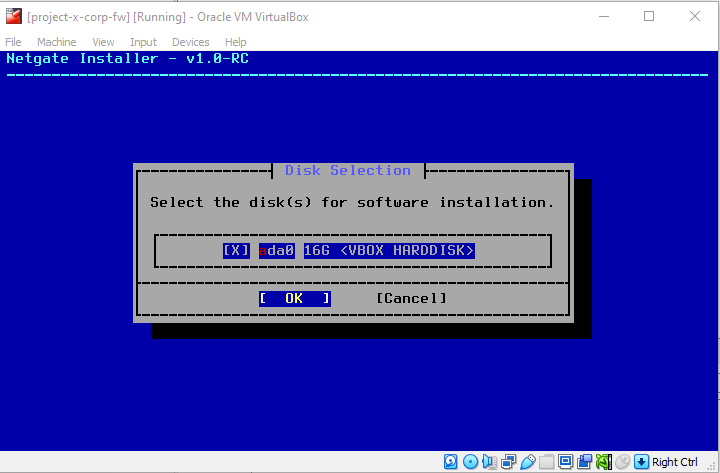
Select "OK" by hitting "Enter".
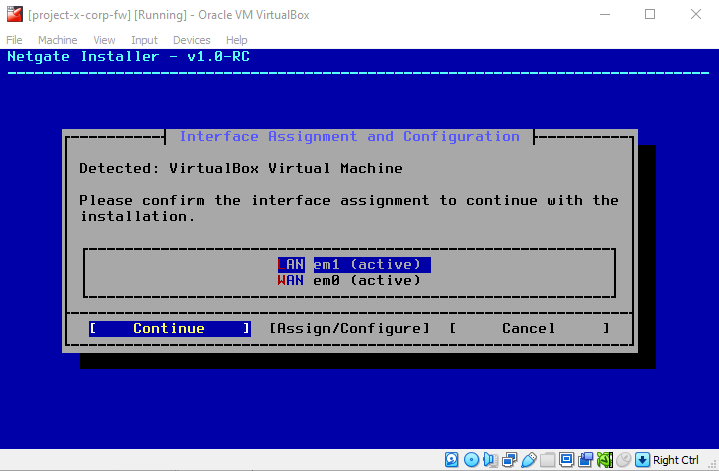
Select the default WAN interface, em0.
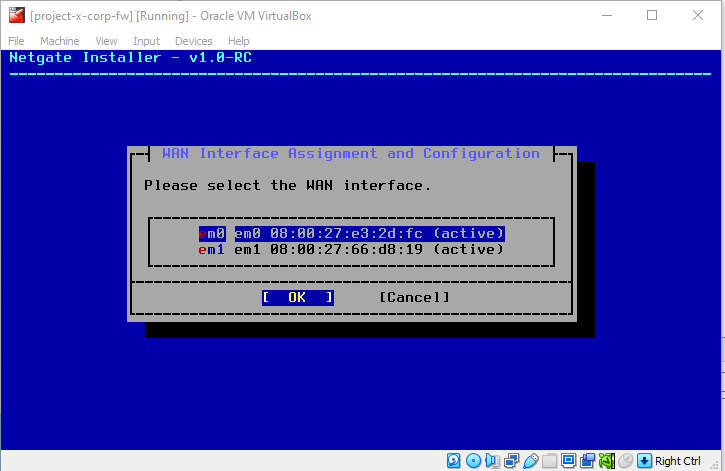
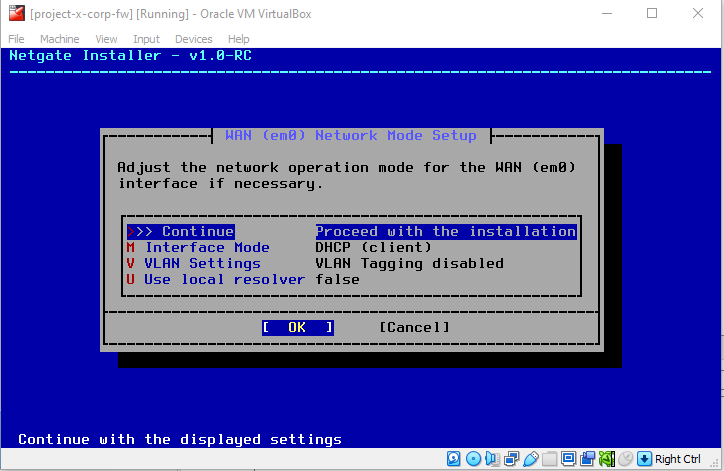
Leave defaults, hit "Enter".
Select the default LAN interface, em1.
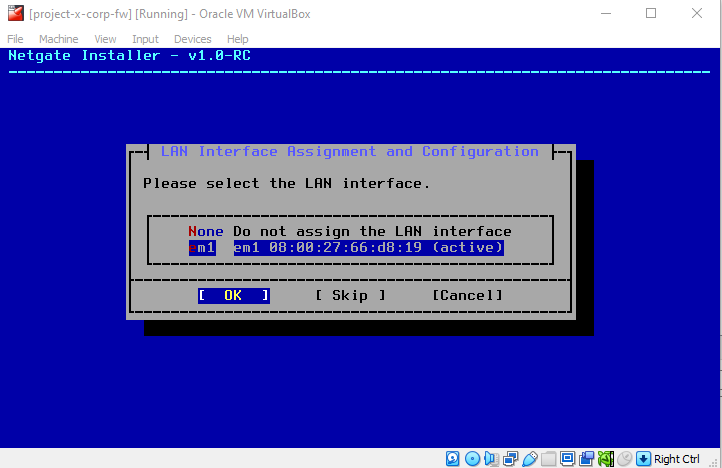
Leave defaults, hit "Enter".
Confirm the interface assignments.
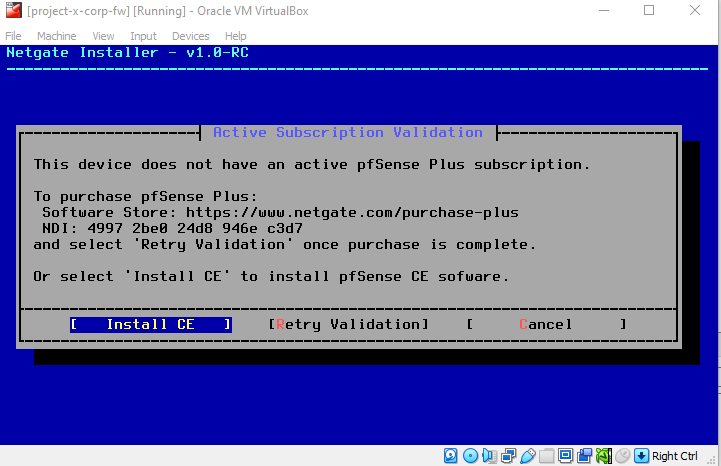
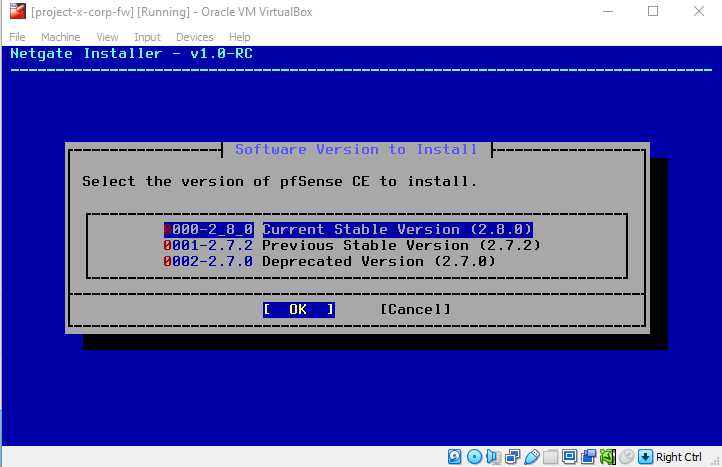
Choose "Install CE".
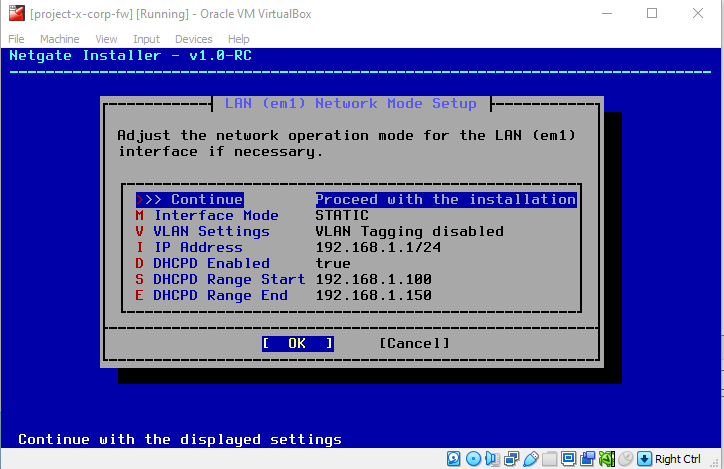
Leave the defaults, "OK".

Leave the default, "OK".
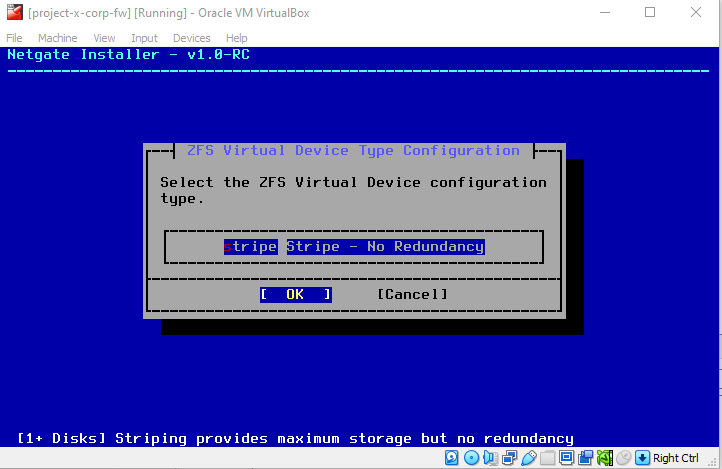
Leave the default, "OK".
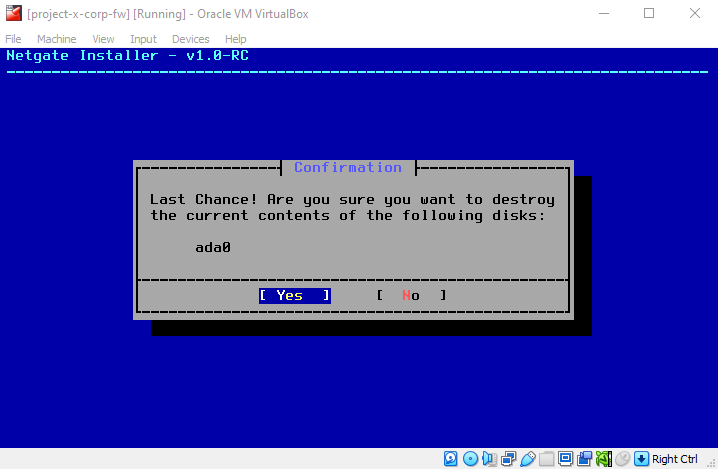
Leave the default, "Yes".
Leave the default, "OK".
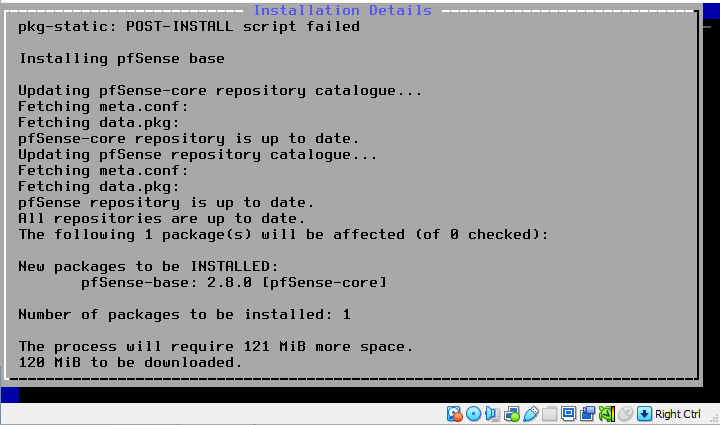
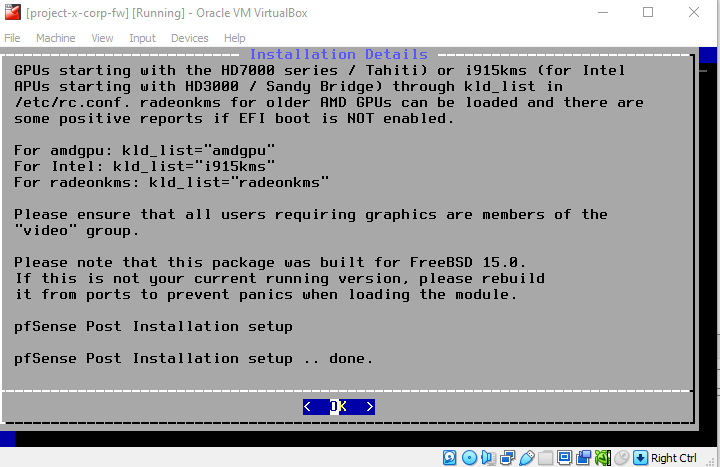
Allow pfSense to install, this will take a few minutes.
Once the installation is complete, you will see an "OK", Enter.
❗ This step is important.
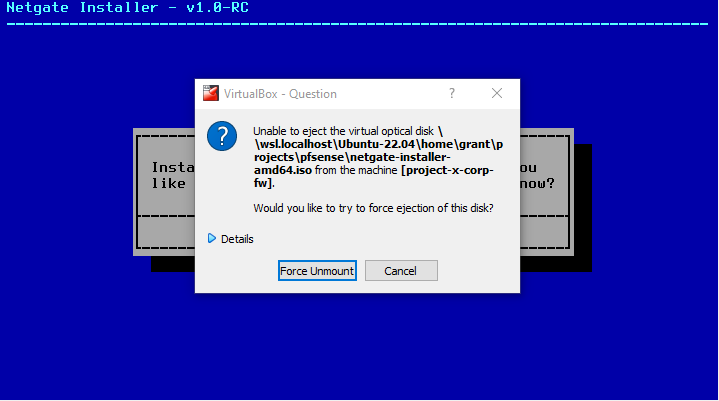
Before rebooting the machine, navigate to "Device" ➔ "Optical Drives" ➔ "Remove disk from virtual drive".
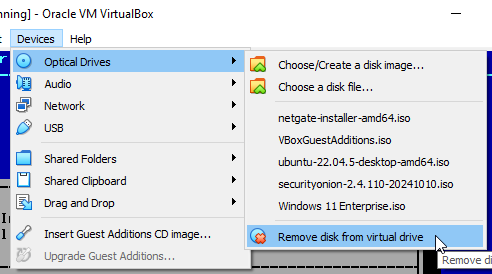
Choose "Force Unmount".
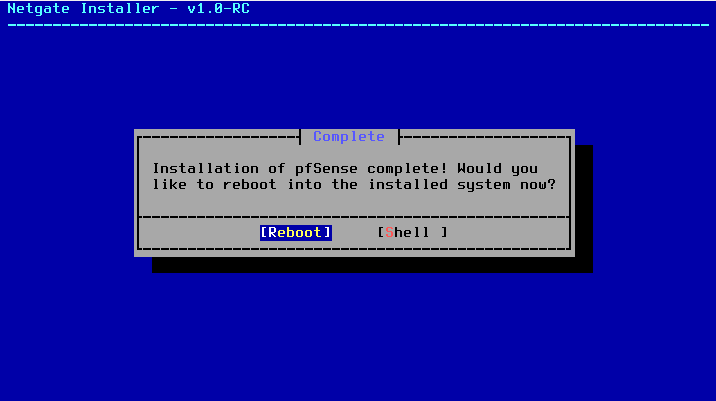
Now we can "Reboot". Power off the VM in VirtualBox.
Part 2: Configure pfSense Router
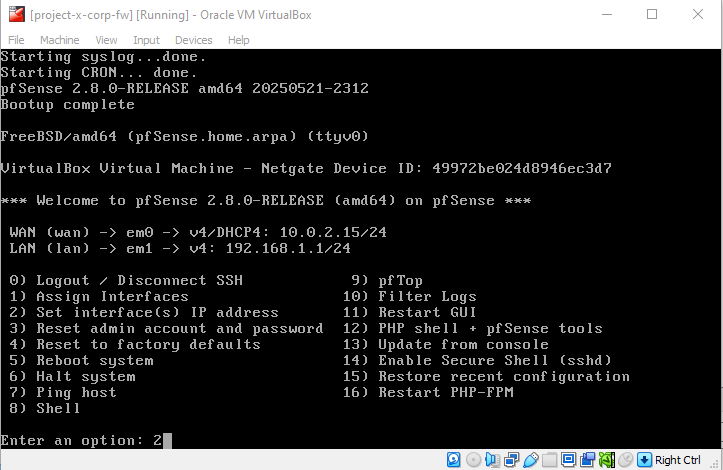
Now we can set up a few base settings for our LAN interface. We have to do this through the commandline to access the pfSense UI.
Select "2" from the options menu.
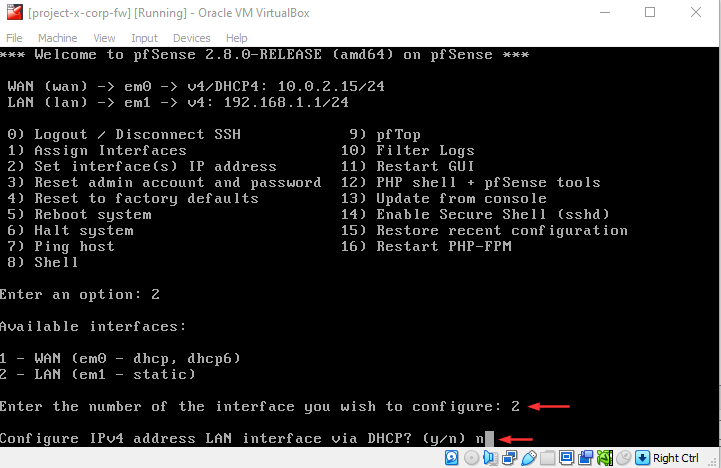
Select "2", which is the LAN interface.
Type "n".
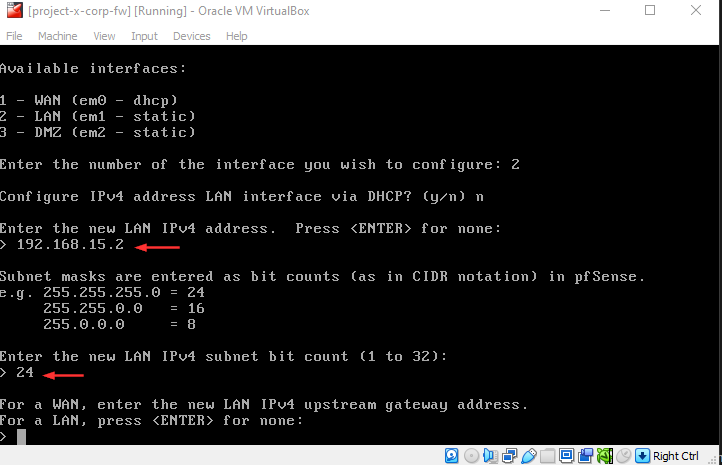
Enter the LAN IPv4 address 192.168.15.2.
For the subnet mask, type "24".
Hit "Enter" for none.
Select "n" for the IPv6.
Hit "Enter" for none.
Select "n" for the DHCP server.
Select "n" for webConfigurator.
You will now see the dialogue box with a URL.
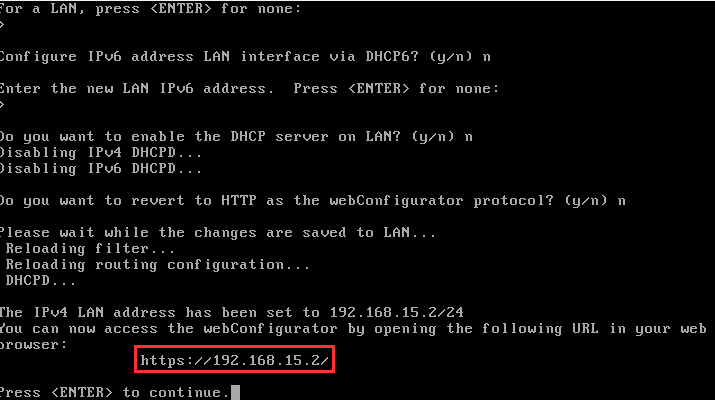
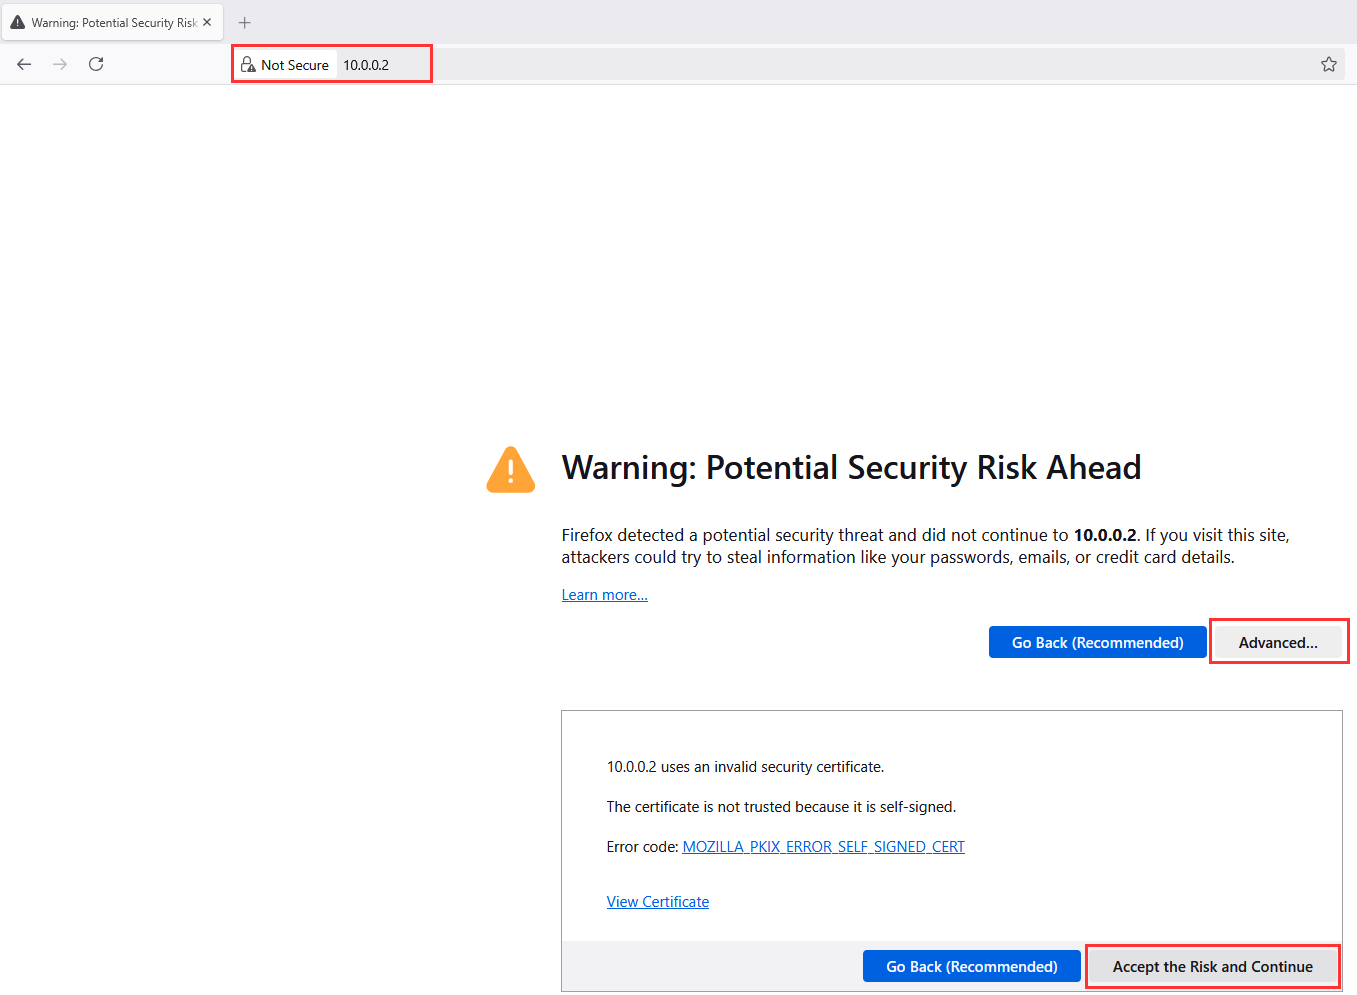
Navigate to your host machine's browser, type in the IP address of http://192.168.15.2 ➔ "Advanced..." ➔ "Accept the Risk and Continue".
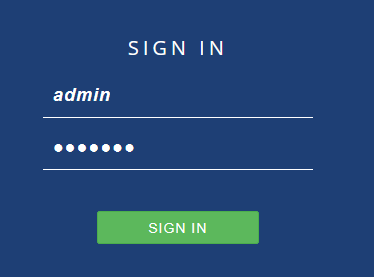
Log into the pfSense web interface:
-
Username: admin
-
Password: pfsense
👉 Refer to the “Project Overview” guide for more information on default usernames and passwords.
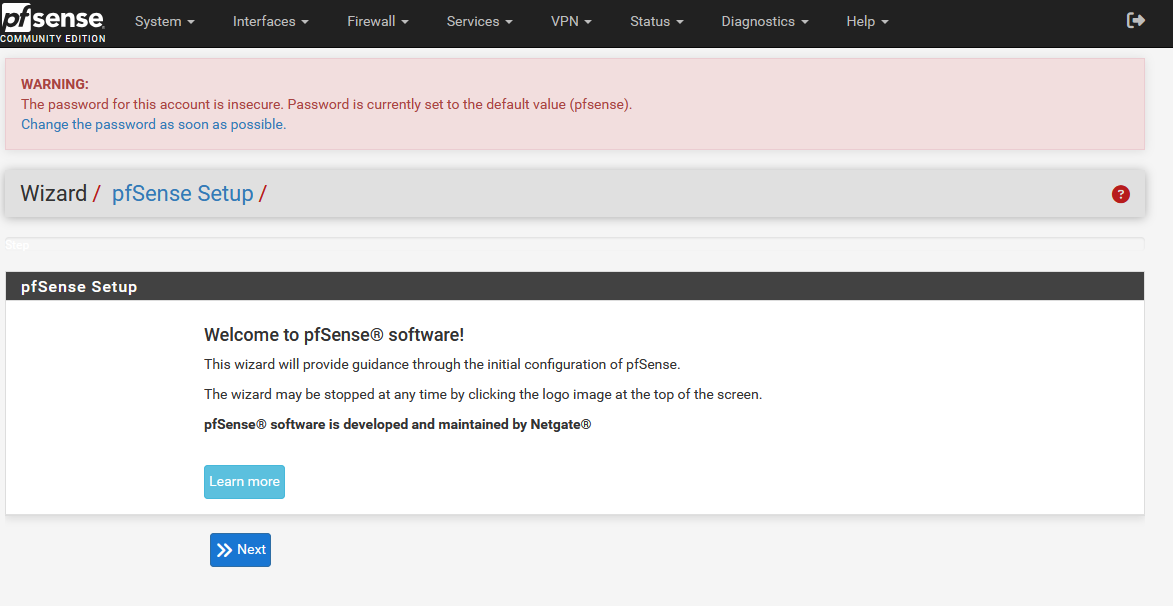
You should be logged into the web interface.
Create DMZ Interface
By default, pfSense comes packaged with two network interfaces, WAN and LAN. We have setup the WAN interface with DHCP in pfSense and attached the Bridged VirtualBox setting to the Adapter #1 profile in the Network Settings inside VirtualBox.
The LAN interface is setup with a static IP address of 192.168.15.2 in pfSense with "VirtualBox Host-Only Ethernet Adapter #2" profile in the Network Settings inside VirtualBox.
To achieve our DMZ network configuration, we will perform the following changes:
-
VirtualBox: Attach the "VirtualBox Host-Only Ethernet Adapter #3" profile in the Network Settings inside
[project-x-corp-fw]VM. -
pfSense: Add the new interface, rename to DMZ, and configure segmentation operations.
VirtualBox
Power off [project-x-corp-fw] VM.
Navigate to the [project-x-corp-fw] VM "Settings" ➔ "Network".
Go to "Adapter 3".
Choose "Host-only Adapter".
Inside the name choose "VirtualBox Host-Only Ethernet Adapter #3" or the Network Adapter # that the 10.0.5.1 network was configured in.
In this screenshot, it's "#6".
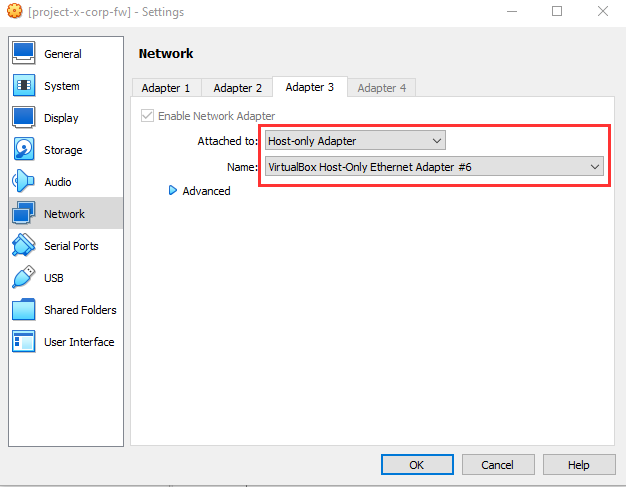
Select "OK" to save changes Power On VM again.
pfSense
Navigate to the web interface, log in.
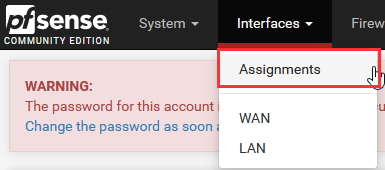
Go to "Interfaces" ➔ "Assignments".
Under "Interface Assignments", you should see a new network port available.
Select "Add".
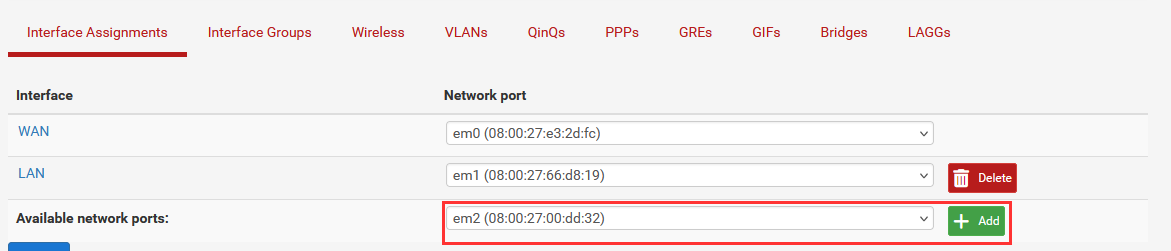
A new interface with the default name of "OPT1" will be created.
Navigate to "Interfaces" ➔ "OPT1".
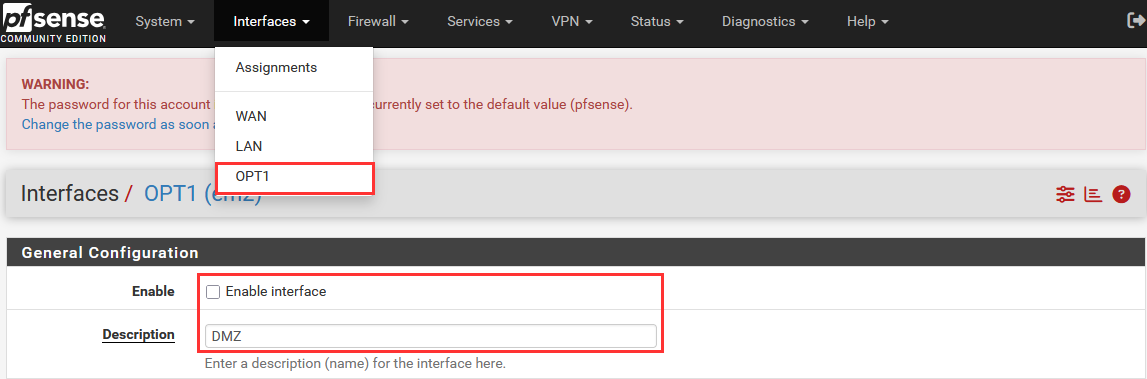
We can now enable this interface, rename to "DMZ", and assign a IPv4 Address to the interface, in our case 10.0.5.2.
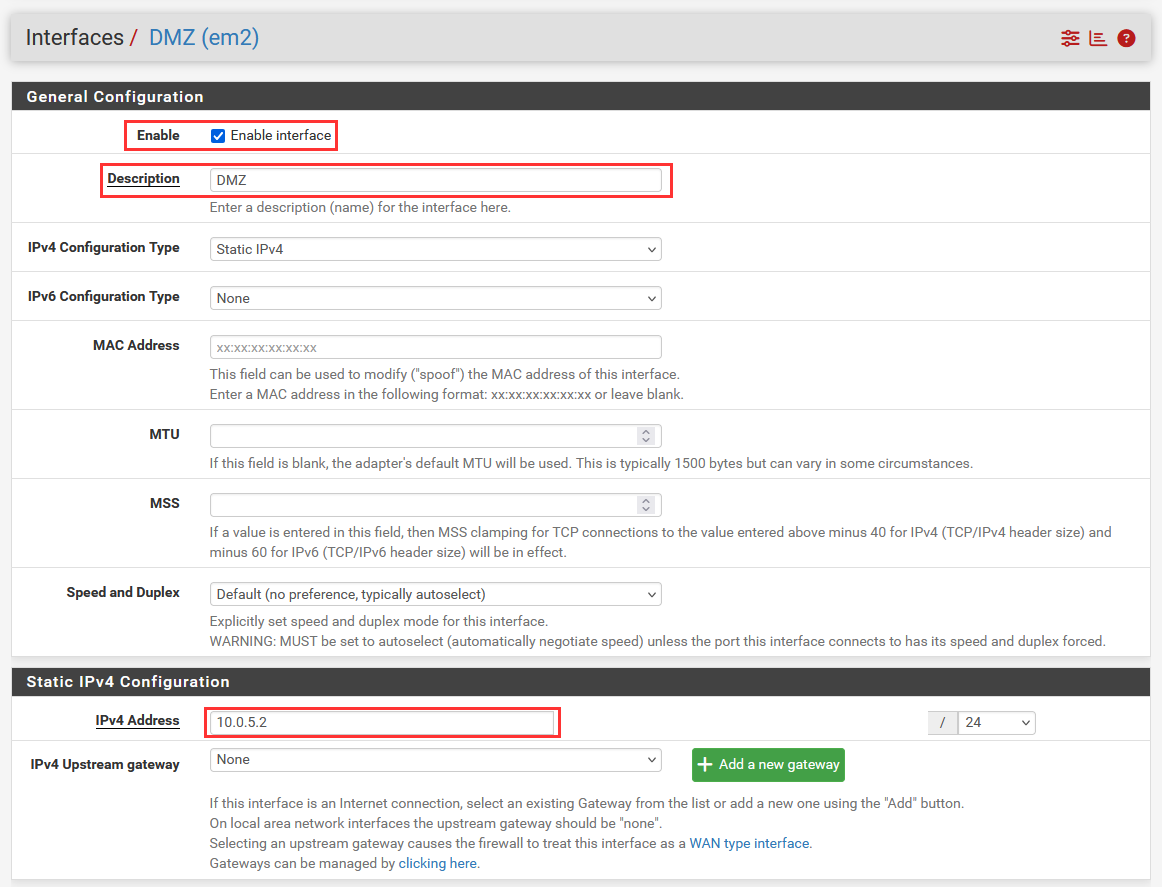
At the bottom of the configuration page select "Save".
You will notice a dialogue box appear at the top, select "Apply Changes" to deploy these changes.

Success! We have a new DMZ up and running.
Restart the VM through Virtualbox to apply the settings.
DHCP & DNS Routing on LAN Interface
Navigate to the pfSense UI.
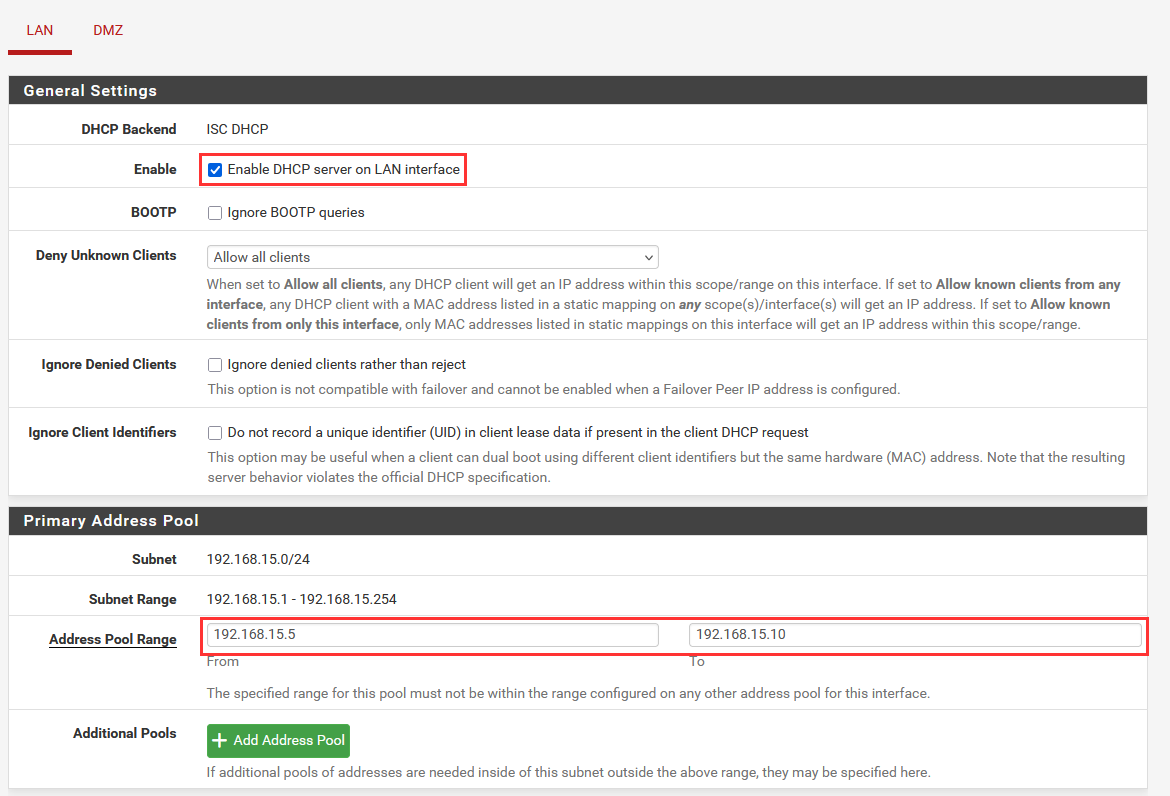
Let's configure the DHCP Server setting in pfSense to lease addresses to our workstation fleet. We will choose to lease five total IP addresses:
- Lease Range: 192.168.15.5 - 192.169.15.10
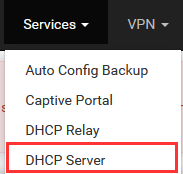
Navigate to "Service" ➔ "DHCP Server".
Select the "LAN" interface.
Enable the DHCP server on LAN interface and provide the address pool.
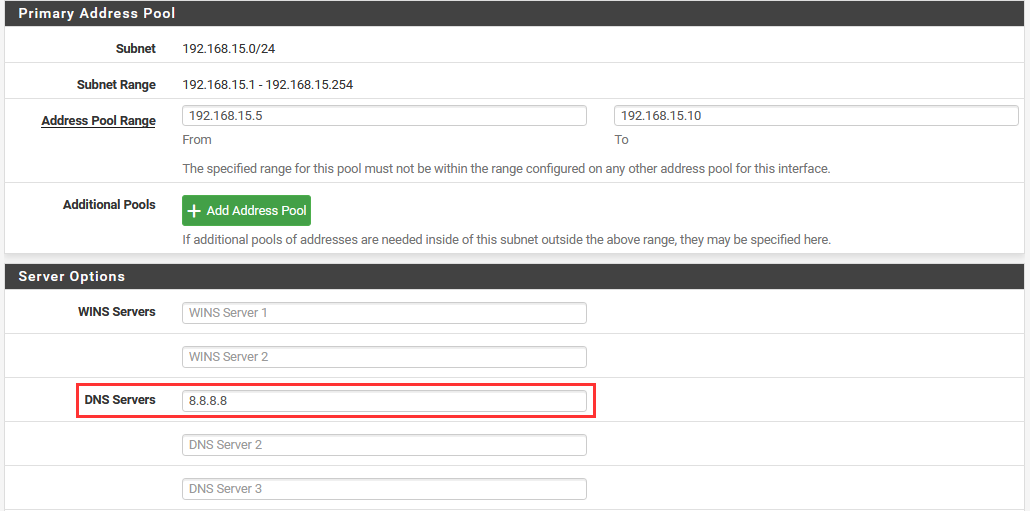
In addition, let's allow the DHCP service to send our DNS server.
Under the address pool assignment, set the DNS Server to 8.8.8.8.
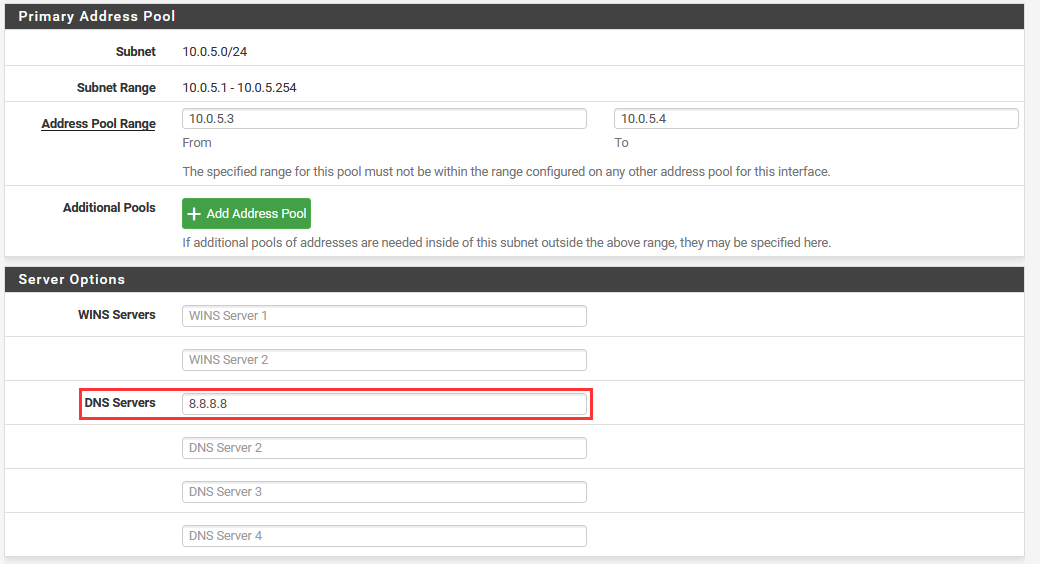
DHCP & DNS Routing on DMZ Interface
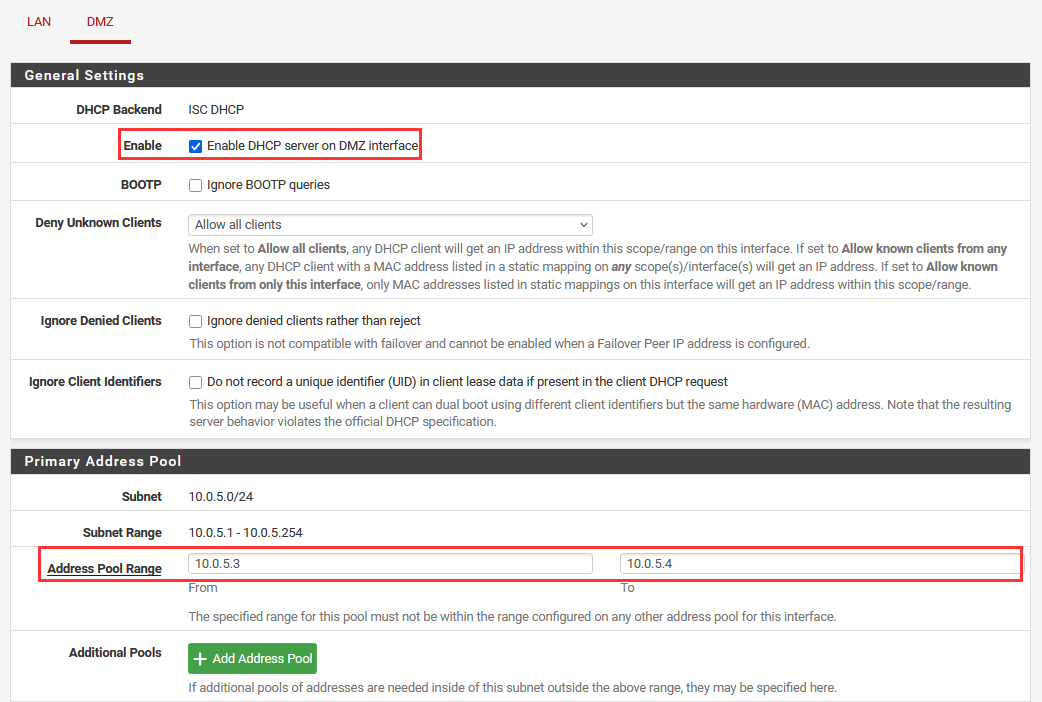
The DMZ subnet will also have a dynamic IP address assignment. Although it will be restricted to just two IP addresses.
We will choose to lease two total IP addresses:
- Lease Range: 10.0.5.3 - 10.0.5.4
Navigate to "Service" ➔ "DHCP Server".
Select the "DMZ" interface.
Enable the DHCP server on DMZ interface and provide the address pool.
Let's allow the DHCP service to send our DNS server.
Under the address pool assignment, set the DNS Server to 8.8.8.8.
Part 3: Attach VMs to [project-x-corp-fw]
Now we can attach our VMs to the corresponding network segments.
To do this, we are going to attach our workstation VMs to "VirtualBox Host-Only Ethernet Adapter #2", which will get a 192.168.15.0/24 address.
We will attach [project-x-corp-svr] to "VirtualBox Host-Only Ethernet Adapter #3" and assign a static IP address.
[project-x-win-client] & [project-x-linux-client]
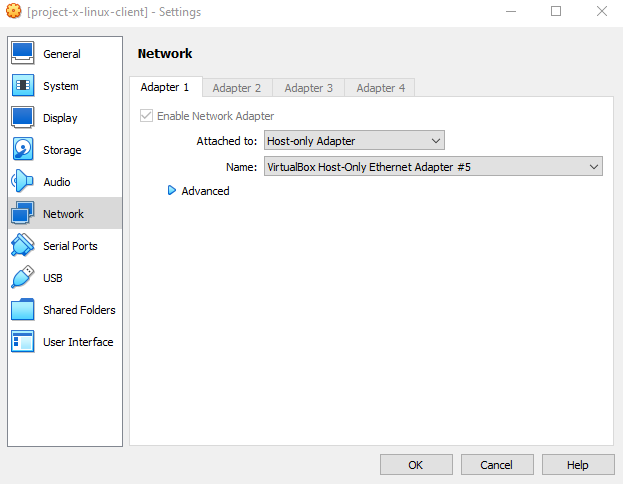
Navigate to the VM profile on VirtualBox "Settings".
Choose "Host-only Adapter".
Inside the name choose "VirtualBox Host-Only Ethernet Adapter #2" or the Network Adapter # that the 192.168.15.1 network was configured in. In this screenshot, it's "#5".
Select "OK" to save changes.
Power on [project-x-linux-client] if it is not already powered on.
Navigate to the "Wired Settings" menu.
Ensure that [project-x-linux-client] is set to a dynamic IP address.

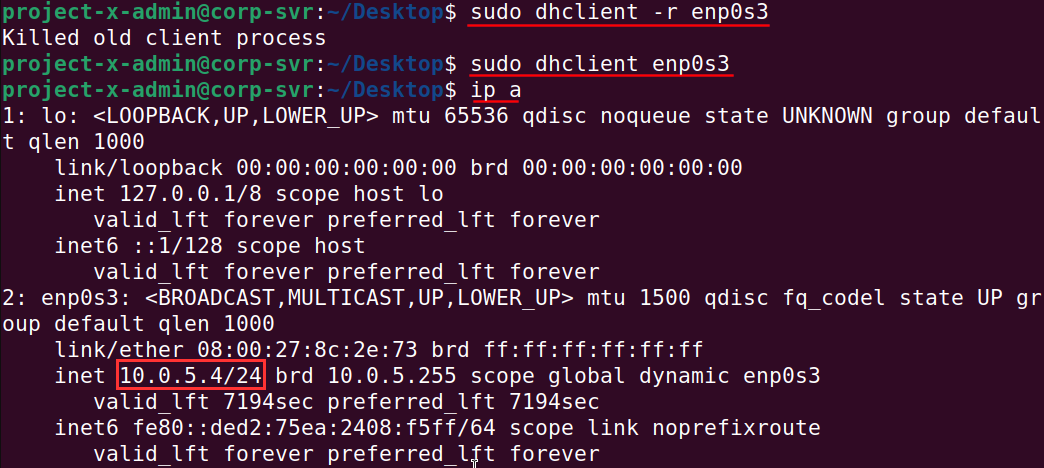
Open a new terminal session.
We are going to manually release our current IP address and request a new one with dhclient.
-
sudo dhclient -r enp0s3: Release current IP address with-rflag. -
sudo dhclient enp0s3: Request new IP address. -
ip a: You should see your new IP address, it should be between 192.168.15.5 to 192.168.15.10.
Power on [project-x-win-client] if it is not already powered on.
Navigate to the "Network Adapter Settings".
Make sure the IPv4 and DNS address settings is set to automatic.
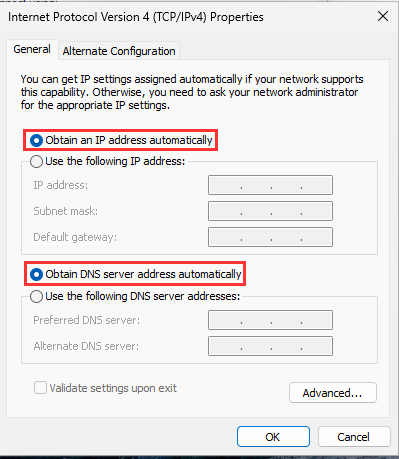
Restart each VM to apply Network Settings.
[project-x-corp-svr]
Navigate to the VM profile on VirtualBox "Settings".
Choose "Host-only Adapter".
Inside the name choose "VirtualBox Host-Only Ethernet Adapter #6" or the Network Adapter # that the 10.0.5.1 network was configured in. In this screenshot, it's "#6".
Select "OK" to save changes.
Power on [project-x-corp-svr] if it is not already power on.
Navigate to the "Wired Settings" menu.
Ensure that [project-x-corp-svr] is set to a dynamic IP address.
Open a new terminal session.
We are going to manually release our current IP address and request a new one with dhclient.
-
sudo dhclient -r enp0s3: Release current IP address with-rflag. -
sudo dhclient enp0s3: Request new IP address. -
ip a: You should see your new IP address, it should be 10.0.5.3 or 10.0.5.4.
Restart VM to apply Network Settings.
Now our VMs will be associated with different network segments. pfSense will be in charge of the routing and firewall.
Part 4: Configure the Firewall
Our final part is to create firewall rules to accept and deny traffic. We want to control what type of traffic will traverse in the LAN segment, DMZ segment, and WAN segment.
LAN <---> DMZ segment. WAN <---> DMZ. WAN <---> LAN.
We can do accomplish all of this through firewall rules.
While creating this guide, we found a great guide for setting up LAN and DMZ firewall rules on pfSense's official documentation page. Feel free to use this as a reference.
pfSense Firewall rules follow a top-down approach or table. The first rule matched starting from the top to the bottom is what will be executed.
Configure pfSense FW Rules
We are going to create two types of rules.
-
Standard Port Rule: Grant access to specific protocols via the port number.
-
Subnet Zones: Block entire subnets specifying the name of the subnet, such as "DMZ subnet".
Inside the LAN segment, we want our workstations and employees to access all resources related to ProjectX DMZ, while being able to access the Internet.
This guide shows how to create one firewall rule. You will repeat this for the following ports, protocols, and subnet zones.
LAN
Subnet Zones
-
✅ Source: LAN Subnets | Destination: DMZ Subnets
-
❌ Source: DMZ Subnets | Destination: LAN Subnets
Allowed Ports
-
ICMP
-
TCP 80
-
TCP 443
-
TCP/UDP 53
-
TCP 25
-
TCP 21
-
TCP 20
Navigate to "Firewall" ➔ "Rules".
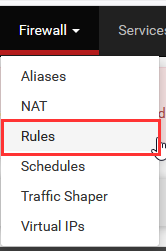
Select "LAN". You will see two default rules. These rules allow all traffic through LAN. Let's disable them so that we can be selective on the type of traffic.
Disable both rules, they will be grayed out when disabled.
Then, navigate to "Add".

Here we can specify the "Action", "Address Family", "Protocol", "and "Destination Port Range". In this case, we are allowing HTTP 80 traffic.
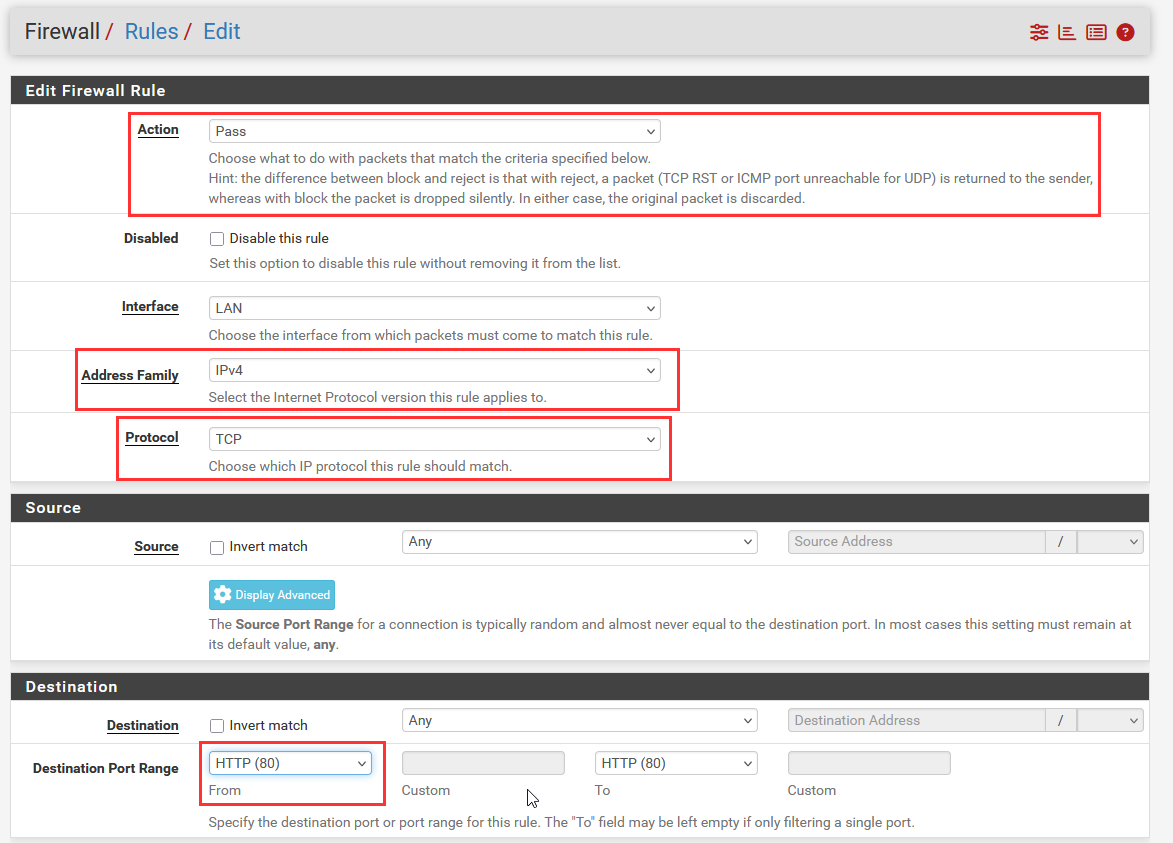
Select "Save" to add this rule.
Make sure to "Apply Changes" to deploy changes to the firewall.
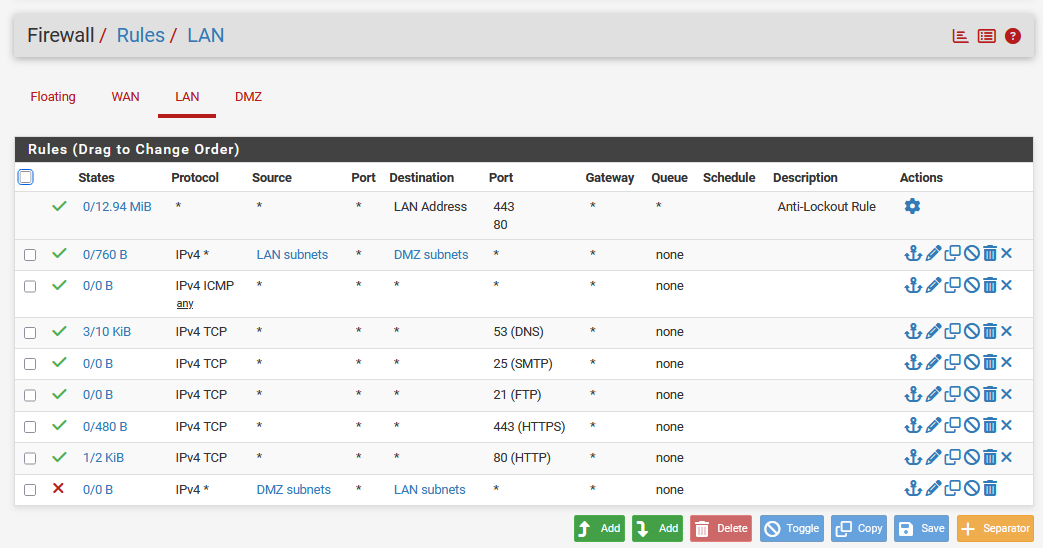
Repeat the same steps, but change the protocol and port from the above list.
LAN: Final Rules List
DMZ
For the DMZ, we want to give limited public access to the assets we intend on exposing to the world, in our case it is our web server.
Subnet Zones
- ❌ Source: DMZ Subnets | Destination: LAN Subnets
Allowed Ports
-
Source: 10.0.5.3 | Destination: 192.168.15.50 (Hardcoding our
[project-x-sec-box]IP address to allow agents to communicate) -
TCP/UDP 53
-
TCP 80
-
TCP 443
-
TCP 21
-
TCP 20
-
Protocol ICMP *
We will allow the following ports.
Repeat the same steps from the LAN section, this time under the "DMZ" interface.
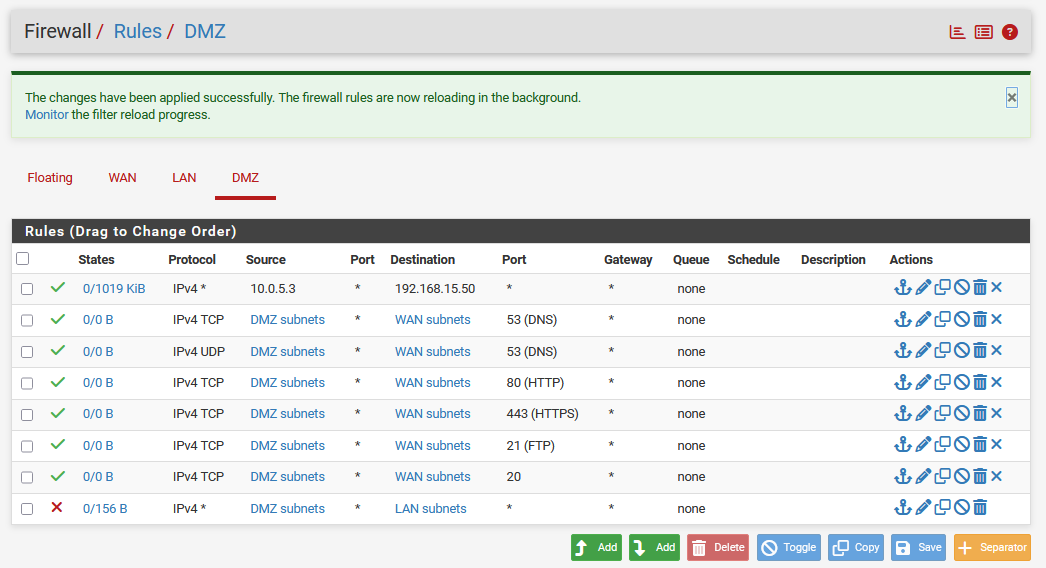
Here you can see we are doing something a bit different... We are allowing the entire subnet ranges over specific ports. This "grouping" allows us to provide more flexibility.
Make sure to "Apply Changes" to deploy changes to the firewall.
DMZ: Final Rules List
WAN
The WAN interface is intended to be public. If a network packet reaches the WAN interface, either from an asset inside our LAN, DMZ, or from a public web server, we want to accept it.
Allow Ports
- ANY
Success! At this point, we have done a lot with pfSense. We have introduced network segmentation, creating three separate zones, WAN, DMZ, and LAN.
We have applied routing capabilities inside pfSense. pfSense will now act as our router.
We have built firewall rules to accept and block traffic based on ports or subnets.
And in a few guides we will install Suricata. pfSense is awesome.