C2 Monitoring, IOCs, & Prevention
Prerequisites
- VirtualBox or VMware Workstation Pro Installed.
- Virtual Machine
[project-x-linux-client]is turned on and configured. - Virtual Machine
[project-x-corp-fw]is turned on and configured. - Virtual Machine
[project-x-attacker]is turned on.
Network Topology
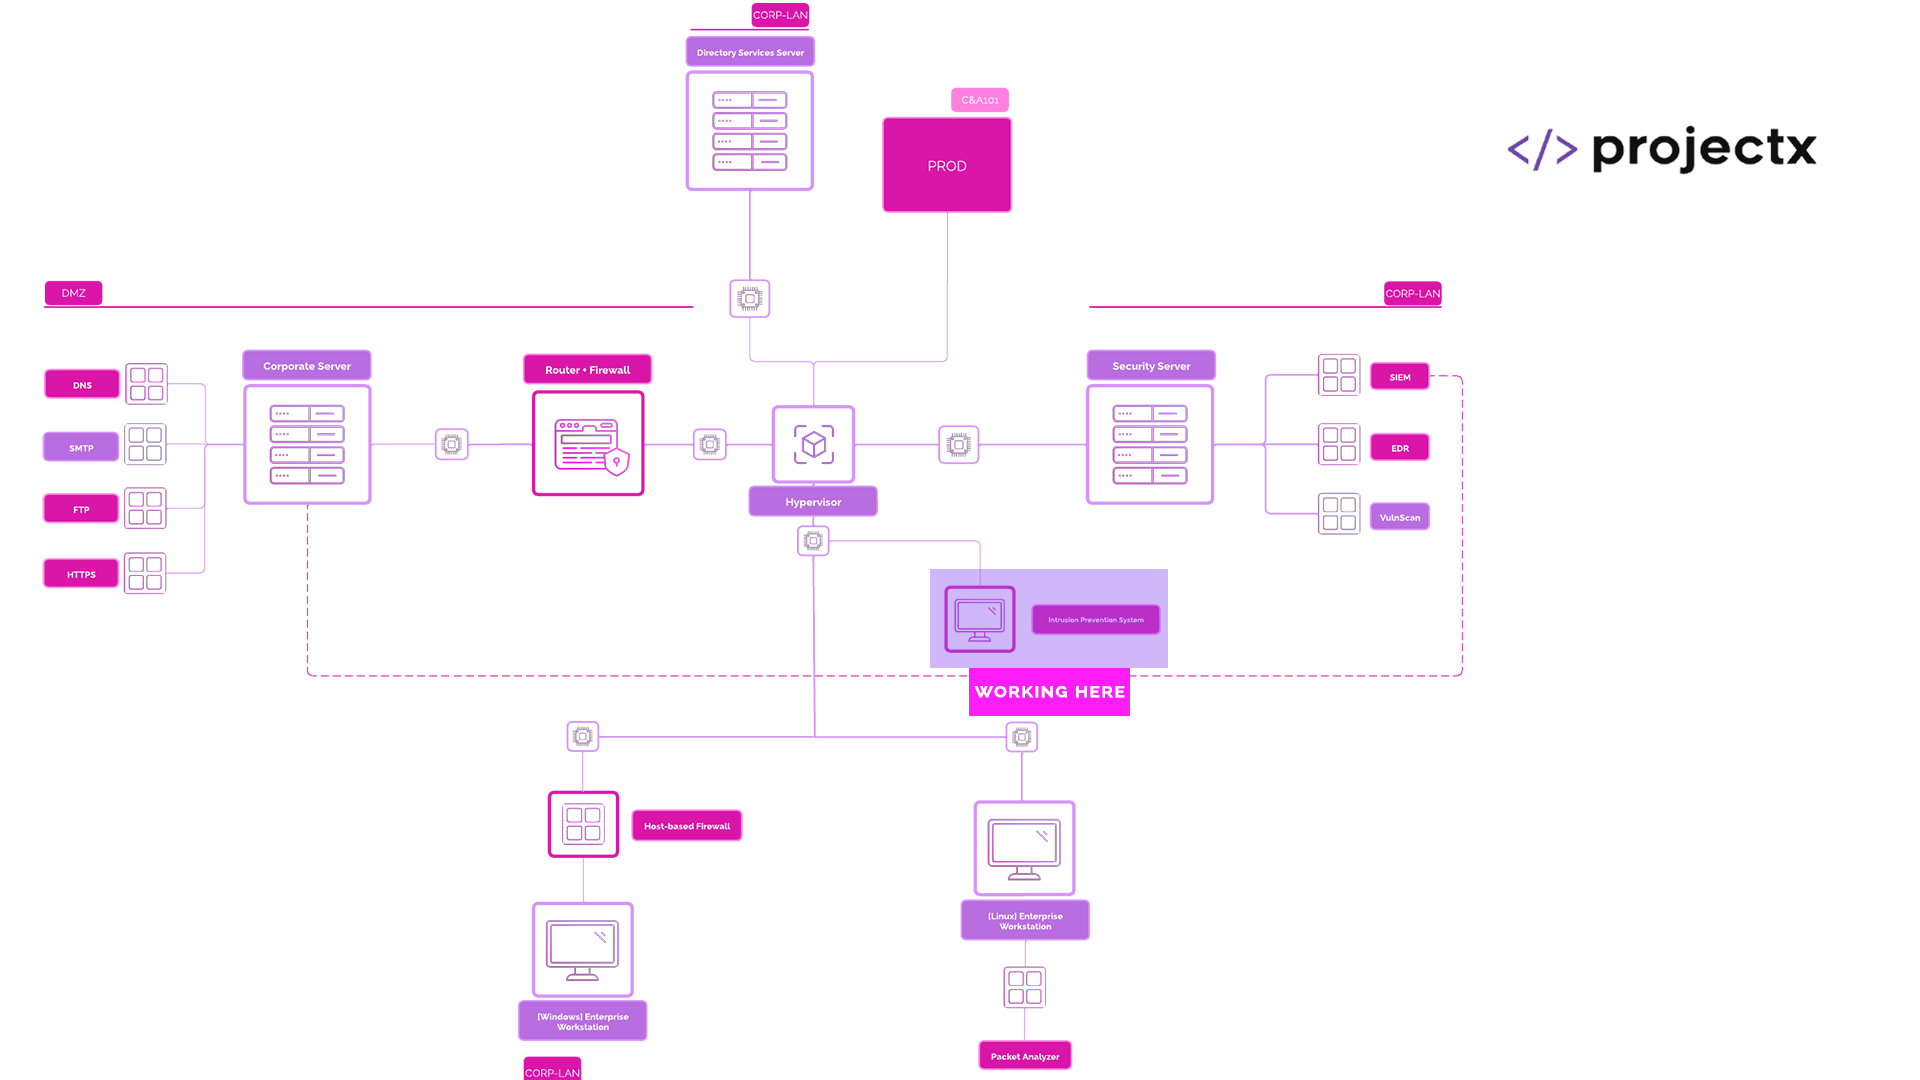
Overview
During our C2 attack, we "exfiltrated" (as in wrote a message to the terminal), from our "victim" machine to our attacker machine.
Command & Control servers are like weeds in a yard full of nice grass. They will always find ways to pop up and maintain persistence.

Bad analogy?
Detection of C2
There are many ways to detect and prevent C2 access. If and when a victim machine or user account gets compromised, C2 access will occur.
A few main methods include::
-
Monitoring DNS Queries: DNS query analysis can reveal patterns. If your user all the sudden starts browsing to deeboodah.com, then this may be a indicator that something has gone wrong.
-
Threat Intelligence Feeds or Lists: There are open-source and commercial threat intelligence lists that are updated everyday with known bad IP addresses and domain names. This can be a good filter for commodity malware. Advanced attackers will be able to circumvent this type.
-
Network Traffic Analysis: Similar to monitoring DNS queries, network traffic monitoring can be set into place to identify any unusual patterns or behavioral anomalies.
Our attack was highly theoretical (as is the rest of this NA101). We are learning about the basic primitives of network-based attacks.
Indicators of Compromise (IoC) & Indicators of Attack (IoA)
This is a good time to overview two important detection related concepts, Indicators of Compromise (IoC) and Indicators of Attack (IoA). You will sometimes see this used interchangeably, they represent different aspects of threat detection and response.
Indicators of Compromise: Are artifacts or evidence that a system has already been breached. These include things like unusual network traffic, file hash values, domain names, or IP addresses associated with known threats. In short, IoCs help identify what happened after the fact.
Indicators of Attack: Focus on detecting ongoing malicious behavior before a compromise is complete. They reflect the intent and tactics of an attacker in real time — such as privilege escalation attempts, lateral movement, or reconnaissance. IoAs help defenders understand what is happening, so they can respond proactively and prevent the attack from succeeding.
Using our C2 compromise as an example...
If our security analyst receives an alert of the victim workstation attempting to initiate an outbound connection over a non-standard port to an unknown external host, this pattern of behavior may be considered an Indicator of Attack.
Let's say the C2 payload is dropped on the victim machine and some time later, say a few days later, the security analyst is digging through a backlog of logs and they happen to find the C2 payload file signature that matches a known malicious hash value, this would an Indicator of Compromise.
Understanding the difference between IoCs and IoAs helps analysts build more effective detection strategies: IoCs are useful for forensics and retrospective analysis, while IoAs are vital for real-time detection and prevention
Blocking C2 access with pfSuricata
Let's deploy the Network Traffic Analysis technique with a custom rule using pfSuricata. To do this, we will create a new Suricata rule that will filter out any traffic if our workstation starts reaching out to some high, random network port.
If you can remember, our little C2 python script reaches out on port 4444. This can be an "indicator" that something is going on. Most Destination Internet traffic should be on port 443.
Navigate to the web interface inside a browser session, the IP address should be 192.168.15.2.
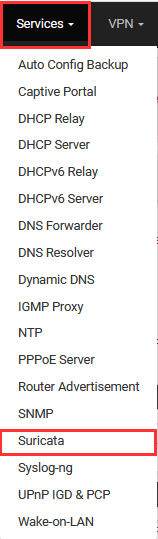
Go to "Services" ➔ "Suricata".
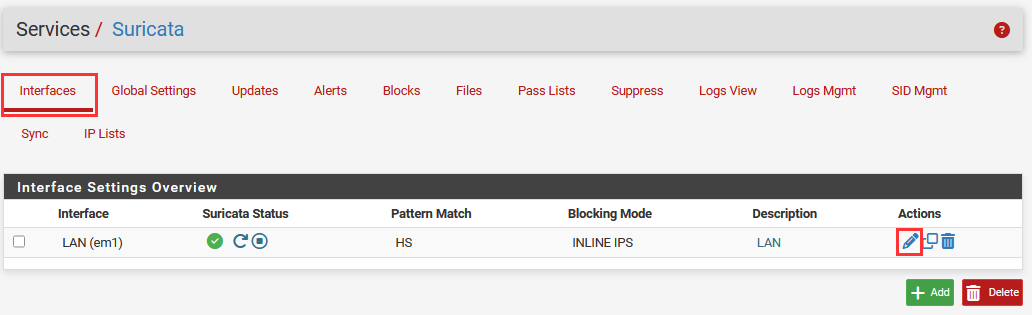
Go "Interfaces" ➔ Select Pencil Icon next to "LAN".
Navigate to "LAN Rules" ➔ Select "custom.rules" for the drop down.
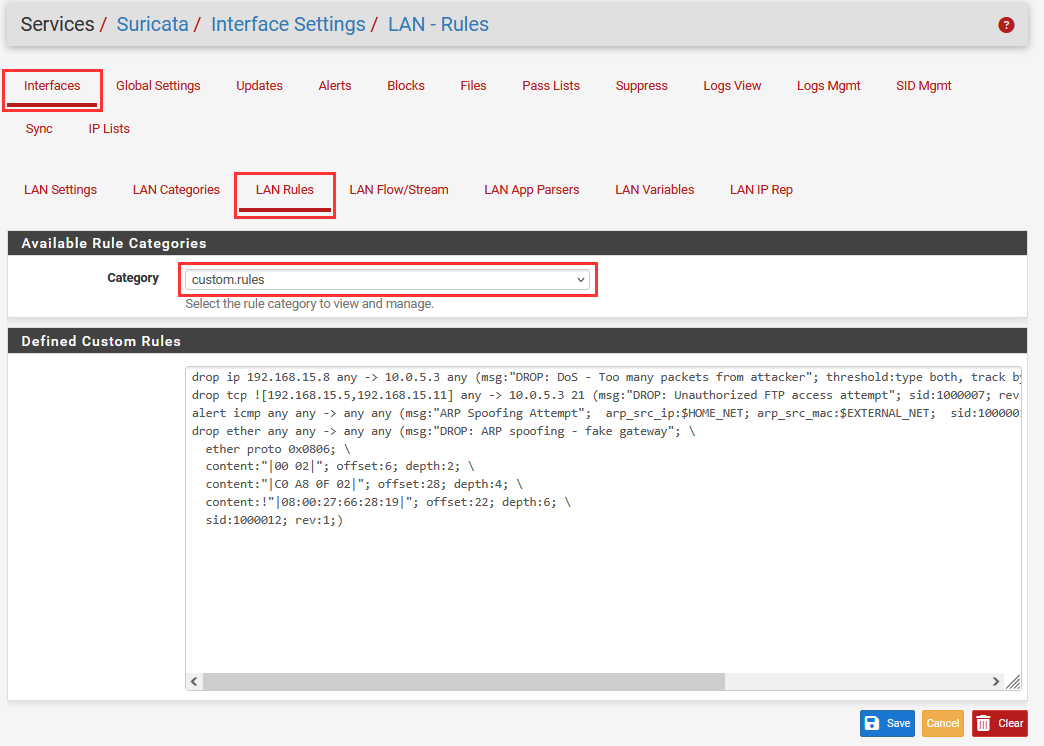
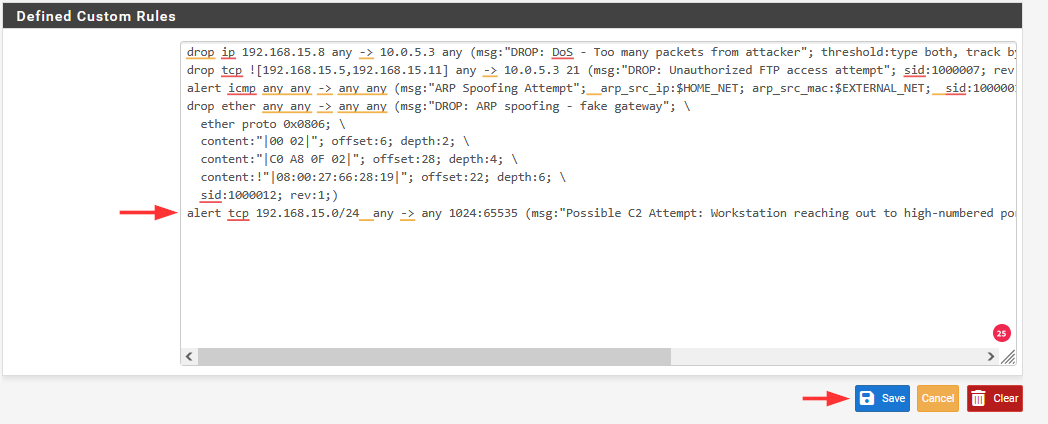
We can add something like this rule.
alert tcp 192.168.15.0/24 any -> any 1024:65535 (msg:"Possible C2 Attempt: Workstation reaching out to high-numbered port"; sid:1000011; rev:1; classtype:trojan-activity; priority:1;)
Here's a quick breakdown of what we are doing.
alert tcp: The action is to alert on TCP traffic.
192.168.15.0/24 any -> any 1024:65535: From any LAN IP, any source port, to any destination IP and a destination port between 1024 and 65535.
msg: The message you'll see in logs.
sid: Suricata rule ID (choose a unique number above 1,000,000 for custom rules).
rev: Revision of the rule.
classtype: Categorizes the alert (this uses trojan-activity).
priority: Severity of the alert (1 = highest).
Select "Save" to save the rule.
Now if we have the proper VMs turned on, we should see our traffic get blocked.
No more "hello victim" message fellow attacker.