DNS Security
Prerequisites
- VirtualBox or VMware Workstation Pro Installed.
- Virtual Machine
[project-x-corp-svr]is turned on and configured. - Virtual Machine
[project-x-sec-box]is turned on and configured. - Virtual Machine
[project-x-corp-fw]is turned on. - Optional - Virtual Machine
[project-x-attacker]is turned on. - Docker Container
[project-x-corp-svr-dns-svr]setup and configured.
Network Topology
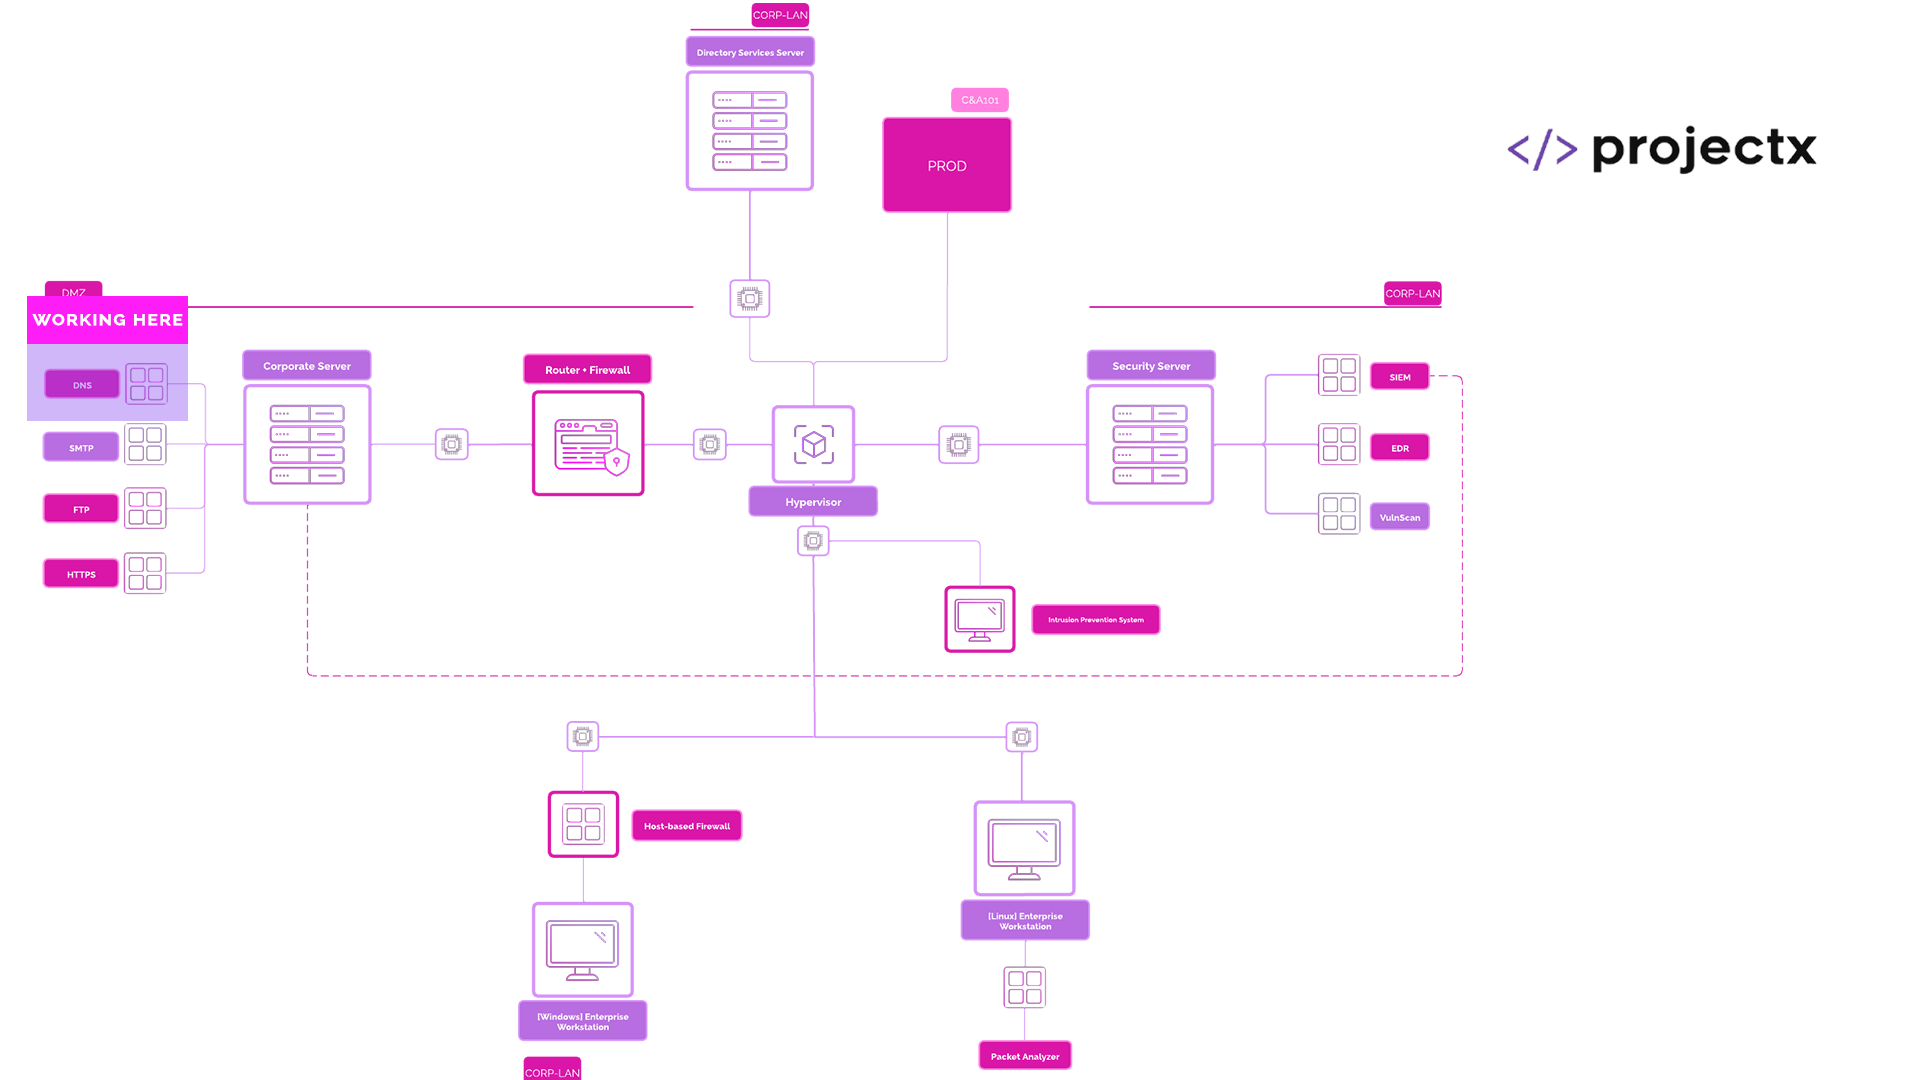
Overview
As we've explored, DNS is a foundational part of internet infrastructure—without it, accessing websites, memes, or online games wouldn’t be possible. Because of its central role in routing traffic, DNS also carries significant security implications.
Implementing proper security controls to monitor, detect, and prevent DNS infrastructure is imperative. This may be part of the reason why we have seen a centralization of DNS servers and it associated services by large technology companies. It must be done correctly.
When it comes to DNS security, there are a few main methods security practitioners can use to defend against man-in-the-middle attacks.
Implementing DNS Security Extensions (DNSSEC), using encrypted DNS protocols like DoH or DoT, and monitoring DNS traffic help protect users and organizations from these threats. Securing DNS is essential not just for preventing attacks but for maintaining the trust and integrity of internet communications.
DNSSEC
DNSSEC (Domain Name System Security Extensions) is a suite of protocols designed to add a layer of security to the DNS by enabling authentication of DNS data. It works by digitally signing DNS records with cryptographic signatures, allowing clients to verify that the information they receive hasn't been altered or forged.
This helps protect against attacks like DNS spoofing and cache poisoning, where attackers attempt to redirect users to malicious sites by manipulating DNS responses.
While DNSSEC doesn't encrypt DNS traffic, it ensures the integrity and authenticity of the data.
For encryption of data, DNS Over HTTPS or DNS Over TLS can be used.
DNS over HTTPS (DoH) & DNS over TLS (DoT)
Traditionally, DNS queries are sent in plaintext, making them vulnerable to eavesdropping or manipulation by attackers or ISPs. DoH encrypts DNS traffic using the HTTPS protocol, blending it with regular web traffic to make it harder to detect or block. DoT, on the other hand, encrypts DNS using TLS (Transport Layer Security) on a dedicated port (853), providing encryption but keeping DNS traffic distinguishable from other types.
DNS Zone Monitoring
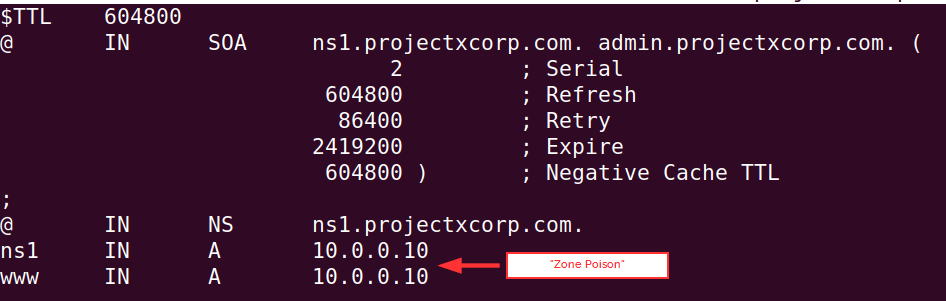
When we conducted our DNS zone poisoning attack, we were effectively setting up a man-in-the-middle attack. Although this type of attack is not common, it is possible.
To help safeguard against DNS zone poisoning attacks, zone monitoring can be set up.
DNS zone monitoring continuously observes and analyzes the changes within a DNS zone to detect unauthorized modifications, misconfigurations, or potential security threats.
A DNS zone contains the authoritative records for a domain, such as A, MX, and TXT records. We modified an A record to point to our attacker controlled device.
Monitoring these records helps ensure that domain configurations remain accurate and have not been tampered with.
Let's set up zone monitoring by setting up a detection of our zone files and forward these logs to Wazuh.
We can do this with File Integrity Monitoring. Remember when we set up File Integrity Monitoring (FIM) in E101?
Since our zone files should not be changing very often, setting up a monitor for modifications to the zone file will allow us to ensure only authorized users are making the change.
Set Up Zone Monitoring with Wazuh FIM
FIM is a powerful capability within Wazuh.
We can monitor specific file paths and locations, let's do this on [project-x-dns-svr].
Navigate to /var/ossec/etc/ossec.conf on [project-x-corp-svr].
Add the following under the<syscheck> block.
If you can recall from when we deployed our dns docker container, we had created a docker volume. This volume copies any files and its changes from /etc/bind/* over to /opt/bindconfig/*.
What we are doing here is setting up Wazuh to monitor a directory location (as denoted by the directories statement), for this specific location.
If the zone files were changed inside the container, as we simulated when we had our attacker hat on, we would get these logs sent over.
Restart the Wazuh agent.
sudo systemctl restart wazuh-agent.
Change Settings In [project-x-dns-svr] Container
Since we have changed our network topology with pfSense and Suricata, we will need to change some things around with zone files and more.
We will need to modify a few existing configuration files.
Start the dns container.
docker start dns-svr.
Log in under the bash shell.
docker exec -it dns-svr /bin/bash.
Navigate to the /zones directory.
cd /etc/bind/zones.
Edit the db file.
nano db.projectxcorp.com
Change the two IP addresses from our original 10.0.0.8 to 10.0.5.10 since we have changed the network topology with pfSense acting as our router.
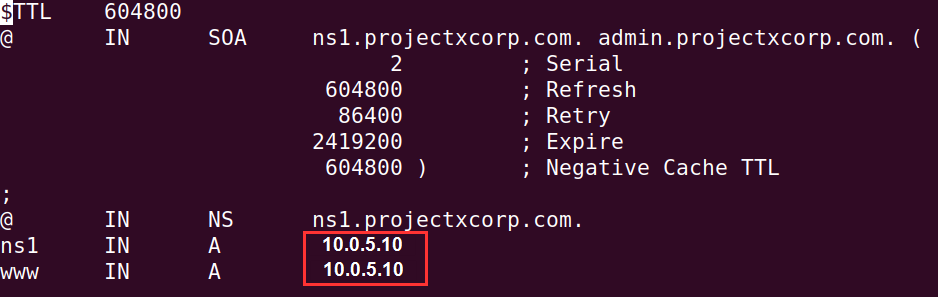
Exit Nano with CTRL + X, then Y key, Enter Key.
Open a new terminal session or terminal tab, we should now be interacting with the [project-x-corp-svr] host.
Change to a root shell.
sudo su.
Go to the Wazuh agent's OSSEC configuration file.
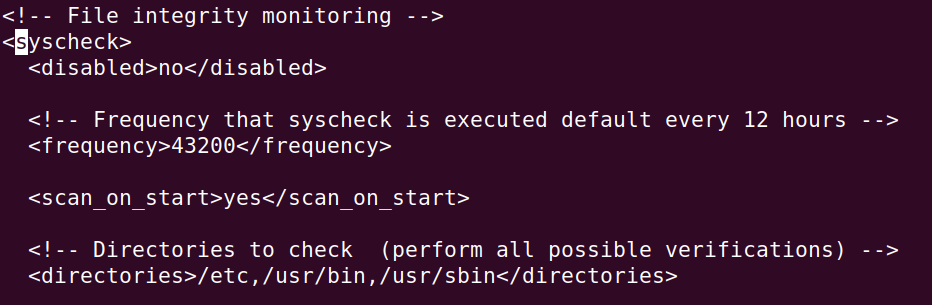
nano /var/ossec/etc/ossec.conf
Use CTRL + W, search for "
As you can see in the comments, this is where we can add configuration settings for File Integrity Monitoring.
Let's add the following block. Make sure to be aware of the identation.
<directories check_all="yes" realtime="yes">/opt/bind-config</directories>
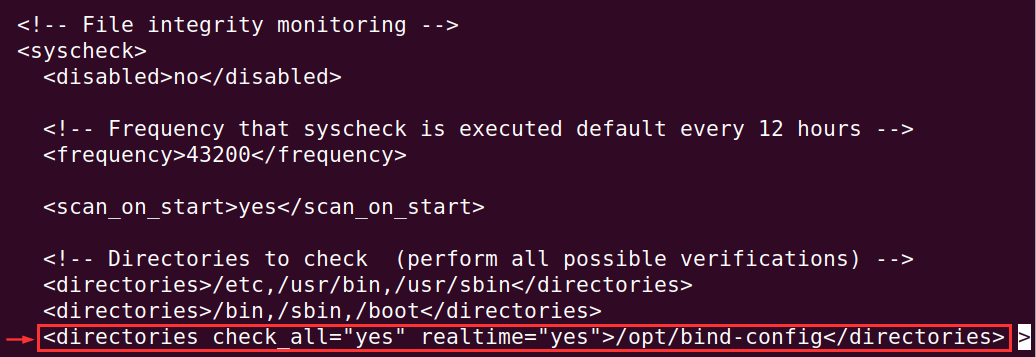
Exit Nano with CTRL + X, then Y key, Enter Key.
Restart [project-x-corp-svr]'s Wazuh agent.
systemctl restart wazuh-agent.
Wait for the agent to restart.
Head back to the original terminal session or tab with the dns container.
Navigate to the /etc/bind/zones file again.
nano db.projectxcorp.com
Change to some arbitrary IP address (or the IP address of your attacker machine).
Exit Nano with CTRL + X, then Y key, Enter Key.
Go to [project-x-sec-box].
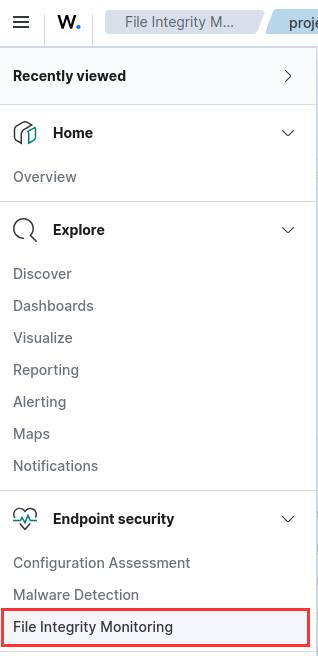
Navigate to "Endpoint security" "File Integrity Monitoring".
Make sure project-x-corp-svr agent is selected in the console. If not, select the "Endpoints" right next to the agent and select the agent profile.
Select "File Integrity Monitoring".
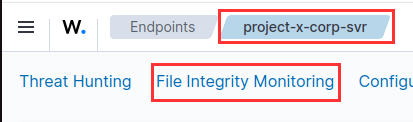
Select "Events".
Notice how there are events being reported for changes in the /opt/bindconfig/zones/db.projectxcorp.com.
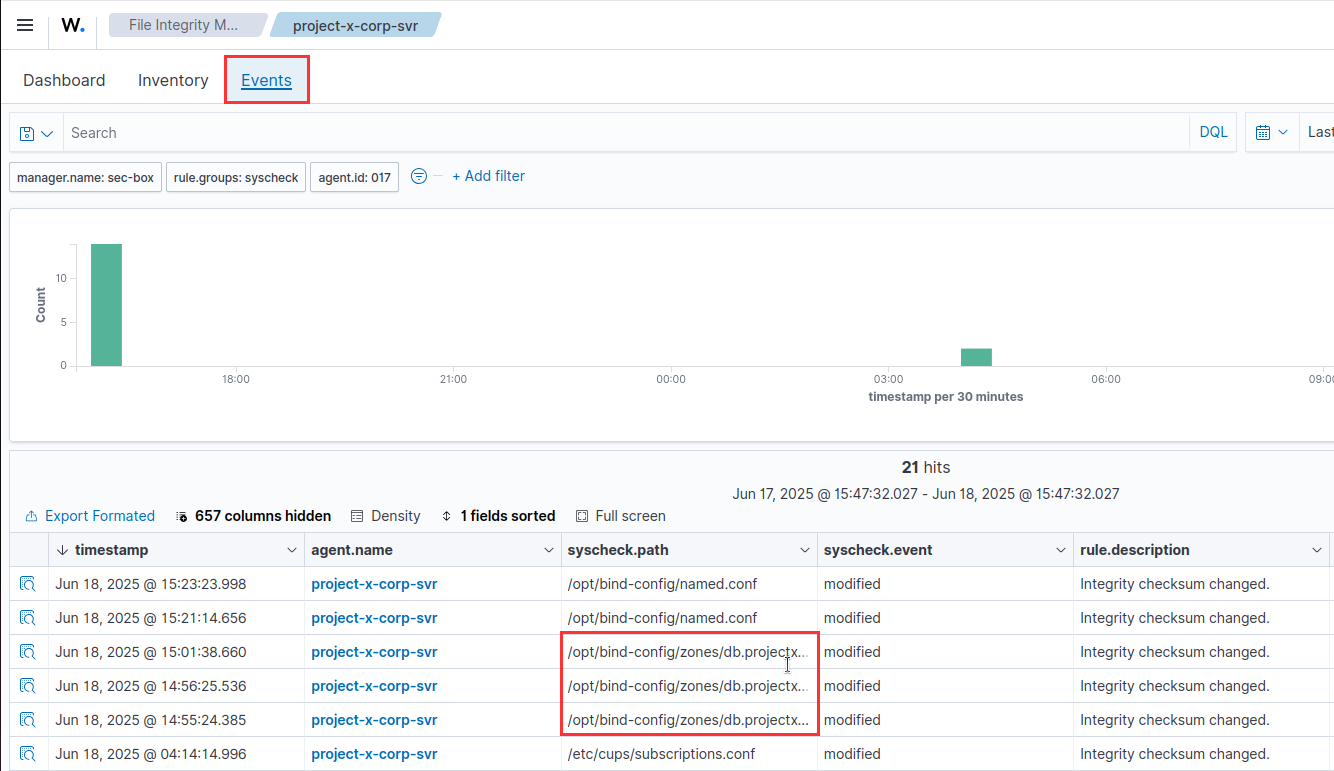
This means that there were changes to the file. From here we can set up an detection and alert to deliver to our SOC analysts for triage in the real world.
Success!
Logs and alerts will populate under the FIM module in Wazuh for these changes. This effectively adds an element of monitoring and prevention (if we set up a block action) to our DNS server.
🚨 Setup Monitor & Alert
Navigate to "Explore" ➔ "Alerting".
Select "Create Monitor".
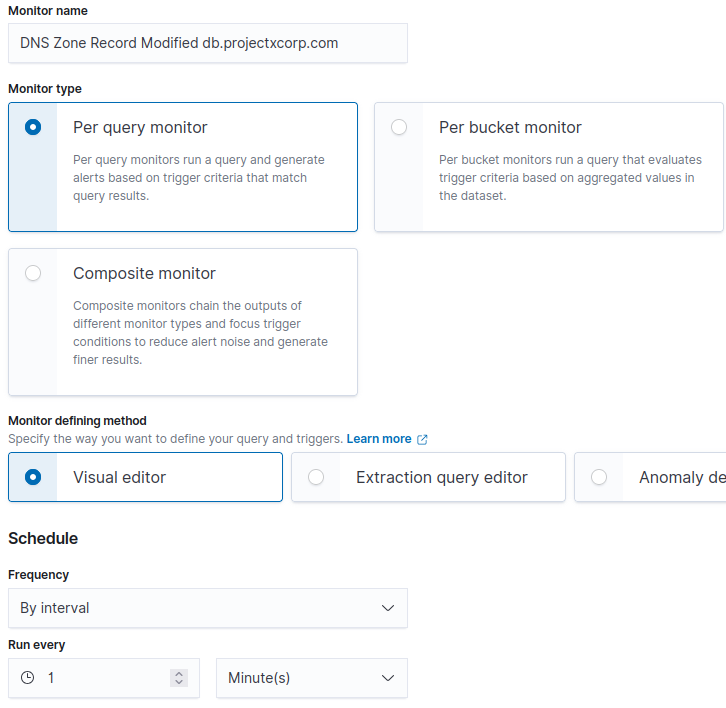
Monitor details
Under Monitor Name: "DNS Zone Record Modified db.projectxcorp.com"
Monitor type: Per query monitor.
Frequency: By interval.
- Run every: 1 Minute(s)
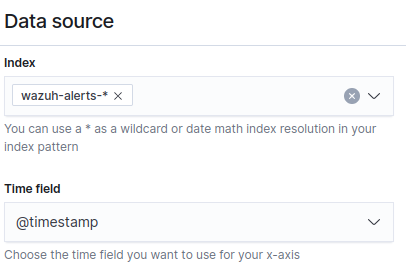
Data source
Data Source: wazuh-alerts-*.
*: Allows us to use all dates in the index pattern.
Time field: @timestamp
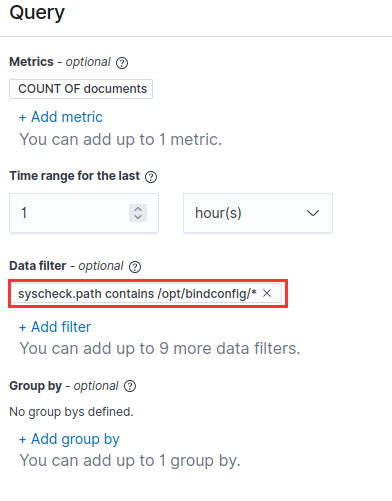
Query
Data filter: syscheck.path contains /opt/bindconfig/*
Triggers
Trigger Name: DNS Zone Record Modified db.projectxcorp.com
Severity level: 1 (Highest).
Trigger condition: IS ABOVE 0.

You should see the newly setup monitor under the "Monitors" tab.
