MiTM - ARP Cache Poisoning
Prerequisites
- VirtualBox or VMware Workstation Pro Installed.
- Virtual Machine
[project-x-win-client]is turned on and configured. - Virtual Machine
[project-x-attacker]is turned on.
Network Topology

Likeliness Meter
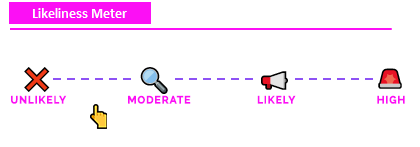
Moderate to Unlikely: ARP is a Layer 2 protocol, this means the attacker must already be inside a local network (physically) or logically (Wi-Fi, infected endpoint). Most modern breaches are carried out remotely without the attacker having to be locally present. End-to-end traffic is also mostly used in today's modern environment. And the detection signals, flooding the ARP tables of the routers and endpoints provides a verbose detection.
Address Resolution Protocol (ARP)
Address Resolution Protocol (ARP) is used to assign MAC addresses to IPv4 addresses. This allows the network gateway to know where to route network packets when reaching the local network.
The local network uses MAC addresses to facilitate communications when interfacing locally on the LAN.
The MAC to IP address assignments are stored locally in the ARP table of each device. The allows the device to quickly reference the proper address without having to issue another ARP request.
ARP Cache Poisoning
ARP cache poisoning works by flooding the victims ARP table using fake ARP replies. When the victim establishes a connection with another local device or server, the MAC address will be set to the attacker's device.
Ettercap
To assist in ARP cache poisoning, open-source tools are available to attackers like we have seen many times before. ARP cache poisoning is an older technique, so there's been some great tools and resources provided for some time.
Ettercap is an open-source tool that comes packaged with Kali Linux natively. Ettercap is used as a man-in-the-middle (MiTM) attack tool. It support active and passive eavesdropping on local network connections.
Ettercap provides a simple user interface for us to capture and propagate ARP poisoning attacks.
There is also another open-source tool called Bettercap, which is a command line tool that can be used to accomplish the same attacks.
Security Implications
Why would an attacker ARP cache poison?
An attacker would deploy this method to primarily impersonate or manipulate a victim's network connection. Since the victim would likely be an authorized device allowed on the local network, the attacker could leverage this trust to their advantage.
A key detection opportunity stems from changes to the ARP table, which can be monitored to identify and prevent suspicious activity. ARP requests and responses are not one-to-one, they broadcast out to the entire network. This means all devices will receive a ARP request from the attackers machine, even if it is not the targeted victim.
From a network monitoring perspective, if you suddenly have a device broadcasting its MAC address out, it's a pretty good indication that something is going on.
ARP Cache Poison [project-x-windows-client]
Victim Machine:
-
Hostname:
[project-x-windows-client] -
IP Address:
10.0.0.100. -
Account:
[email protected].
Open a new command line session on [project-x-windows-client].
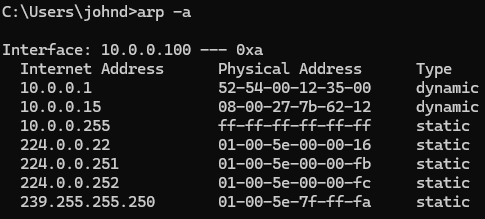
Let's first view the ARP table to see what devices are currently cached. We can do this by typing arp -a.
Looks like we see our standard devices, such as the workstations, corporate server, etc.
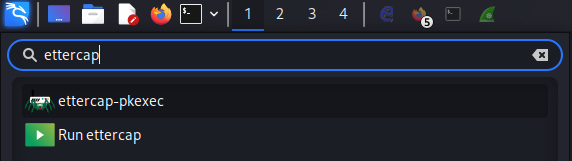
Navigate to [project-x-attacker].
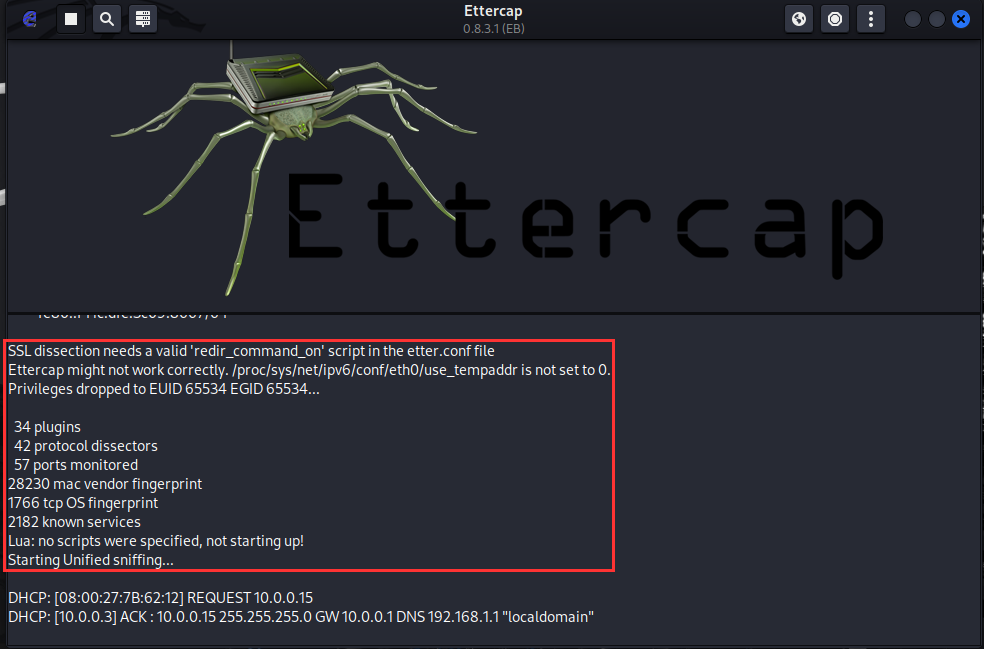
Look up "Ettercap" in the search bar. Type in the attacker's password.
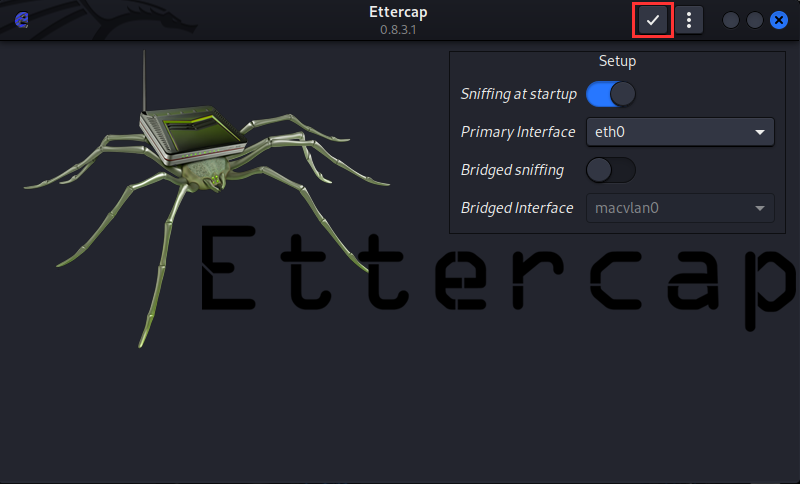
Here we see the Ettercap UI. Make sure the "Primary Interface" is set to eth0.
Select the ✅ to start capture.
You will see log output on the bottom panel.
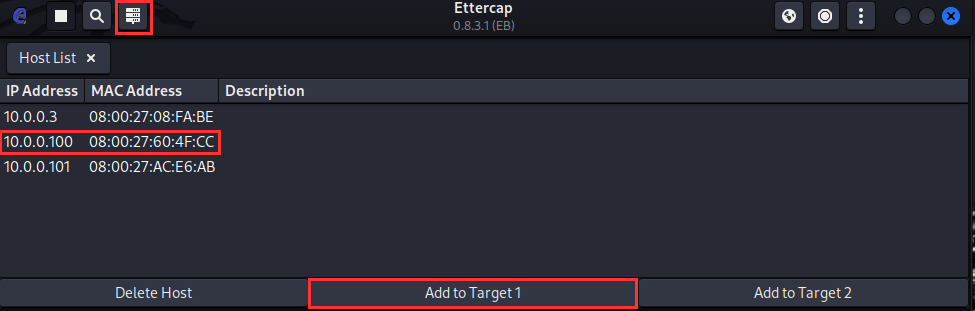
Navigate up to the top left ➔ "Hosts List".
You will see IP addresses of reachable hosts on the local network.
Navigate to the Kali search bar ➔ "Wireshark" ➔ Start Capture.
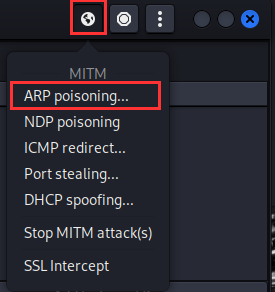
Go back to Ettercap to the top right panel, select "MiTM" ➔ "ARP Poisoning..."
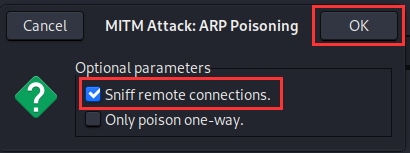
A dialogue box will appear, make sure "Sniff remote connections." is selected ➔ "OK".
You will see new messages appended to the log panel.

Navigate back to Wireshark ➔ Stop Capture.
Look around for ARP requests and responses.
Notice how 10.0.0.100's MAC address mapping is the attackers MAC address.

Navigating back to [project-x-win-client] ➔ Issue arp -a.
You will now notice the attackers MAC address is mapped to this device.
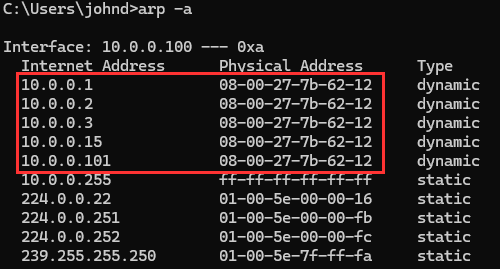
Success - we have ARP cache poisoned this client device.
However, you will notice from the output the attacker's MAC address has also cached all other entries in the ARP table. And therein lies the detection opportunity.