VMWare Workstation Pro
A Primer on Provisioning Virtual Machines with VMware Workstation Pro
Network Topology

What is VMWare Workstation Pro?
VMware Workstation Player is a free desktop application that allows you to run virtual machines (VMs) on your Windows or Linux system. Like VirtualBox, it’s a Type 2 hypervisor, which means it runs on top of your existing operating system rather than directly on your computer’s hardware.
In a cybersecurity context, VMware Workstation Player is perfect for creating safe, isolated environments to practice penetration testing, malware analysis, or simulate mini-networks for red/blue team labs.
You can load up intentionally vulnerable machines, set up attack tools, and connect VMs together—all without affecting your actual system.
💡 VMware Workstation Player vs Pro: VMware has two types of hypervisors. Player was historically free, while Pro was paid. This has changed. Pro comes with some UI, settings, and support enhancements.
VMWare Workstation Network Settings
VMware Workstation Player offers several networking options to control how your virtual machines connect to your host and the outside world. These settings let you isolate your VMs, let them talk to each other, or even give them full access to your real network.
Here are the main networking types you can use:
-
NAT (Network Address Translation): NAT is the default network type. Your VM shares the host’s IP to access the internet, but it’s not visible on your local network. It’s simple, secure, and works great when you just need web access.
-
Bridged Network: This setting connects your VM directly to your physical network. The VM acts like a separate device with its own IP address on your home or office network. Use this if you want full network access—for example, hosting services or connecting with other real devices.
-
Host-Only Network: Host-Only networking creates a private network between your host and your VMs. There’s no internet access, but the VM can still talk to your host machine. This is great for safe, offline testing or simulating attacks from the host.
-
Custom/VMnet Networks: VMware also lets you define custom virtual networks (like
VMnet1,VMnet2, etc.) using the Virtual Network Editor. This is useful if you want to create more complex or segmented lab environments. These can be configured for internal-only traffic, NAT, or fully custom routes.
For this project, we’ll be editing VMware's "Custom VMnet (NAT-enabled)" setup, which allows your VMs to communicate with the internet while remaining logically separated from your physical network.
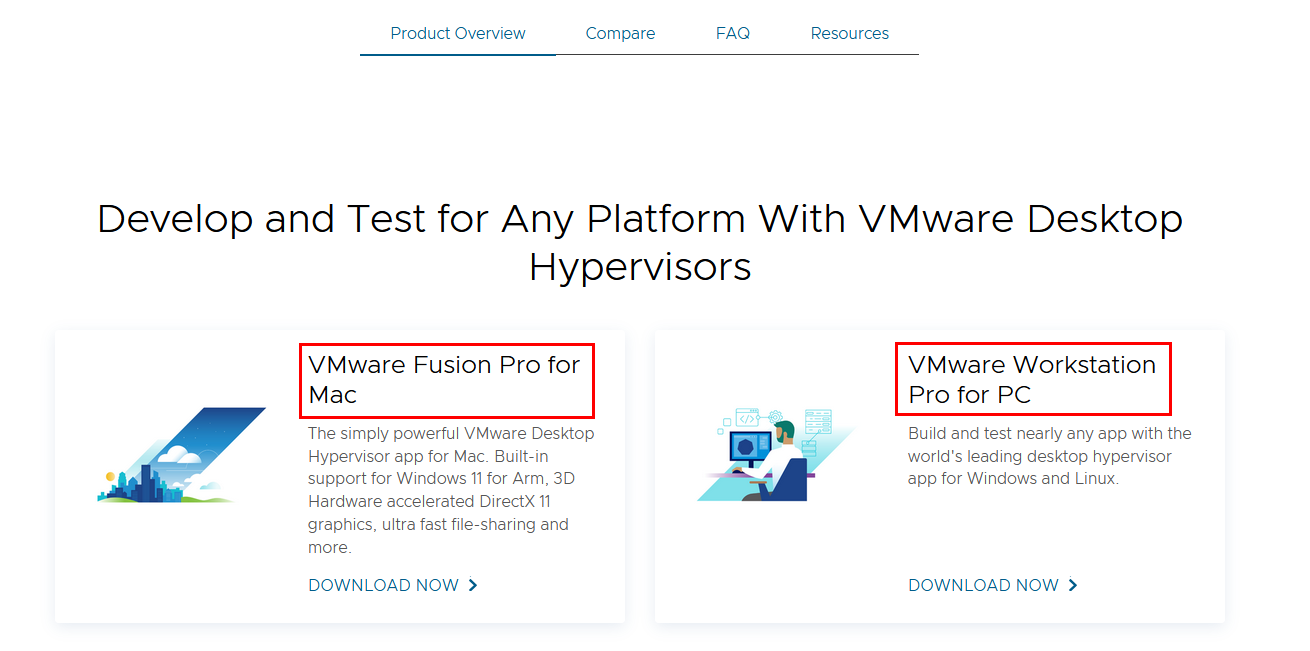
Let’s download VMware Workstation Pro and get it set up.
Download VMWare Workstation Pro
Navigate to VMware Workstation and Fusion URL: https://www.vmware.com/products/desktop-hypervisor/workstation-and-fusion.
You will be redirected to a Broadcom page ➔ "Register".
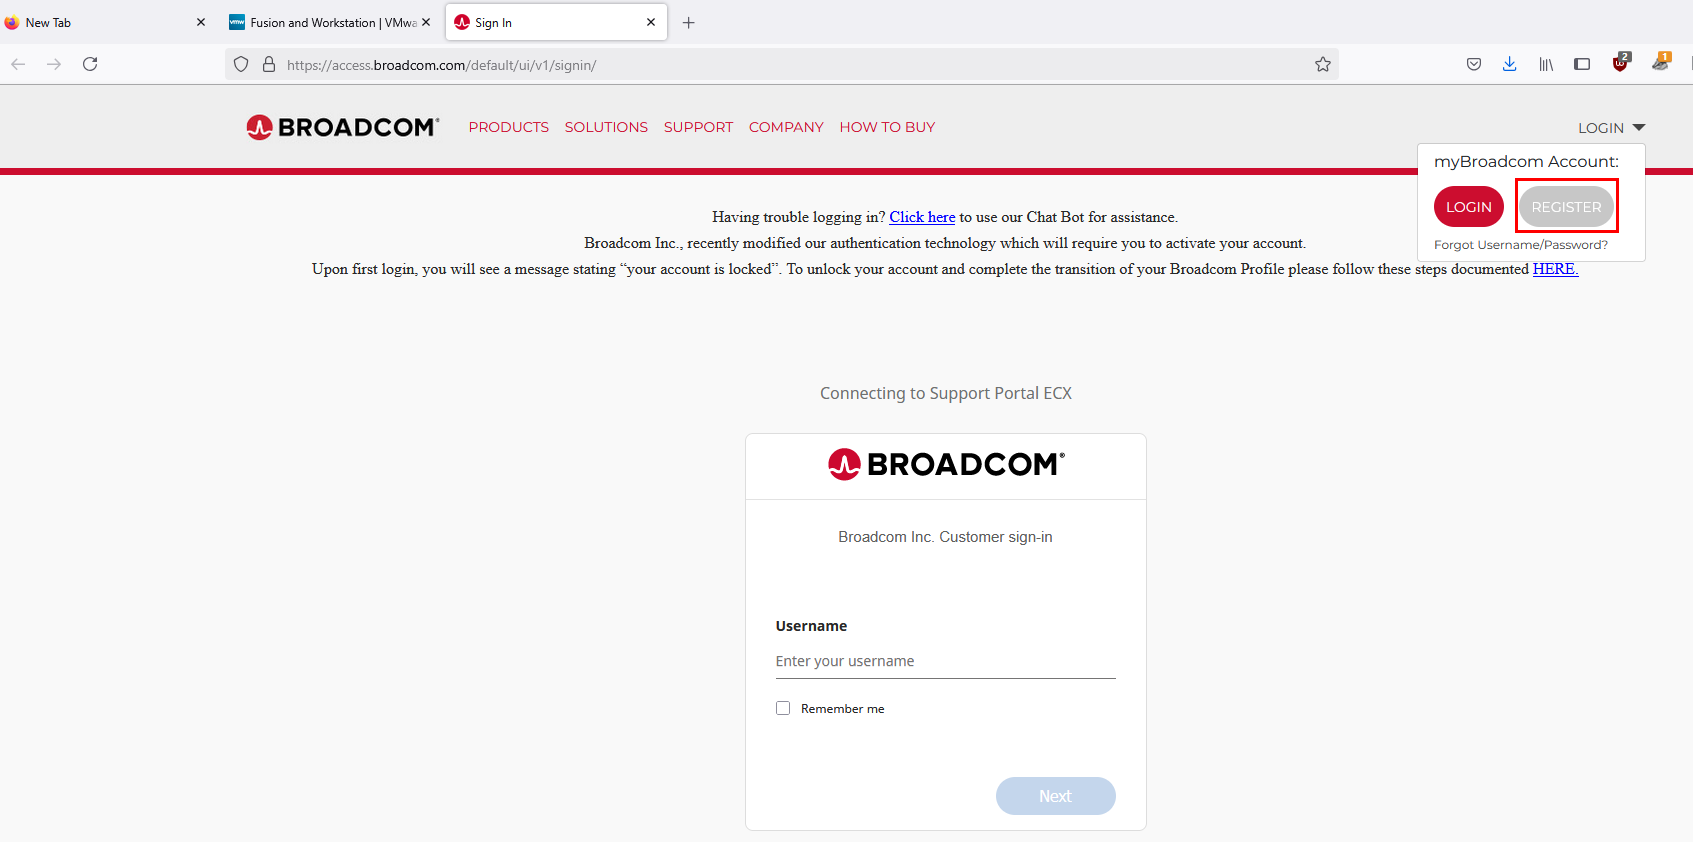
You will have to register for an account. You can use a temporary email address and supply dummy information if you would like.
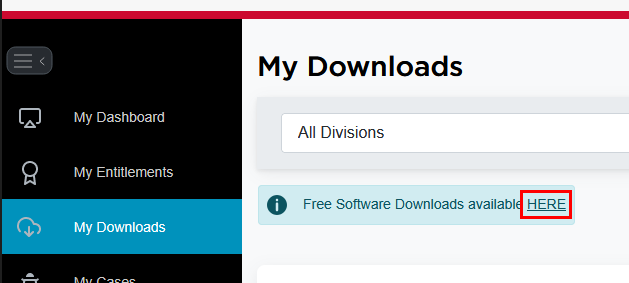
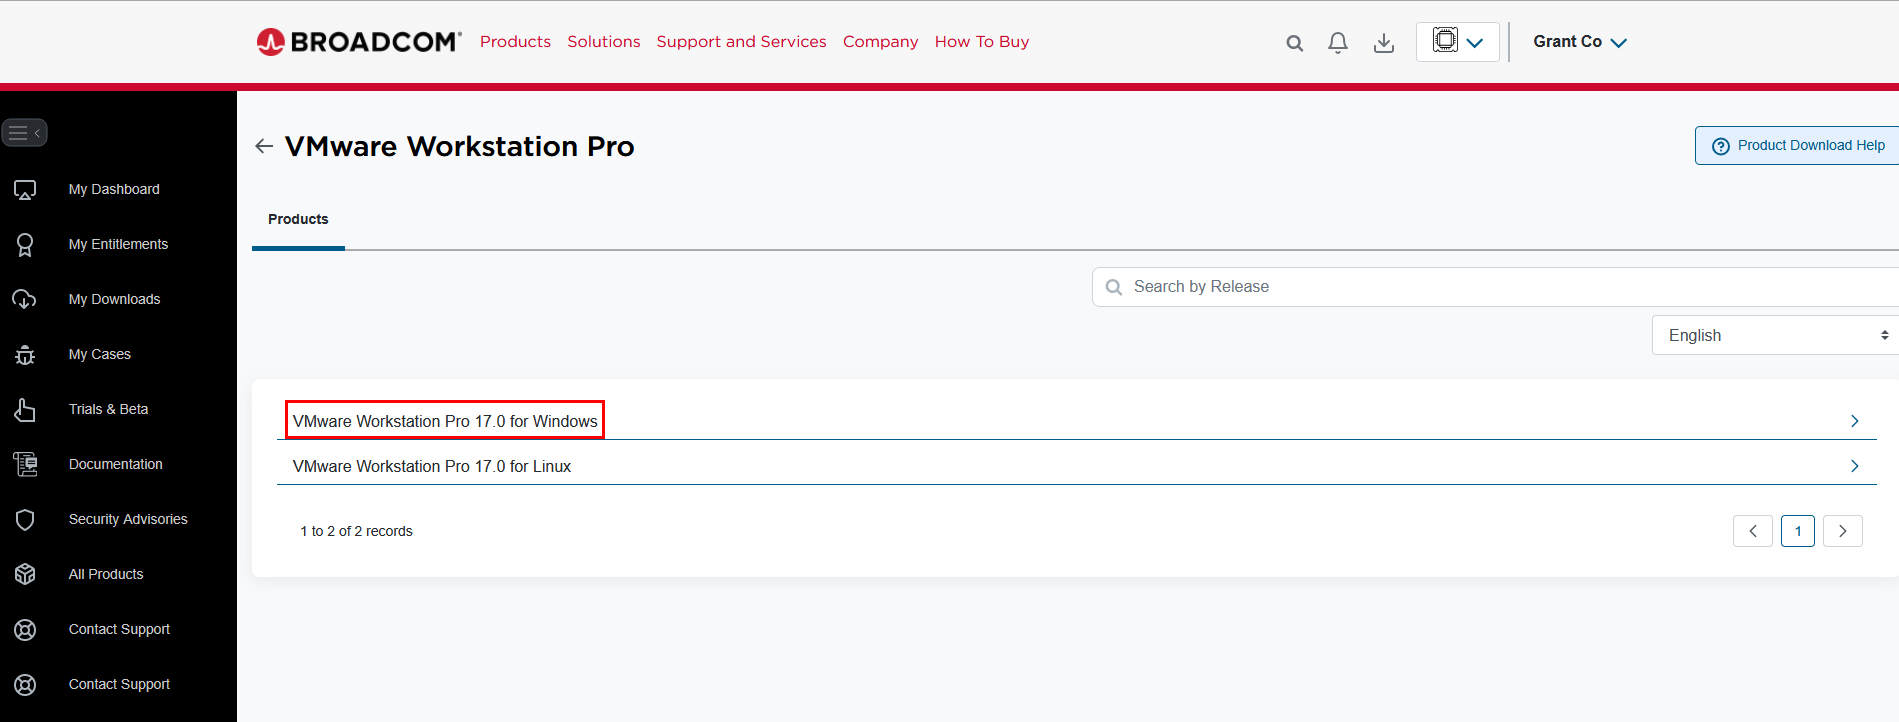
Navigate to the "Downloads" Section ➔ "HERE".
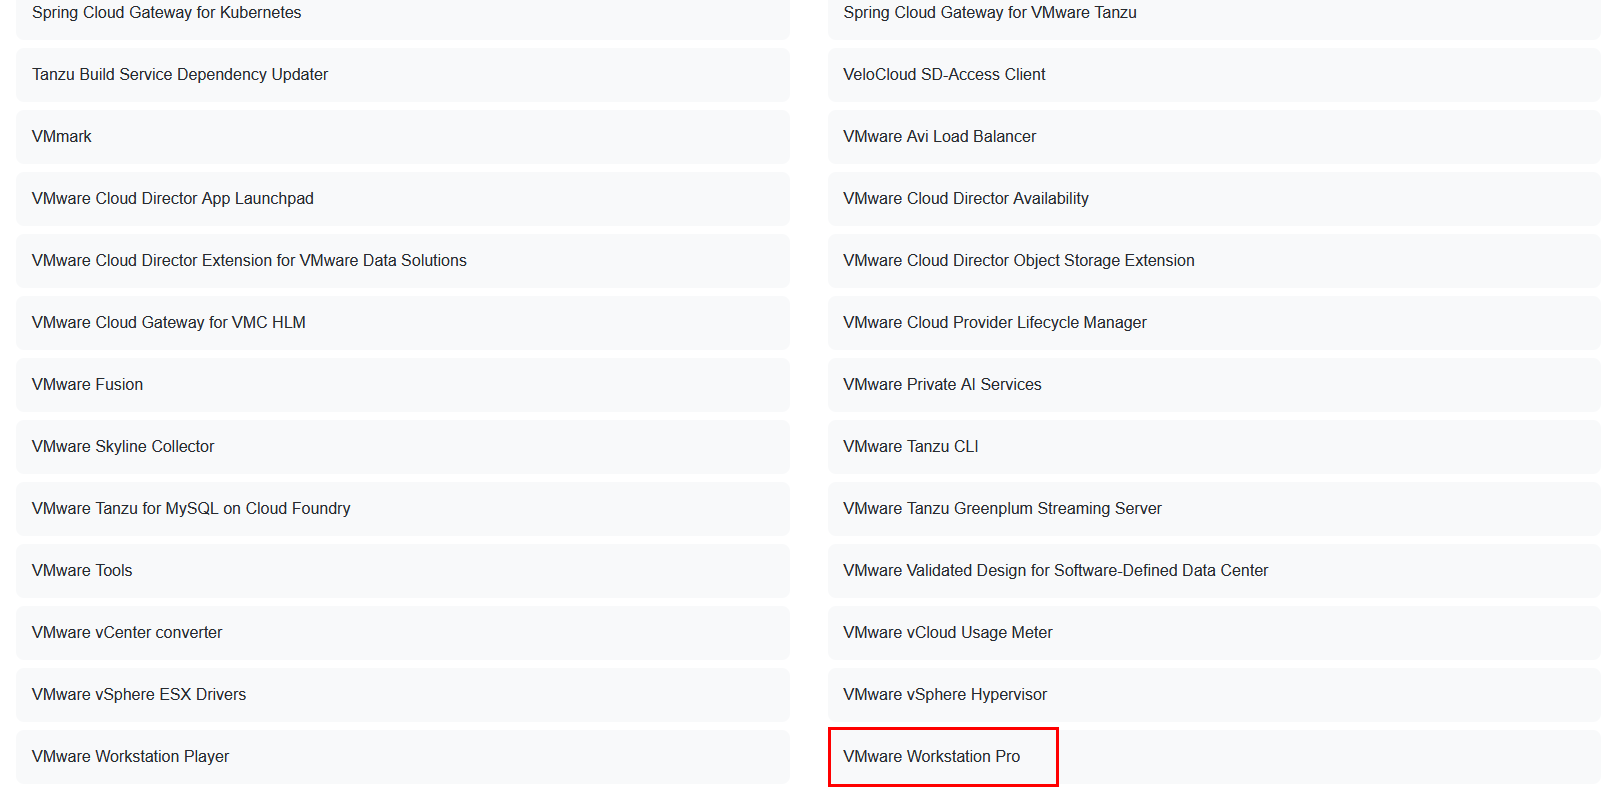
Scroll down at the very bottom until you see "VMware Workstation Pro", Select It.
Select "Windows" or "Linux", depending on what you want. You will see a little box that drops below, choose the most recent version number.
Agree to the Terms and Conditions Box. You may have to enter additional street address information, you can supply dummy information if needed.
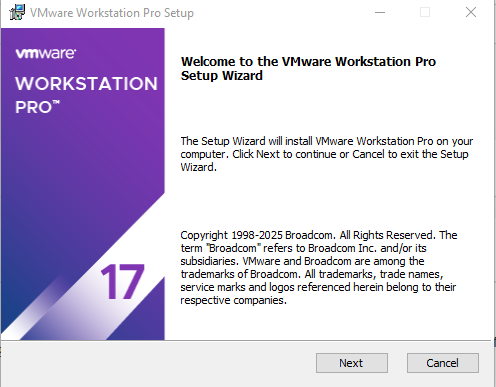
On the Installation Wizard ➔ "Next".
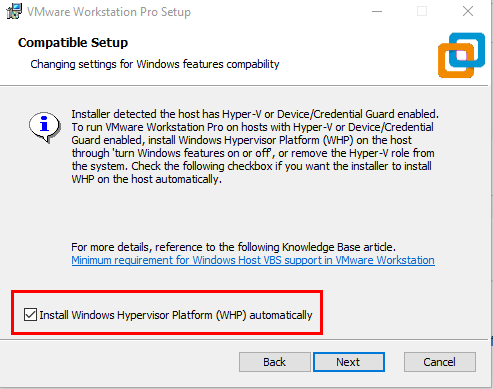
Select the WHP checkbox ➔ "Next".
Run through all other pages until you get to the "Install". Leave everything default.
Choose "Finish".

You should have a VMware Workstation icon on your Desktop.
Host Key
In VMware Workstation Pro, the Host Key is a special key or combination of keys that allows you to interact with the VirtualBox application itself rather than the guest operating system running inside the virtual machine (VM). This allows you to exit the Virtual Machine to get back into your host system.
Default Host Key:
- In most systems, the default Host Key is the Right
CTRLkey. However, this can vary based on your system configuration or preferences.
Purpose of the Host Key:
-
The Host Key is used to perform certain VMware-specific actions without interfering with the guest operating system. These include:
-
Releasing Keyboard and Mouse Input: If the VM has captured your mouse or keyboard input, pressing the Host Key releases the input back to the host operating system.
- Accessing VirtualBox Features: You can use Host Key combinations to perform actions like switching to full-screen mode, capturing screenshots, or opening the VMware menu.
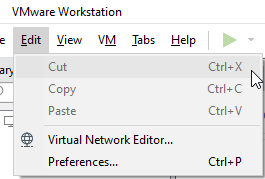
To view your current Host Key setting, go to “Edit” ➔ “Preferences”.

Edit VMNet8 (NAT-enabled) Network
We will be editing the default VMNet8 NAT network. This will allow us to connect with each of the Virtual Machines while also connecting to the Internet when needed.
VMNet8 comes with the standard NAT settings, however we need to change the IP addresses to conform to our IP address space.
👉 Refer to the “Project Overview” guide for more information on IP address information.
Navigate to "Edit" ➔ "Virtual Network Editor".
"Change Settings".
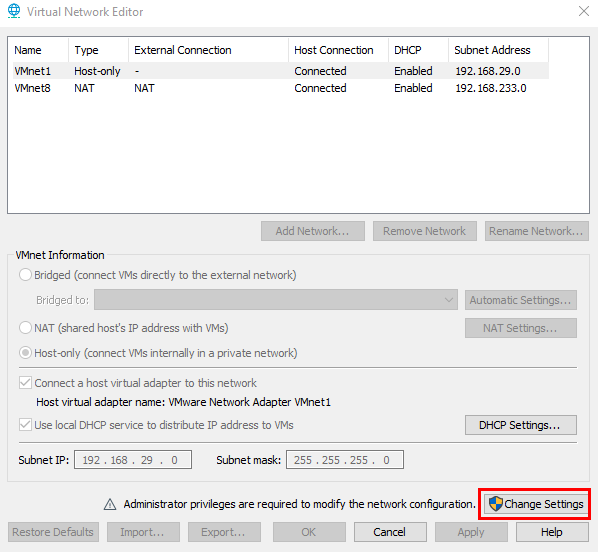
Select VMNet8. And change the Subnet IP to 10.0.0.0.
Navigate to the "DHCP Settings..."

Add the following address spaces.
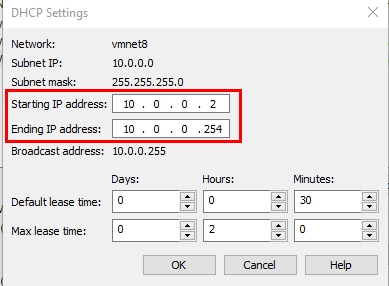
Select "Apply" back on the Virtual Network Editor ➔ "OK".
Download ISOs (Identical Storage Image)
From ISO Provider
Warning
Downloading from the ISO provider will not lock in the versions used throughout this project. This will likely not result in any major disruption to the project, but UI changes may occur.
The ISOs can be downloaded from the ISO providers.
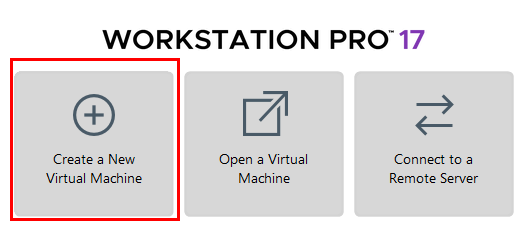
Create a Virtual Machine
Select "Create a New Virtual Machine".
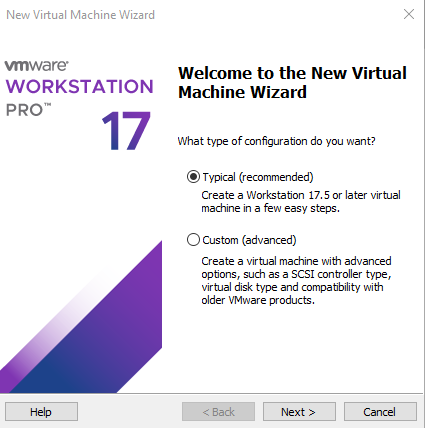
Leave the default.
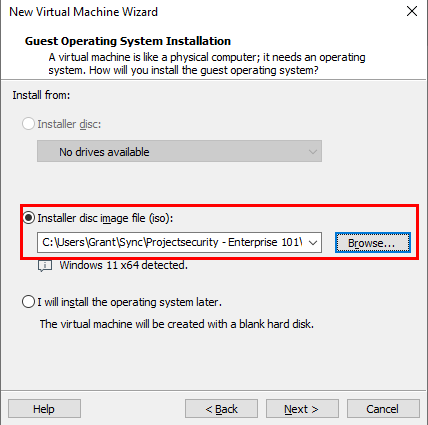
Select the .iso file under Browse.
👉 Refer to the "Project Overview" guide for Virtual Machine file downloads.
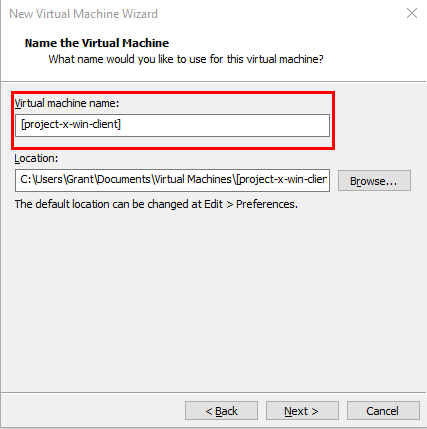
Name the Virtual Machine.
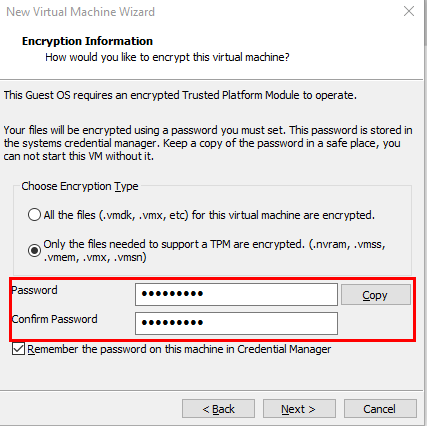
Choose a password for the TPM. Make sure to save this password if needed.
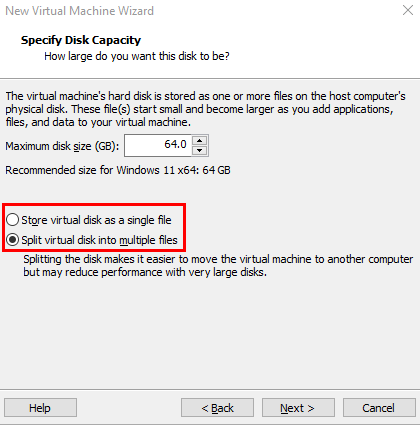
Keep the default "Split virtual disk into multiple files".
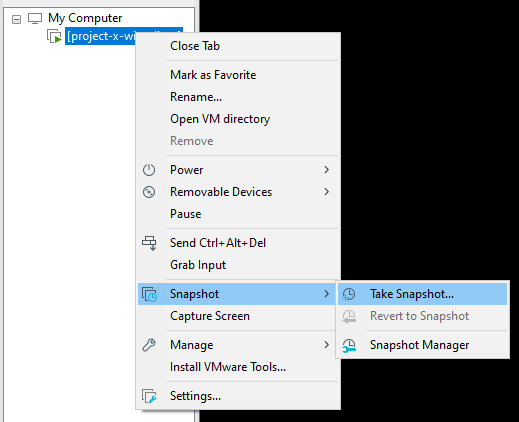
Take A Snapshot
Right-click on the Virtual Machine ➔ "Snapshot" ➔ "Take Snapshot..."
Full Screen in VMWare Workstation
VMware Workstation Pro has native support for Full Screen.
Press CTRL + ALT + Enter.