Provision & Setup Ubuntu Desktop 22.04
Prerequisites
- Virtualbox or VMware Workstation Pro installed.
- Virtual Machine with Ubuntu 22.04 ISO has been downloaded and provisioned (the ISO should be attached to the new VM).
- Windows Server 2025 with AD Directory Services (ADDS) configured and turned on.
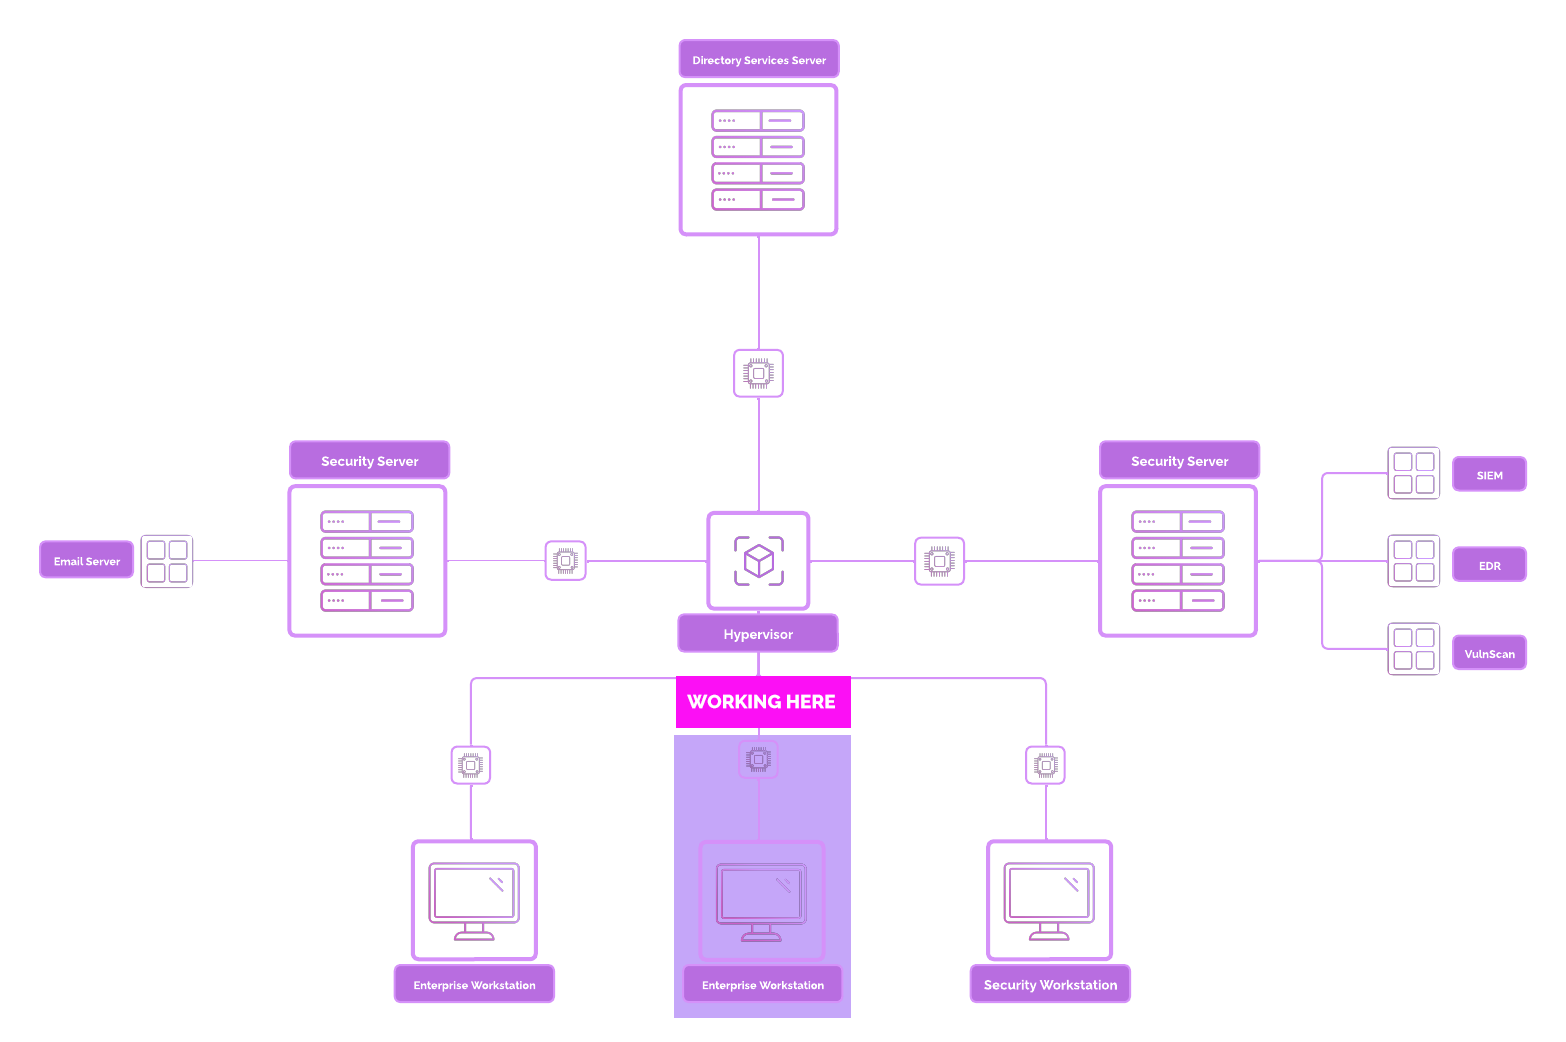
Network Topology
Ubuntu Overview
What is Linux & Ubuntu?
Linux: Linux is an open-source operating system kernel that serves as the foundation for various distributions (distros) like Ubuntu, Debian, Fedora, and CentOS. It is known for its flexibility, stability, and security, making it a popular choice for servers, desktops, and embedded systems.
Ubuntu: Ubuntu is a Linux distribution based on Debian, developed and maintained by Canonical. It is designed to be user-friendly, making it a go-to choice for beginners while remaining robust enough for advanced users and enterprise environments. Ubuntu is available in various editions: Desktop, Server, and Core (for IoT).
Key Features of Ubuntu:
- Open-Source: Free to use, modify, and distribute.
- Wide Compatibility: Supports a variety of hardware and software.
- Active Community: Backed by a vast community and regular updates.
How is Linux used?
Linux is utilized across various fields for diverse purposes:
-
Servers and Hosting
- Web Servers: Leading choice for hosting websites, applications, and databases using services like Apache, Nginx, and MySQL.
- Cloud Computing: Powers major cloud platforms like AWS, Google Cloud, and Azure.
-
Development and Testing
- Popular among developers for its built-in tools, package management (APT), and scripting capabilities.
- Ideal for DevOps workflows with support for Docker, Kubernetes, and CI/CD pipelines.
Security Implications
While Linux and Ubuntu are appear to be more secure than many other operating systems, they are not immune to threats.
Understanding their security implications is crucial for safe and effective usage.
Common Threats
-
Privilege Escalation
- Misconfigured
sudoor excessive permissions can allow attackers to gain root access.
- Misconfigured
-
Unpatched Vulnerabilities
- Delays in applying updates can leave systems exposed to exploits like kernel vulnerabilities.
-
Weak SSH Configurations
- Using default settings or weak passwords can lead to brute-force attacks.
-
Malware and Rootkits
- Though less common, Linux-specific malware and rootkits exist and can compromise systems.
-
Supply Chain Attacks
- Threats can arise from malicious packages or software downloaded from untrusted sources.
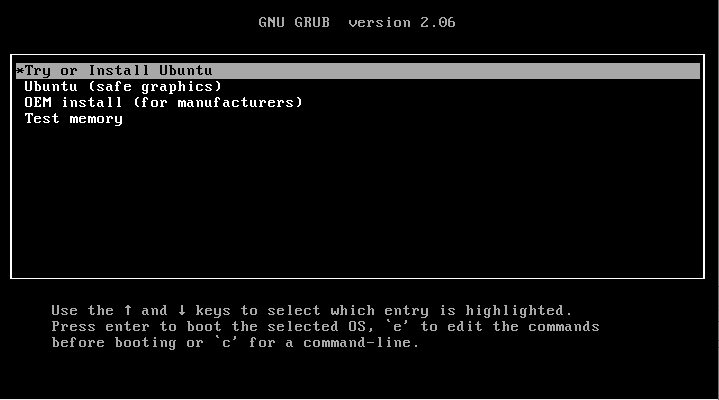
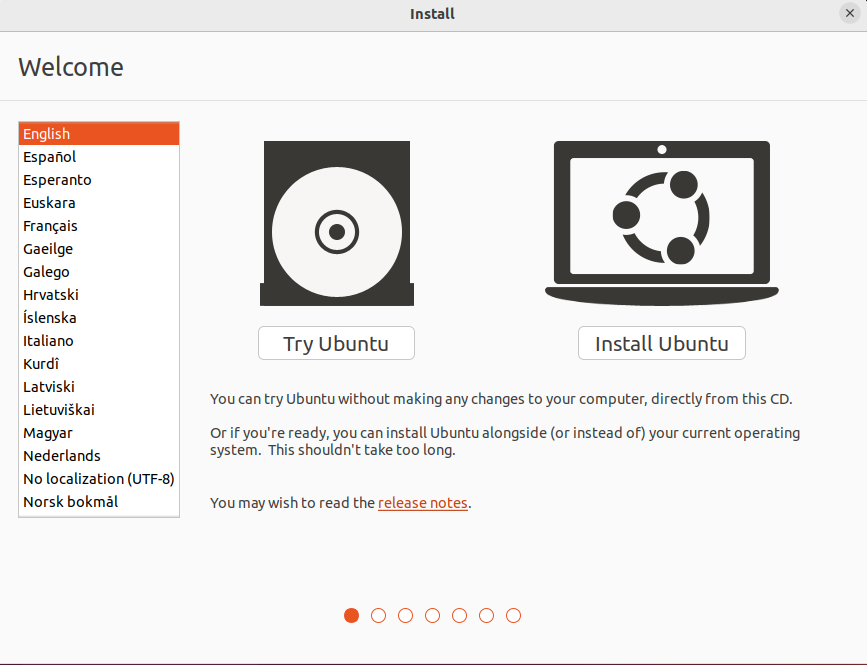
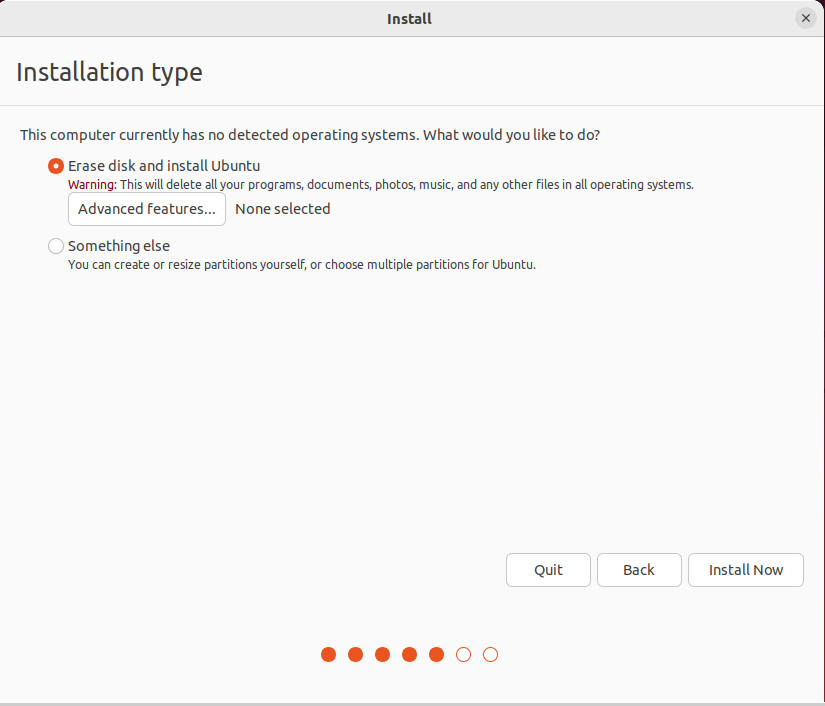
Setup Ubuntu
Hit “Enter”.
Choose “Install Ubuntu".
Proceed through keyboard layout. Choose defaults for “Updates and other software”.
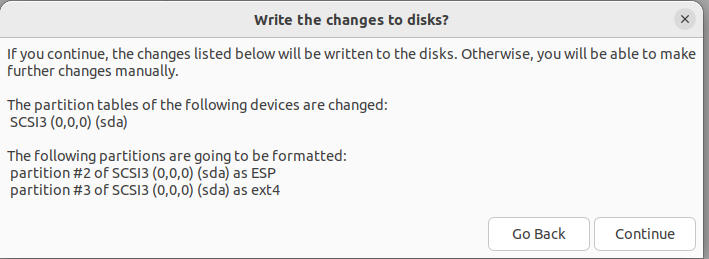
Choose “Erase Disk and Install Ubuntu”. Then select “Install Now”.
Select “Continue”.
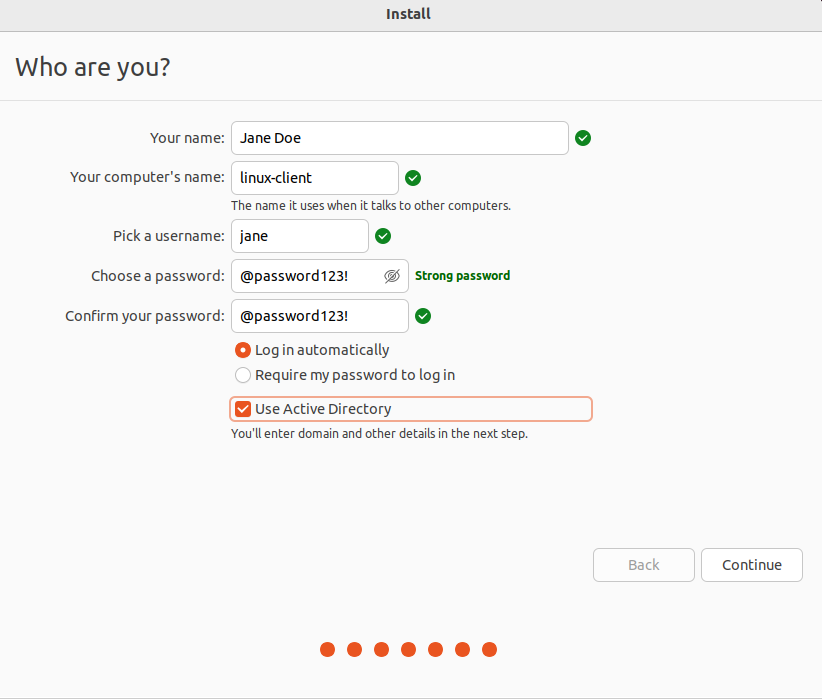
Choose whichever region you live in. Add the following information.
👉 You don’t need to Select “Use Active Directory”. (I was playing around while building this guide).
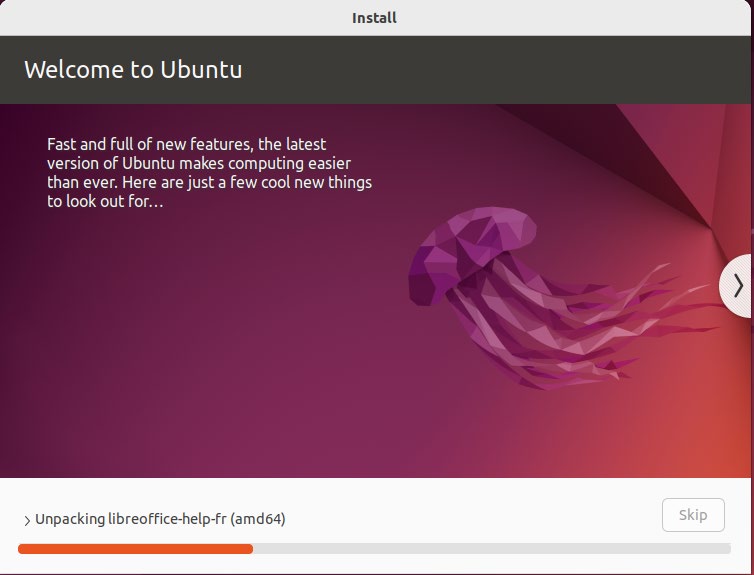
Wait for Ubuntu to install. Let the virtual machine restart and press “Enter” when it says to remove the installation medium.
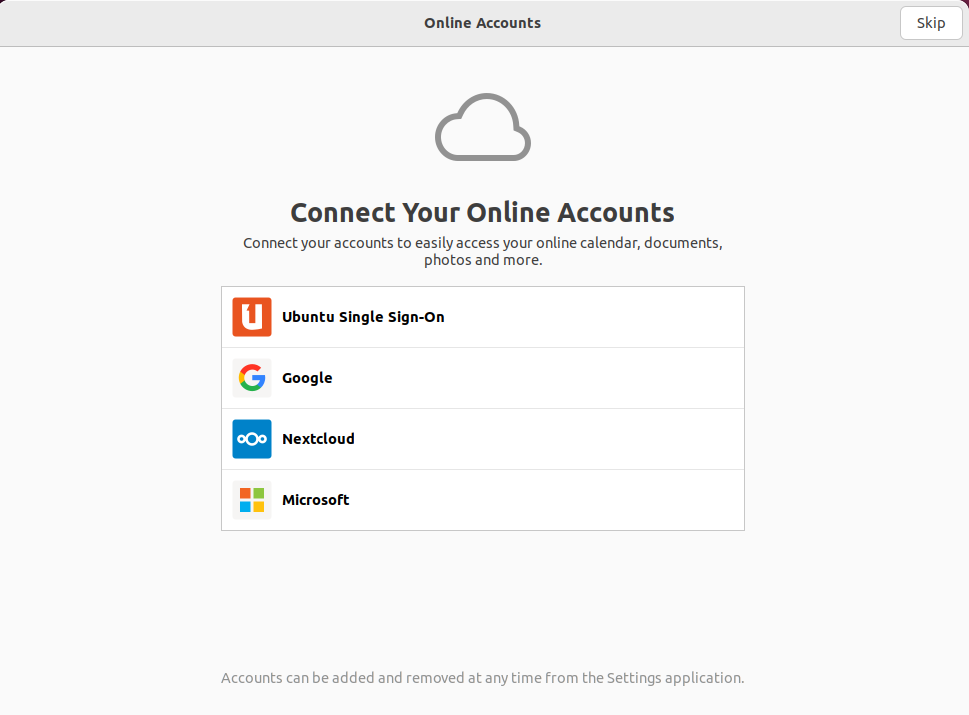
Go through the wizard. Unselect “Location Services".
Success!
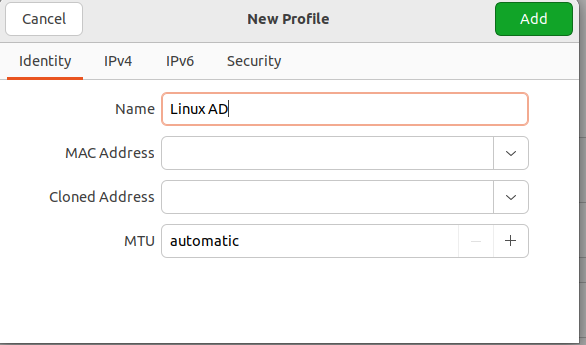
Go to “Settings” ➔ “Network”. Choose “+” symbol to add a new network.

Name the new Wired connection “Linux AD”. Then navigate to “IPv4”.
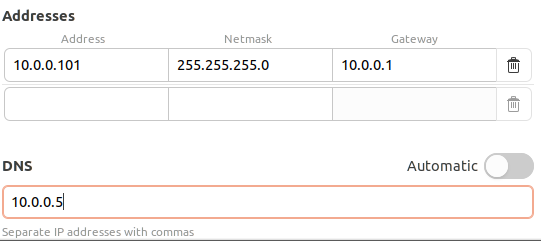
Add the following information to set a static IP address and the Domain Controller as the DNS.
Select the green “Add” button to save changes.
Make sure the Linux Desktop can reach the Windows Server Domain Controller.
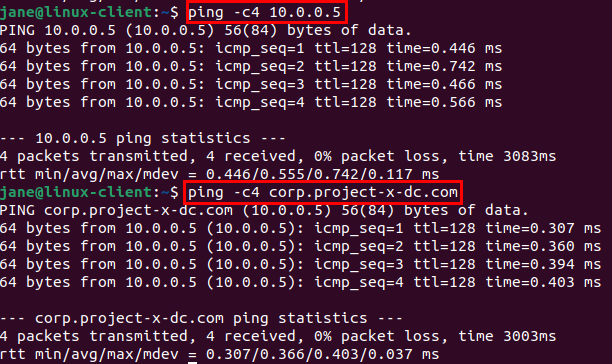
👉 You may not be able to ping corp.project-x-dc.com, that is okay at this time.
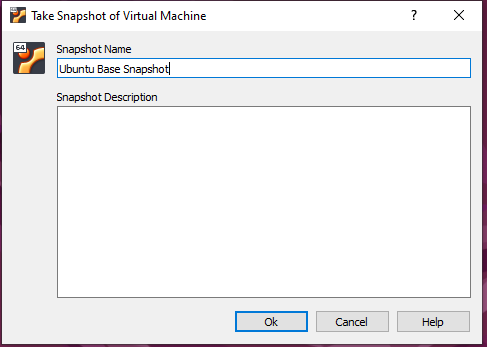
📷 Take Snapshot!
Connect Ubuntu Desktop to Active Directory
Since Ubuntu (and Linux-native operating systems) are not native to the Microsoft ecosystem. Connecting Ubuntu (and Debian-based systems) to Active Directory can be accomplished in a couple ways. The easiest way is to connect Ubuntu to Active Directory with realmd and SSSD (System Security Services Daemon).
Samba Winbind can also be used to join Linux systems if realmd / SSSD is not working.
Note
Currently realmd and SSSD integration does not work for Windows Server 2025 and Debian/Ubuntu-based systems.
About SSSD / Realmd
System Security Services Daemon (SSSD): A service on Linux systems that provides a central access point for identity management and authentication. When connecting a Linux system to Active Directory (AD), SSSD allows for the integration by acting as an intermediary between the Linux system and AD needing to know what files should be edited.
realmd: A tool that simplifies the process of joining Linux machines to AD domains. It automates the discovery, configuration, and enrollment of Linux systems in Active Directory, making it easier to integrate Linux systems into existing AD environments. Realmd is especially useful for administrators because it manages the complexities of setting up Kerberos, configuring LDAP settings, and ensuring proper authentication protocols.
About Samba Winbind
Samba Winbind: A component of the Samba suite that allows Linux systems to authenticate users against Windows Active Directory (AD) and integrate with Windows network environments. Is a more direct integration, especially useful for legacy systems and environments where tight compatibility with Windows protocols is necessary. It’s often preferred when working in older Windows Server environments or where native Samba compatibility is crucial.
Realmd + SSSD
Open a new terminal session. Update the system with:
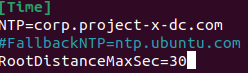
Adding the following under the [Time] block
Install the necessary packages:
sudo apt install realmd sssd sssd-tools samba-common krb5-user packagekit libnss-sss libpam-sss adcli samba-common-bin
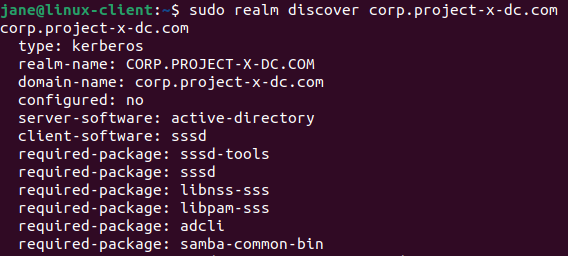
Use the realm command to discover the domain.
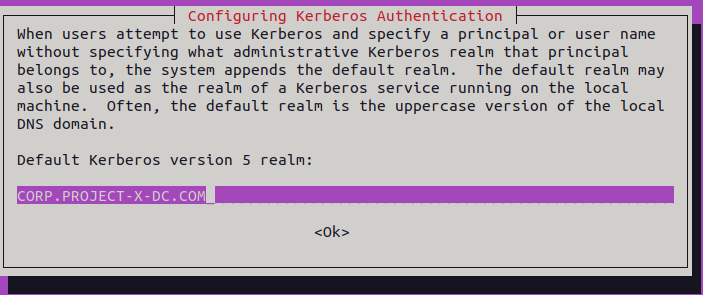
Enter the following command, enter the Administrator password:
If no output is shown in the console, then the VM has been connected. Enter the following command to confirm:
Samba Winbind
Open a new terminal session. Update the system with:
Install the necessary packages
sudo apt -y install winbind libpam-winbind libnss-winbind krb5-config samba-dsdb-modules samba-vfs-modules
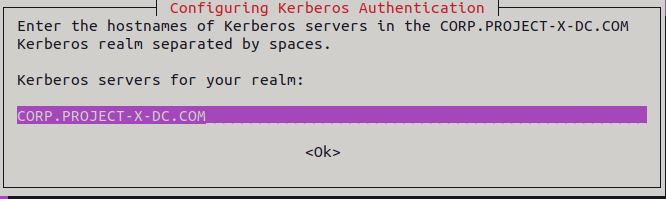
A few dialogue boxes will appear. Add CORP.PROJECT-X-DC.COM all capatialized inside these boxes.

Move the smb.conf file to smb.conf.org.
- We are doing this to replace the contents of smb.conf with our configurations instead.
Create and open the smb.conf file with Nano.
Replace realm and workgroup with the following:
     [global]
       kerberos method = secrets and keytab
       realm = CORP.PROJECT-X-DC.COM
       workgroup = CORP
       security = ads
       template shell = /bin/bash
       winbind enum groups = Yes
       winbind enum users = Yes
       winbind separator = +
       idmap config * : rangesize = 1000000
       idmap config * : range = 1000000-19999999
       idmap config * : backend = autorid
Exit Nano with CTRL + X, then Y key, Enter Key.
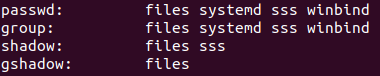
Confirm passwd and group blocks have winbind set as a value. Add the winbind value if needed.
On Ubuntu, every user that has an interactive logon to the system needs a home directory. For domain users, we need to set this before a user is able to successfully logon and start working.
Issue the following command:
Scroll down up to the point where it states: "Create home directory on login". Use the space bar to select with the *, hit the tab key to “OK” and hit Enter.
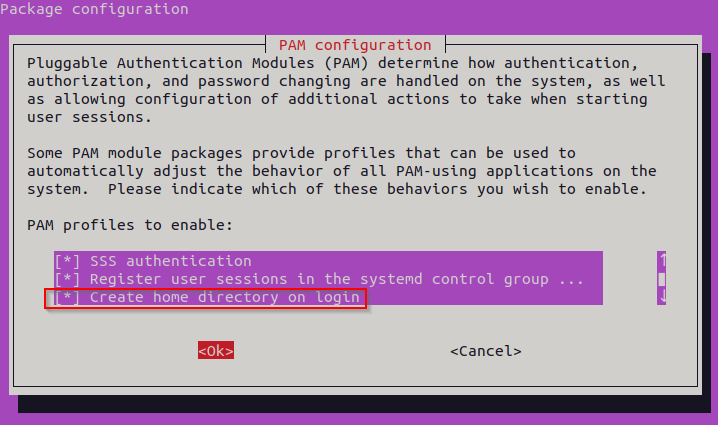
Kudos to Michael Waterman for the screenshot!
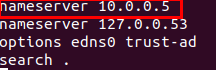
Change DNS settings to refer to AD.
Join the domain with Administrator:
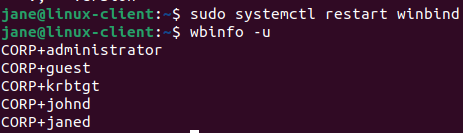
Restart winbind:
Get Active Directory services information listing.
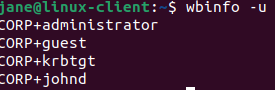
List all available users
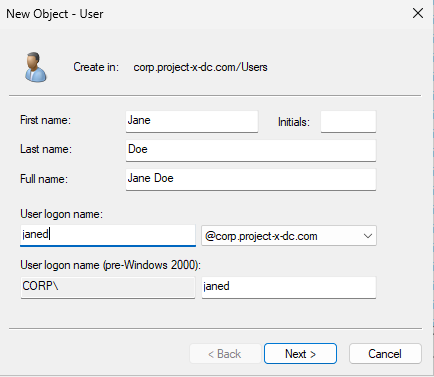
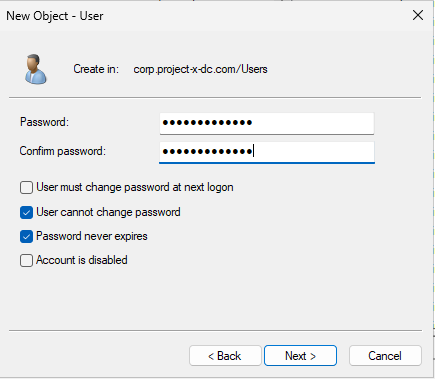
Let’s create Jane’s AD account in our Domain Controller.
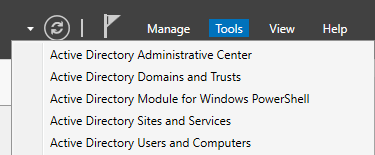
Go to Server Manager, then on the top right “Tools” ➔ “Active Directory Users and Computers”
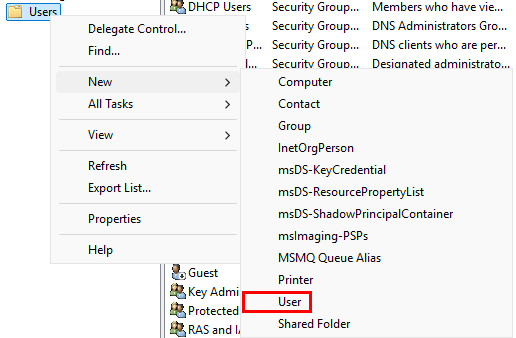
Navigate to the “Users” folder. Right-click, then go to “New” ➔ “User”
Add the following information. Make sure Jane’s username is [email protected].
Set Jane’s password (@password123!).
👉 Refer to the “Project Overview” guide for more information on default usernames and passwords.
Clear the winbind cache by restarting the service, then see the changes reflected.
Login as janed:

Issue an id command to view status:
Success!
Going back to the Server Manager, we should see LINUX-CLIENT under the “Computers” folder.
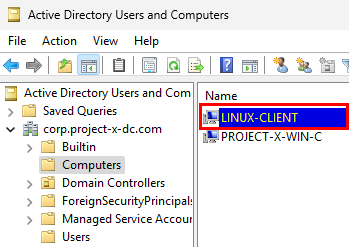
Success!
📷 Take (another) Snapshot!