Prerequisites
Network Topology
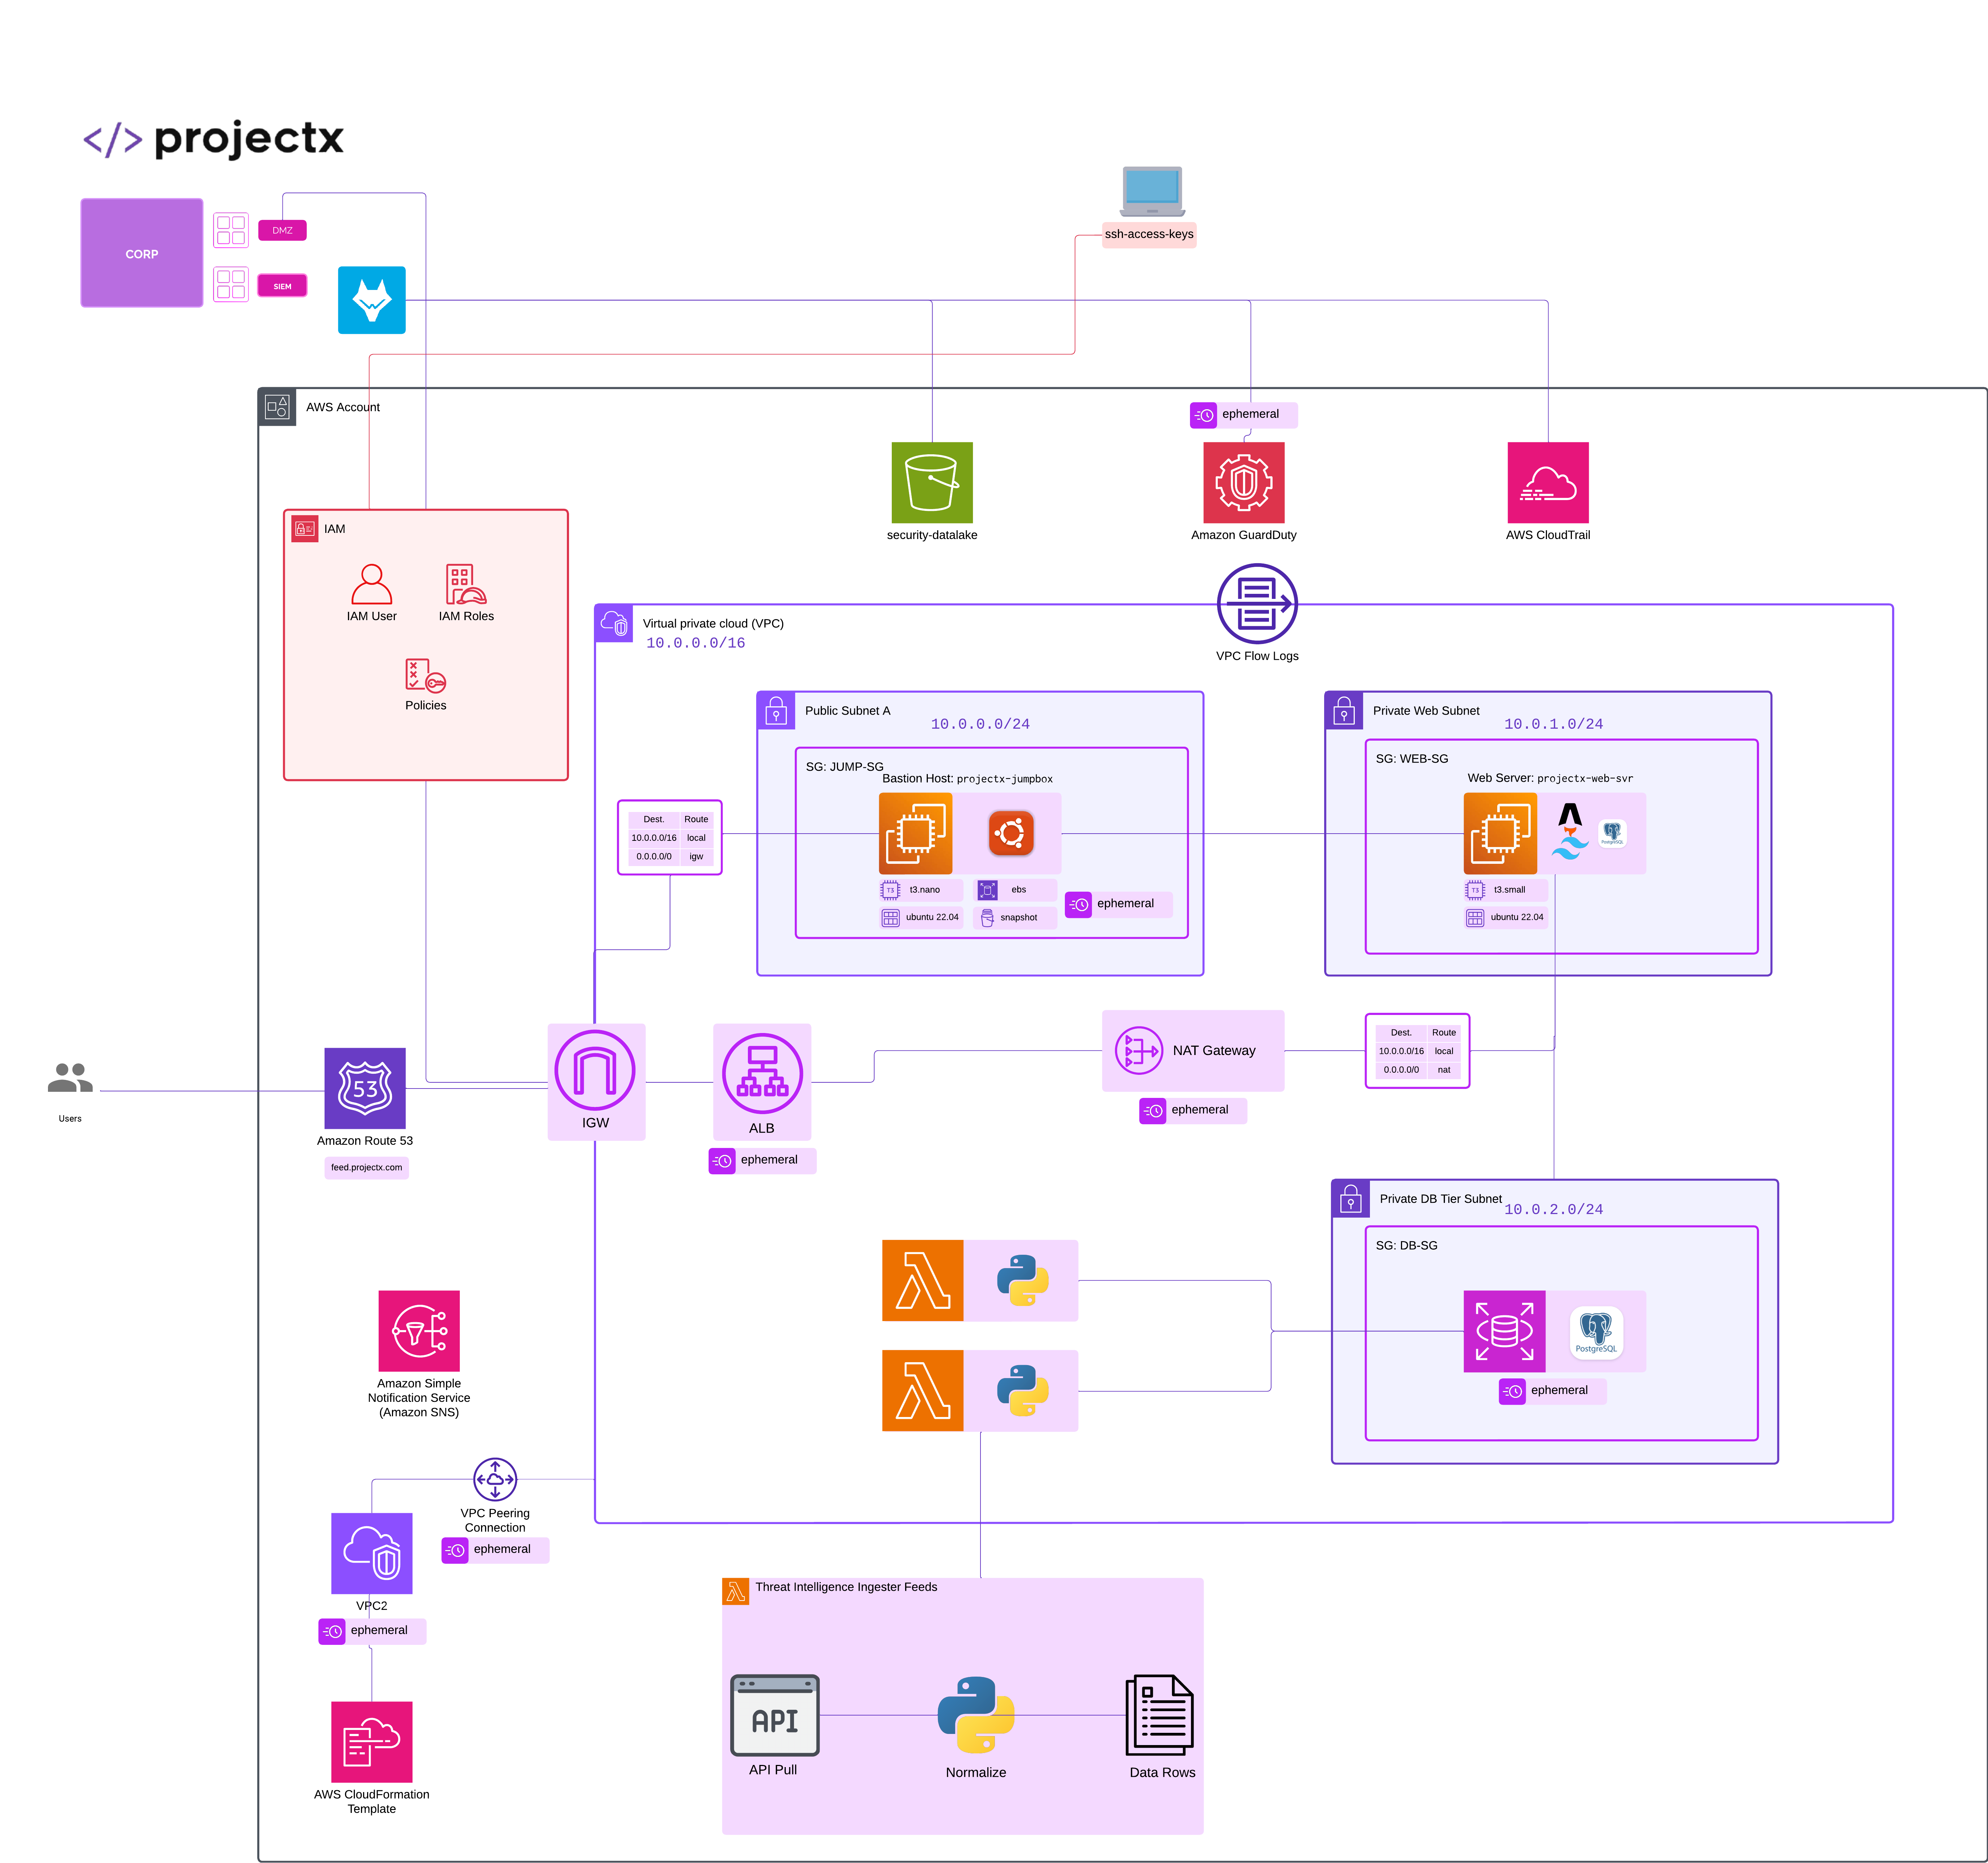
Overview
AWS Identity and Access Management (IAM) is the service that controls who can access what in your AWS environment. It’s the foundation of AWS security. Every API call, console login, and resource creation passes through IAM permissions.
IAM is the security backbone of AWS.
It defines who (identity) can perform what actions (permissions) on which resources (scope), under what conditions (context).
Without properly configured IAM, even a small misstep can expose your entire cloud environment.
There are several key components, called identities that make up AWS IAM.
Let's start with definitions.
IAM Users: A credentialed identity for a person or service. Has long-term credentials (console password, access keys) and belongs to groups or has policies attached. For right now, think of an IAM user as a person.
Groups: Container of users for easier permissions management. Similar to Active Directory Groups, multiple users can be added to a group. Any policy attached to this group will affect all IAM users.
Policy: JSON document that allows/denies actions on AWS resources. Policies describe the "what" or authorization component. Perhaps one policy specifies if a user can access a EC2 Virtual Machine, while another specifies access to a S3 bucket. Policies can be attached to users, groups, or roles.
IAM Roles: Temporary credentials assumed by services (EC2, Lambda) or users. Useful to give EC2 instances permissions without embedding hardcoded keys. When you think of IAM Role, think "Temporary, assumed access."
Inline vs Managed Policy: There are a few different types of policies one can create in AWS.
-
Managed policy: Standalone policy resource you can attach to many identities.
-
AWS Managed Policies: Created and maintained by AWS.
-
Customer Managed Policies: Created and managed by you, the customer. Reusable across multiple identities.
-
-
Inline policy: Embedded directly on a single user/group/role (useful for one-off/exceptional cases).
We are going to create the following IAM identities.
Policies:
- Customer Managed Policy:
projectx-ec2-read-only.
Groups:
- `Administrators` (👈 Already Created)
- `projectx-employees-group`
- `projectx-jumpbox-group`
Users:
- `projectx-prod-admin` (👈 Already Created)
- `projectx-prod-websvr`
- `projectx-prod-janed`
Create IAM Groups
Navigate to "Identity and Access Management (IAM)".
Select "User groups".
We already created our "Administrators" group while we set up projectx-prod-admin IAM user.
Let's create two additional groups.
Go to "Create group".
Enter the group name of projectx-jumpbox-group.
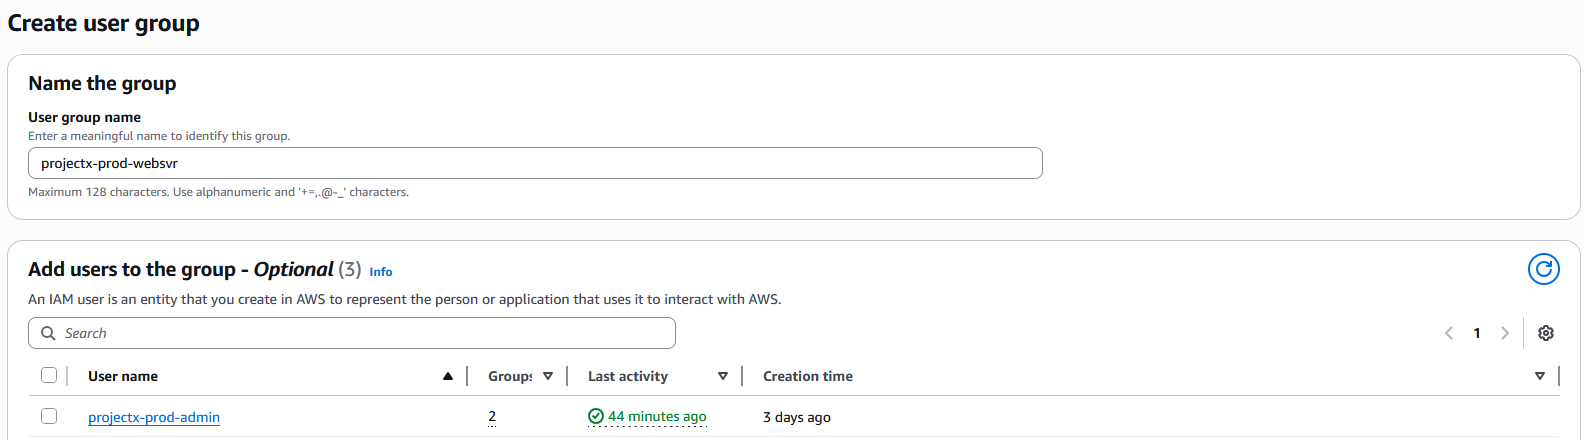
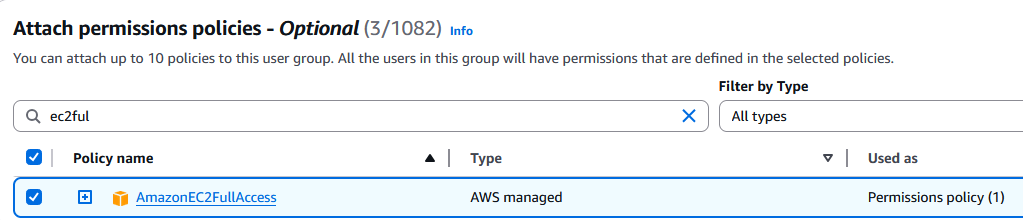
Under the permission policies.
Select the following:
- AmazonEC2FullAccess
- AmazonRDSFullAccess
- AmazonS3FullAccess
Then select "Create user group".
Next, let's create a few additional users.
Create IAM User projectx-prod-websvr
Navigate to "Users".
Select "Create user".
Provide a User name of projectx-prod-websvr.
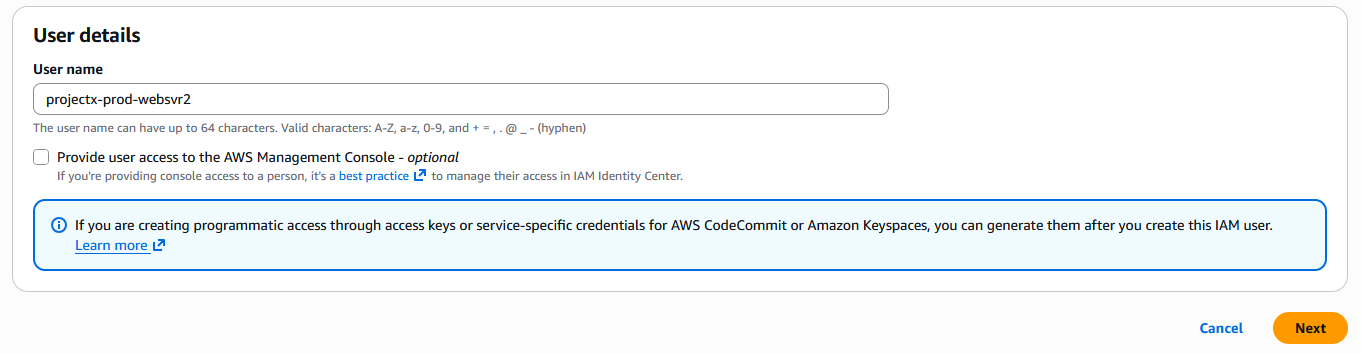
Next, add the user to the projectx-jumpbox-group.
Select "next".
Then select "Create user".
Create Customer Managed Policy
Navigate to the "Policies" view.
Select "Create policy".
Here we can can select granular policy controls through the Visual editor or by specifying JSON syntax.
Toggle over to JSON.
Paste in the following policy.
{
  "Version": "2012-10-17",
  "Statement": [
    {
      "Sid": "EC2DeployBasic",
      "Effect": "Allow",
      "Action": [
        "ec2:RunInstances",
        "ec2:CreateTags",
        "ec2:DescribeInstances",
        "ec2:DescribeImages",
        "ec2:DescribeKeyPairs",
        "ec2:DescribeSecurityGroups",
        "ec2:DescribeSubnets",
        "ec2:DescribeVpcs",
        "ec2:DescribeInstanceTypes",
        "ec2:DescribeAvailabilityZones",
        "ec2:DescribeAccountAttributes",
        "ec2:DescribeNetworkInterfaces",
        "ec2:CreateNetworkInterface",
        "ec2:AttachNetworkInterface"
      ],
      "Resource": "*"
    }
  ]
}
Then select "Next".
Title the policy projectx-ec2-read-only.
Then select "Create".
Navigate back to "Policies".
Select "Customer managed" under "Filter by Type".
Here you can see the custom policy we created.

Create projectx-employees-group
Navigating back to the main IAM menu, create a new group called projectx-employees-group.
Run through the same process as before.
Do not attach any users.
Under "Attach permissions policies" ➔ "Filter by Type" ➔ "Customer managed".
Attach the projectx-ec2-read-only policy.
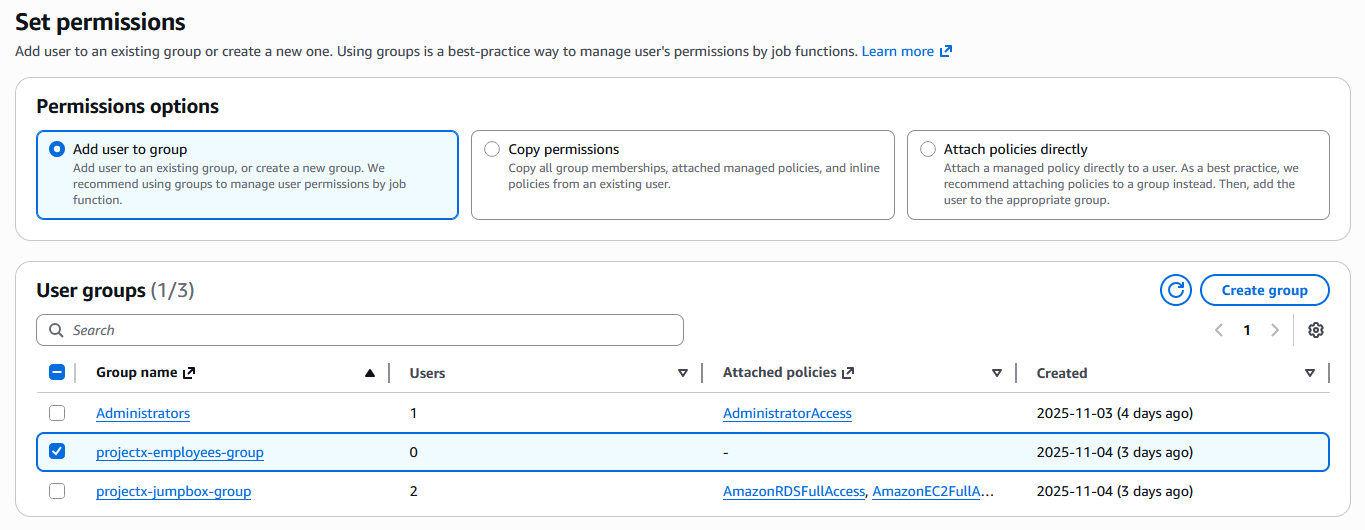
Create projectx-prod-janed IAM User
Under "Users" create a new user for our Jane Doe account.
Select "Provide user access to the AWS Management Console - optional".
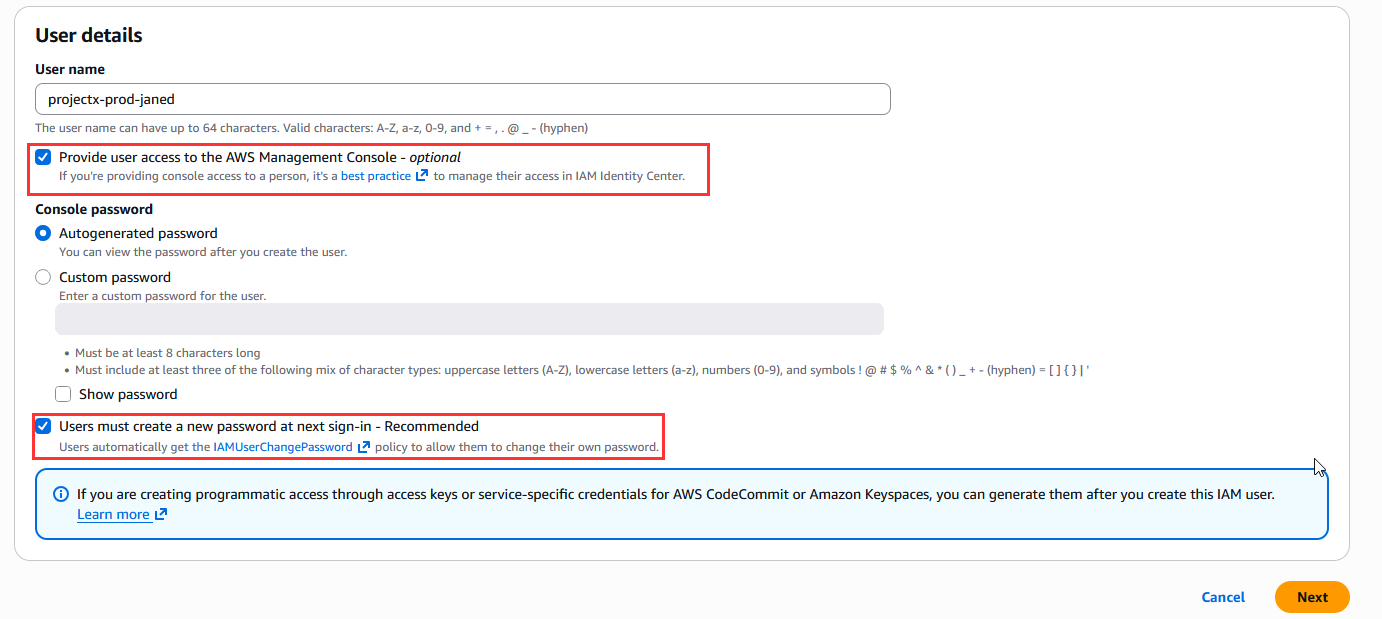
In the "User groups" section, add this IAM user under the projectx-employees-group.
Optional: Turn on [projectx-linux-client]
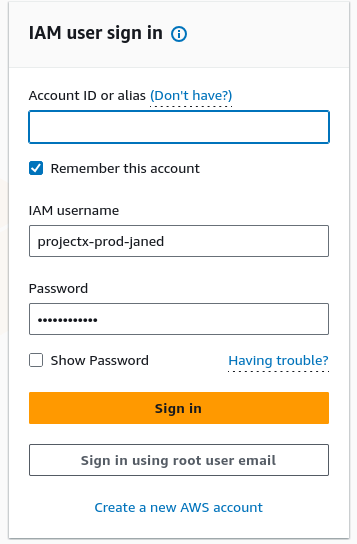
Navigate to "https://console.aws.amazon.com".
Copy-paste your AWS Account ID, projectx-prod-janed, and the password. You will have to change the password upon first login.
If you navigate to the IAM console, you will notice you will not be able to create any type of IAM identities.
If you go to the EC2 console, you will find you can view and launch instances.
This is the power of IAM.
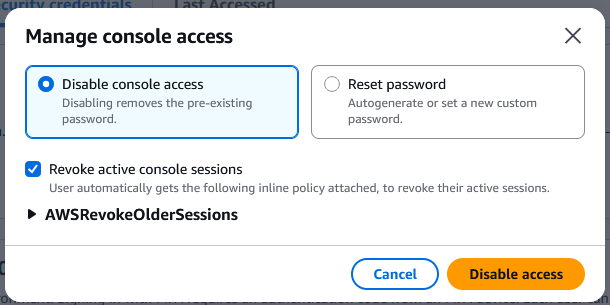
Disable projectx-prod-janed
Since we will not be using the projectx-prod-janed account, let's disable it.
Navigate back to projectx-prod-admin IAM user AWS console.
Go to "Users" ➔ projectx-prod-janed ➔ Security Credentials ➔ "Disable console access".

Under "Groups" ➔ Select projectx-prod-employees ➔ "Remove".
